The Brother LS-2125 is a versatile mechanical sewing machine designed for basic sewing tasks, mending, crafting, and scrapbooking․ It is user-friendly, lightweight, and reliable for various projects․
1․1 Overview of the Brother LS-2125 Model
The Brother LS-2125 is a mechanical sewing machine designed for versatility and ease of use․ It is lightweight, portable, and ideal for basic sewing tasks, mending, crafting, and scrapbooking projects․ The machine is part of a series that includes models like the LS-2220, LS-2720, and LS-1520, offering reliable performance for both beginners and experienced sewists․ Its user-friendly design makes it accessible to a wide range of users, while its durable construction ensures long-lasting functionality․ The LS-2125 is supported by an official instruction manual available in multiple languages, including English, French, Spanish, and Portuguese, ensuring easy navigation for users worldwide․
1․2 Importance of Reading the Instruction Manual
Reading the Brother LS-2125 instruction manual is essential for understanding the machine’s features, operation, and maintenance․ It provides step-by-step guidance for setup, threading, and troubleshooting, ensuring safe and efficient use․ The manual helps users familiarize themselves with the machine’s components, such as the bobbin, stitch selector, and presser foot․ By following the manual, users can avoid common mistakes, prolong the machine’s lifespan, and optimize its performance․ It also highlights safety precautions to prevent accidents and damage․ The manual is a valuable resource for both beginners and experienced sewists, offering tips for maximizing the machine’s capabilities and addressing potential issues․ Always refer to the manual before attempting new techniques or repairs․

Safety Precautions and Guidelines
Always follow safety guidelines to ensure safe operation of the Brother LS-2125․ Keep the machine away from water, avoid overloading, and supervise children during use․ Regularly inspect for damage and use genuine Brother parts to maintain safety and performance․
2․1 General Safety Instructions
To ensure safe operation of the Brother LS-2125 sewing machine, always follow these general safety guidelines․ Keep the machine out of reach of children and pets․ Avoid sewing near water or in damp environments, as this can lead to electrical hazards․ Never touch the machine with wet hands or while standing on a wet surface․ Ensure proper ventilation to prevent inhalation of lint or thread fragments․ Unplug the machine when not in use or during maintenance․ Use only the power source specified in the manual to avoid damage or fire risks․ Keep flammable materials, such as fabric scraps or loose clothing, away from the machine․ Always follow the manufacturer’s instructions for operation and maintenance․
2․2 Machine-Specific Safety Tips
For the Brother LS-2125 sewing machine, always keep loose clothing and long hair tied back to avoid entanglement․ Use the provided presser foot for stability and never touch the needle or sewing area while it is moving․ Avoid sewing over pins, as this can damage the machine or cause injury․ Ensure the machine is placed on a flat, stable surface to prevent vibration or tipping․ Use only genuine Brother needles to maintain performance and safety․ Keep the sewing area well-lit to monitor your work accurately․ If the machine overheats, turn it off immediately and allow it to cool․ Regularly clean lint and debris from the bobbin area to prevent mechanical issues․ Always follow the manufacturer’s guidelines for threading and operation to ensure safe and efficient sewing․

Unboxing and Initial Setup
Open the box carefully to avoid damaging the machine or accessories․ Inspect the Brother LS-2125 for any visible damage․ Remove all packaging materials and protective covers․ Place the machine on a stable, flat surface, ensuring good ventilation․ Locate the power cord and plug it into a nearby outlet․ Familiarize yourself with the included accessories, such as the user manual, bobbins, and presser feet․ Double-check that all items listed in the manual are included in the package․ Position the machine ergonomically to ensure comfortable use during sewing sessions․ Follow the setup guide in the manual to prepare the machine for its first use․ Always ensure the machine is placed on a sturdy table to prevent vibration during operation․
3․1 Checking the Contents of the Package
Upon receiving the Brother LS-2125 sewing machine, carefully unpack and verify all components against the list provided in the manual․ Ensure the package includes the main sewing machine, power cord, bobbin, sewing needles, presser feet, and any additional accessories like a zipper foot or buttonhole attachment․ Inspect each item for damage or defects․ Compare the contents with the manual’s packaging list to confirm nothing is missing․ If any item is damaged or absent, contact Brother customer support immediately․ Organize the accessories in a safe place to avoid misplacement․ Properly checking the contents ensures you have everything needed for setup and operation, preventing delays in your sewing projects․
3․2 Placing the Machine on a Stable Surface
Place the Brother LS-2125 sewing machine on a sturdy, flat, and stable surface to ensure optimal performance․ Avoid uneven or wobbly surfaces, as they may cause vibration or noise during operation․ Position the machine on a dedicated sewing table or a solid desk to maintain balance․ Ensure the surface is dry and free from dust or moisture to prevent damage to the machine’s electrical components․ Keep the machine away from direct sunlight to avoid overheating․ Proper placement enhances sewing accuracy and reduces the risk of mechanical issues․ Always refer to the manual for specific recommendations on the ideal setup environment for your Brother LS-2125 sewing machine․
Threading the Sewing Machine
Threading the Brother LS-2125 is essential for smooth stitching․ Follow the manual’s guide to properly thread the upper and bobbin areas for optimal performance․
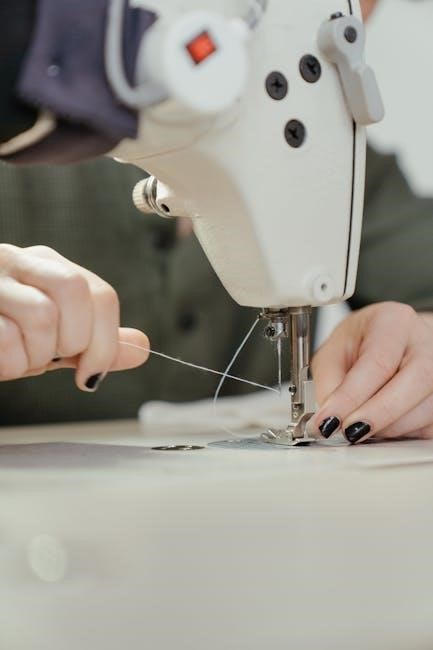
4․1 Threading the Upper Part of the Machine
Properly threading the upper part of the Brother LS-2125 ensures smooth stitching․ Begin by turning off the machine and locating the spool pin․ Place the thread on the spool pin, then gently pull it through the machine’s tension guides․ Follow the manual’s diagram to loop the thread around the take-up lever and through the needle bar․ Leave a small slack before inserting the thread into the needle․ Pull the thread gently to ensure it’s seated correctly․ Adjust the tension dial as needed to maintain even thread flow․ Always refer to the manual for specific threading diagrams to avoid misalignment․ Proper threading is crucial for consistent stitch quality and machine performance․
4․2 Winding and Inserting the Bobbin
To wind the bobbin, place the thread on the spool pin and pull it through the bobbin winder guide․ Turn the handwheel to engage the bobbin winder, then press the foot pedal to start winding․ Stop when the bobbin is full․ Cut the thread, leaving a small tail․ Insert the bobbin into the bobbin case, ensuring the notch aligns with the case․ Pull the thread gently to seat the bobbin․ Cover the bobbin case and ensure it clicks into place․ Properly winding and inserting the bobbin ensures even stitching and prevents thread tangles․ Always refer to the manual for specific diagrams to avoid misalignment․ Correct bobbin installation is essential for smooth machine operation and consistent stitch quality․

Understanding the Machine Components
The Brother LS-2125 features essential components like the needle, bobbin, spool pins, and stitch selectors․ Familiarizing yourself with these parts ensures proper operation and optimal stitching results․
5․1 Major Parts of the Brother LS-2125
The Brother LS-2125 sewing machine consists of several key components designed for efficient sewing․ The bobbin mechanism is located beneath the needle plate and plays a crucial role in forming stitches․ The stitch selector dial allows users to choose from various stitch patterns, while the reverse stitch lever enables reinforcing stitches at the beginning or end of a seam․ The free-arm design provides easy access for sewing cuffs, sleeves, and other hard-to-reach areas․ Additionally, the automatic needle threader simplifies threading, saving time and reducing eye strain․ The tension control dial ensures even stitching by adjusting thread tightness․ Understanding these parts helps users operate the machine effectively and troubleshoot common issues․
5․2 Accessories and Additional Features
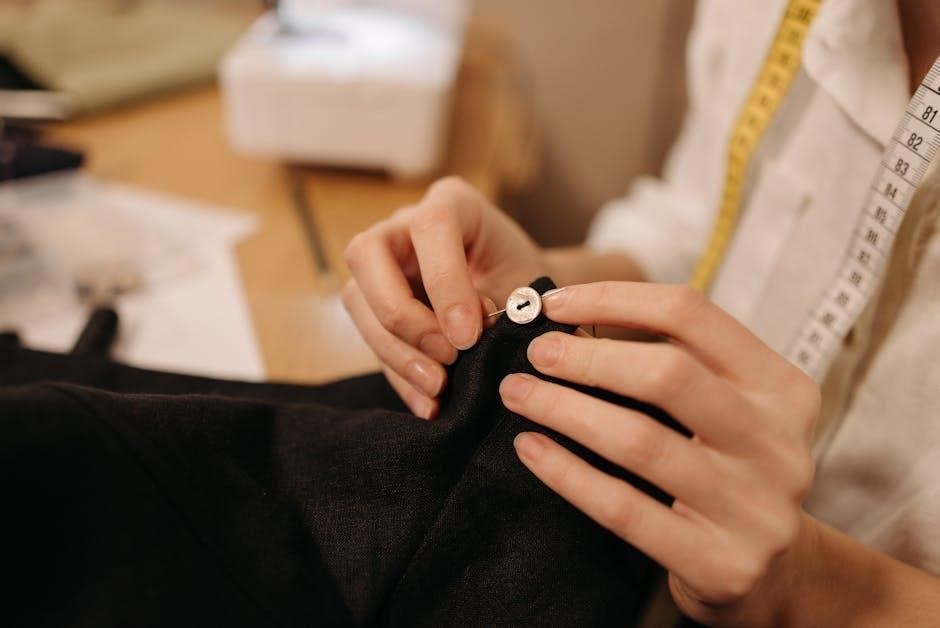
The Brother LS-2125 comes with a variety of accessories to enhance your sewing experience․ These include multiple presser feet, such as the zipper foot and buttonhole foot, designed for specific tasks․ The machine also includes a seam ripper for removing mistakes, extra bobbins, and a set of needles․ Additional features like the free-arm design allow for easy sewing of cylindrical items such as sleeves․ The automatic needle threader simplifies the threading process, while the stitch selector dial provides quick access to various stitch patterns․ Optional accessories, such as an extension table or walking foot, can be purchased separately to expand the machine’s capabilities for heavier fabrics or complex projects․

Basic Sewing Operations
Start by setting up your machine, selecting a basic stitch, and aligning your fabric․ Begin with a straight stitch for simple tasks like hemming or repairing seams․
6․1 Starting Your First Sewing Project
Begin by plugging in your Brother LS-2125 and ensuring it is placed on a stable, flat surface․ Thread the machine as instructed, then wind and insert the bobbin carefully․ Select a basic straight stitch for your first project․ Place your fabric under the presser foot, aligning the edge with the machine’s guide․ Lower the presser foot and gently guide the fabric as it moves․ Start with a scrap piece of fabric to practice and build confidence․ Once comfortable, you can progress to hemming or repairing small items․ Always ensure the machine is properly threaded and the tension is adjusted for a smooth sewing experience․ Keep the area clear of distractions and start slowly to maintain control․
6․2 Selecting the Right Stitch Type
Selecting the right stitch type is essential for achieving professional results with your Brother LS-2125․ The machine offers various stitches, including straight, zigzag, and decorative options․ Choose the straight stitch for general sewing and repairing woven fabrics․ For stretchy or knitted fabrics, opt for the zigzag or stretch stitch․ Decorative stitches can add embellishments to your projects․ Refer to the stitch chart on the machine or in the manual to identify the correct stitch number for your fabric type․ Always test the stitch on a scrap piece of fabric before sewing your final project․ Using the appropriate stitch ensures strong seams and prevents fabric damage․ This feature makes the Brother LS-2125 versatile for both basic and creative sewing tasks․
Maintenance and Care
Regular maintenance ensures optimal performance of the Brother LS-2125․ Clean the machine, oil moving parts, and check for worn components to guarantee smooth operation and longevity․
7․1 Cleaning the Machine Regularly
Regular cleaning is essential to maintain the Brother LS-2125’s performance․ Turn off and unplug the machine before cleaning․ Use a soft, dry brush or lint brush to remove dust, thread fragments, and lint from the bobbin area, feed dogs, and stitch plate․ Gently wipe the exterior with a soft cloth, slightly dampened if necessary, but avoid harsh chemicals․ For stubborn debris, a small vacuum cleaner can be used carefully․ Clean after each project to prevent buildup․ Regular maintenance ensures smooth stitching and prevents mechanical issues․ Always refer to the manual for specific cleaning instructions to avoid damaging the machine․ Consistent care will extend the lifespan of your sewing machine․
7․2 Oiling the Machine for Smooth Operation
Oiling the Brother LS-2125 is crucial for ensuring smooth and quiet operation․ Locate the oiling points as indicated in the manual, typically near the bobbin area and shuttle hook․ Use high-quality sewing machine oil, as specified by Brother, to avoid damaging the machine․ Apply a few drops to the designated areas and gently turn the handwheel to distribute the oil evenly․ Avoid over-oiling, as excess oil can attract dust and cause residue buildup․ Regular lubrication reduces friction between moving parts, preventing wear and tear․ Oiling should be done every 1-2 months or after extended use․ Always refer to the manual for specific oiling instructions to maintain optimal performance and extend the machine’s lifespan․ Proper lubrication ensures consistent stitching and minimizes mechanical issues․
7․3 Troubleshooting Common Issues
Identifying and resolving common issues with the Brother LS-2125 ensures uninterrupted sewing․ If the machine jams, check for tangled threads or lint buildup near the bobbin area․ Uneven stitches may result from incorrect tension settings or a dull needle․ To fix, adjust the tension dial or replace the needle with a compatible Brother part․ Loud noises could indicate improper oiling or debris in the shuttle hook․ Clean the machine and apply oil as instructed․ If the bobbin doesn’t spin, ensure it’s correctly inserted and threaded․ Always refer to the manual for specific troubleshooting steps․ Regular maintenance and proper usage can prevent many of these issues․ Addressing problems promptly extends the machine’s lifespan and ensures optimal performance․
Advanced Features and Techniques
Explore advanced sewing techniques with the Brother LS-2125, such as automatic buttonholes and decorative stitching․ Utilize specialized feet for zippers, buttonholes, and blind hems․ Customize stitch length and width for precise results․ The machine also supports free-arm sewing for intricate projects․ Experiment with various fabric types and layered materials․ For professional finishes, use the built-in sewing speeds and reverse stitching options․ These features allow for creativity and versatility in your sewing projects․ Regular practice with these advanced techniques will enhance your sewing skills and expand your creative possibilities․ The Brother LS-2125 is designed to cater to both beginners and experienced sewists, offering a wide range of advanced functionalities to explore․
8․1 Sewing Buttonholes Automatically
The Brother LS-2125 offers an automatic buttonhole feature, making it easy to create professional-looking buttonholes; Simply use the buttonhole foot and follow the on-screen guide to select the desired buttonhole style․ The machine automatically measures and sews consistent buttonholes, ensuring precision and uniformity․ For best results, use stable fabric and follow the manual’s guidelines for buttonhole placement․ The automatic buttonhole function saves time and effort, especially when working on garments or home decor projects․ This feature is particularly useful for beginners who want to achieve professional-grade results without manual calculations․ Always test the buttonhole settings on scrap fabric before sewing on your final project to ensure accuracy․
8․2 Using the Zipper Foot Attachment
The zipper foot attachment for the Brother LS-2125 is designed to make sewing zippers easy and precise․ To use it, first attach the zipper foot to the machine by snapping it onto the presser foot holder․ Align the zipper under the foot, ensuring the teeth are centered․ Sew slowly, guiding the fabric steady to maintain a straight line․ The foot’s narrow design allows for close stitching next to the zipper teeth․ For a professional finish, backstitch at the start and end of the zipper․ Use a matching thread color to blend with the fabric․ This attachment is ideal for sewing zippers on bags, garments, or home decor projects․ Always test the stitch settings on scrap fabric before working on your final piece․ Regularly cleaning the foot ensures optimal performance․ This feature simplifies zipper installation, making it quick and efficient for sewists of all skill levels․
Accessories and Compatible Parts
This section explores the array of accessories designed to enhance functionality; Accessories include various feet, bobbins, and needles, catering to diverse sewing needs and ensuring professional results․
9․1 Genuine Brother Accessories
Genuine Brother accessories are specifically designed for the LS-2125, ensuring optimal performance and compatibility․ These include a variety of presser feet, such as the zigzag foot, buttonhole foot, and zipper foot, which cater to different sewing tasks․ Additional accessories like bobbins, needles, and seam rippers are also available, ensuring durability and reliability․ Using genuine Brother parts guarantees precise fitment and maintains the machine’s warranty․ They are crafted to meet Brother’s high standards, providing users with confidence in their sewing projects․ Always check for the Brother logo to ensure authenticity and avoid compatibility issues․
9․2 Using Third-Party Accessories
While genuine Brother accessories are recommended, third-party options can be viable alternatives․ However, compatibility and quality may vary, so it’s crucial to research thoroughly․ Ensure any third-party accessory is specifically designed for the Brother LS-2125 to avoid operational issues․ Some users find cost-effective solutions with third-party parts, but there’s a risk of damaging the machine or voiding the warranty․ Always check reviews and product descriptions to confirm compatibility․ If unsure, consult the manual or contact Brother support for guidance․ Using non-genuine parts may require adjustments, so proceed with caution to maintain optimal performance and avoid potential harm to your sewing machine․
Downloading and Referencing the Manual
The Brother LS-2125 manual is available for download on the official Brother website․ Ensure to navigate through the PDF document for detailed instructions and troubleshooting guides․
10․1 Finding the Official Brother LS-2125 Manual
To locate the official Brother LS-2125 manual, visit the Brother Industries, Ltd․ website․ Navigate to the “Support” section and enter “LS-2125” in the search bar․ Click on the appropriate result to access the PDF manual․ Ensure the document is labeled as the official Brother LS-2125 instruction manual to confirm authenticity․ If the manual is not available on the main site, check Brother’s regional websites or authorized distributors․ Additionally, verify the file size and publication date to ensure you have the most recent version․ For convenience, download the manual directly from Brother’s official sources to avoid third-party risks․ Always prioritize official channels for accurate and reliable information․
10․2 Navigating the PDF Document
Once you’ve downloaded the Brother LS-2125 manual, navigating the PDF is straightforward; The document typically includes a table of contents with clickable links to different sections․ Use the bookmarks panel in your PDF reader to quickly access chapters like setup, maintenance, or troubleshooting․ The search function (Ctrl+F or Cmd+F) helps locate specific topics instantly․ Zoom in (Ctrl+Plus or Cmd+Plus) for detailed diagrams or small text․ Many manuals also include hyperlinks to external resources, such as video tutorials or FAQs․ Familiarize yourself with the layout to efficiently find the information you need․ Keyboard shortcuts can enhance your navigation experience, ensuring you make the most of the manual’s guidance․
Frequently Asked Questions
Common queries include resolving thread jams, adjusting tension, and understanding error messages․ Solutions often involve cleaning, rethreading, or consulting the manual for specific guidance․
11․1 Common Issues and Solutions
Users often encounter issues like thread jams, uneven stitching, or the machine not turning on․ To resolve thread jams, turn off the machine, remove the fabric, and gently cut the thread․ For uneven stitching, check the bobbin tension and ensure the needle is correctly sized for the fabric․ If the machine won’t power on, verify the power cord is securely plugged in and the outlet is functional․ Regular cleaning and oiling can prevent mechanical issues․ Always refer to the manual for specific troubleshooting steps tailored to the Brother LS-2125․ Proper maintenance and adherence to guidelines can significantly reduce common problems and ensure smooth operation․
11․2 Tips for Optimal Machine Performance
To achieve the best results with your Brother LS-2125, use genuine Brother accessories to ensure compatibility and quality․ Always align fabric properly before sewing to avoid distortion․ Select the correct stitch type for your fabric to ensure even stitching․ Maintain consistent thread tension to prevent loose or tight stitches․ Use the appropriate presser foot for your project, such as the zipper foot for zippers or the buttonhole foot for precise buttonholes․ Synchronize the needle and bobbin movement for smooth operation․ Regularly clean and oil the machine to keep it functioning at its best․ By following these tips, you can optimize your sewing experience and achieve professional-looking results with your Brother LS-2125 sewing machine․
The Brother LS-2125 sewing machine offers versatility and ease of use, making it perfect for both beginners and experienced sewists․ Its durable design ensures long-lasting performance, while its intuitive controls and diverse stitch options empower users to create a wide range of projects․ By following the manual and maintaining the machine, users can enjoy seamless sewing experiences and achieve professional-quality results․ This machine is a reliable companion for crafting, repairs, and creative endeavors, providing countless opportunities to bring imagination to life through stitching․
12․1 Final Thoughts on Using the Brother LS-2125
Congratulations! You’ve completed the Brother LS-2125 instruction manual․ This machine is designed to be user-friendly for both beginners and experienced sewists, offering a wide range of stitch options for various projects․ Its durability and reliability make it a long-lasting companion for your sewing journey․ Whether you’re crafting, repairing, or creating, the Brother LS-2125 provides the precision and versatility needed to bring your ideas to life․ We encourage you to explore all the features and techniques covered in this manual to maximize your sewing potential․ Happy sewing, and enjoy the countless creative possibilities with your Brother LS-2125!
12․2 Encouragement to Explore More Features
Now that you’ve familiarized yourself with the Brother LS-2125, we encourage you to explore its advanced features and capabilities․ Experiment with the various stitch options, including decorative and stretch stitches, to enhance your sewing projects․ Don’t hesitate to try the automatic buttonhole feature or the zipper foot attachment for professional-looking results․ The more you use the machine, the more you’ll discover its versatility and how it can adapt to your unique sewing needs․ Keep practicing, and soon you’ll be tackling complex projects with confidence․ Remember, the Brother LS-2125 is a powerful tool designed to help you create, innovate, and achieve sewing excellence․ Happy sewing!