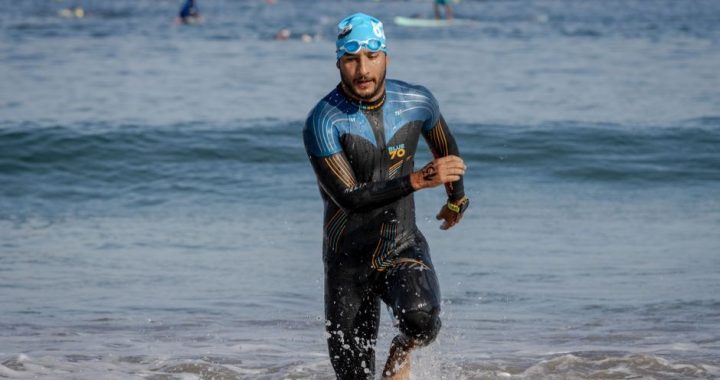
the classroom behavior manual

This manual provides educators with strategies to foster supportive learning environments, minimize disruptions, and positively impact student achievement through effective classroom management.

The Importance of Effective Classroom Management

Effective classroom management is paramount to a thriving educational experience. It directly fosters a supportive learning environment where students feel safe, engaged, and motivated – crucial elements for academic success. Minimizing disruptions allows teachers to maximize instructional time, leading to improved student outcomes.

Research, like that from Robert Marzano, emphasizes a teacher’s need to be an effective manager. A well-managed classroom isn’t simply about control; it’s about creating a space where learning flourishes. Addressing diverse needs and challenges within the classroom landscape is vital for positive student development and overall classroom harmony.

The Teacher’s Impact on Student Achievement

Teachers wield significant influence over student success, extending far beyond curriculum delivery. Effective classroom managers, as highlighted by Marzano’s research, demonstrably improve academic outcomes. A teacher’s ability to establish a positive learning environment, minimize disruptions, and engage students directly correlates with higher achievement levels.

By proactively addressing behavioral challenges and fostering a sense of safety and belonging, teachers unlock students’ potential. This impact isn’t merely anecdotal; it’s supported by research examining the complexities of K-12 classroom management and the vital role educators play in shaping young minds.

Understanding Student Behavior

Exploring the root causes of disruptive behavior, individual student needs, and diverse learning styles is crucial for effective classroom management and student success.

Identifying the Root Causes of Disruptive Behavior

Understanding why a student misbehaves is paramount, moving beyond simply addressing the behavior itself. Disruptions often signal unmet needs – academic frustration, a desire for attention, or difficulties with social-emotional regulation.

Educators should consider factors like home life, peer influences, and potential learning disabilities. A student’s behavior isn’t isolated; it’s communication. Investigating these underlying causes allows for targeted interventions.

Ignoring the ‘why’ leads to a cycle of reactive discipline, while proactively addressing root causes fosters a more supportive and effective learning environment. Careful observation and open communication are key to uncovering these reasons.

The Role of Individual Student Needs

Recognizing that each student is unique is fundamental to effective classroom management. Individual needs – whether academic, emotional, social, or physical – significantly influence behavior. A ‘one-size-fits-all’ approach rarely succeeds.

Students with attention deficits, learning disabilities, or challenging home lives require tailored support. Differentiation in instruction, flexible seating, and individualized behavior plans can address these specific needs.

Understanding a student’s background and learning style allows educators to proactively minimize potential disruptions and create a more inclusive and supportive classroom environment for all learners.

Understanding Different Learning Styles and Their Impact

Acknowledging diverse learning styles – visual, auditory, kinesthetic, and reading/writing – is crucial for effective classroom management. When instruction doesn’t align with a student’s preferred style, frustration and disruptive behavior can emerge.

Visual learners benefit from diagrams and presentations, while auditory learners thrive in discussions. Kinesthetic learners need hands-on activities, and those who prefer reading/writing excel with written assignments.

Adapting teaching methods to incorporate various styles increases engagement and minimizes off-task behavior, fostering a more positive and productive learning atmosphere for every student.

Proactive Classroom Management Strategies

Implementing preventative measures, establishing clear expectations, and creating a positive environment are key to minimizing disruptions and maximizing learning potential.

Establishing Clear Expectations and Rules

Clearly defined expectations and rules are foundational for effective classroom management. Students thrive in structured environments where boundaries are understood and consistently enforced. These guidelines should be collaboratively created with student input whenever possible, fostering a sense of ownership and responsibility.

Rules should be stated positively, focusing on desired behaviors rather than prohibitions. For example, instead of “No talking out of turn,” frame it as “Raise your hand to speak.” Regularly review these expectations, especially at the beginning of the year and after breaks. Consistency in applying these rules is paramount; fairness builds trust and minimizes challenges. A well-defined system promotes a focused and respectful learning atmosphere.

Creating a Positive and Supportive Learning Environment

A positive classroom climate is crucial for student engagement and minimizes disruptive behaviors. This involves fostering a sense of belonging, respect, and safety where students feel comfortable taking risks and participating actively. Encourage collaboration and celebrate successes, both academic and social-emotional.

Show genuine care and interest in students’ well-being, acknowledging their individual strengths and needs. Positive teacher-student relationships are key to building trust and rapport. A supportive environment proactively addresses potential issues before they escalate, promoting a culture of kindness and mutual respect. This atmosphere directly contributes to improved learning outcomes.

Utilizing Positive Reinforcement Techniques

Positive reinforcement is a powerful tool for encouraging desired behaviors and creating a more productive classroom. Focus on acknowledging and rewarding students when they demonstrate appropriate conduct, academic effort, or helpfulness. This can range from verbal praise and positive notes home to small rewards or classroom privileges.

Specifically recognize positive actions rather than solely addressing negative ones. Consistency is key; reinforce desired behaviors frequently and predictably. Tailor rewards to individual student preferences for maximum impact. Positive reinforcement fosters intrinsic motivation, encouraging students to take ownership of their learning and behavior, ultimately minimizing disruptions.

Implementing Preventative Measures to Minimize Disruptions

Proactive strategies are crucial for a well-managed classroom, focusing on preventing disruptions before they occur. This involves carefully planning lessons that are engaging and cater to diverse learning styles, minimizing boredom and frustration. Establish clear routines and procedures for common classroom activities, providing structure and predictability.

Ensure the physical classroom environment is conducive to learning – organized, well-lit, and free from unnecessary distractions. Proximity control, where the teacher moves closer to students who are beginning to disengage, can be effective. Anticipate potential challenges and proactively address them, fostering a positive and supportive learning atmosphere.

Reactive Classroom Management Strategies

Responding effectively to disruptive behavior requires de-escalation techniques and consistent, fair consequences to maintain a productive learning environment for all.

Responding to Disruptive Behavior Effectively

Addressing disruptive behavior requires a thoughtful and measured approach. Initially, employ non-verbal cues like eye contact or proximity to redirect the student. If the behavior persists, a calm, private verbal redirection is crucial, focusing on the specific behavior and expected alternative.

Avoid public reprimands, as they can escalate the situation and damage the student-teacher relationship. Implement pre-established consequences consistently and fairly, ensuring they align with the severity of the disruption. Document all incidents, including the behavior, intervention, and outcome, for tracking patterns and informing future strategies.

Remember, the goal isn’t simply to punish, but to teach appropriate behavior and restore a positive learning environment.

De-escalation Techniques for Challenging Situations

When facing escalating behavior, prioritize safety and remain calm. Lower your voice and maintain a non-threatening posture, creating physical space if needed. Active listening is key – acknowledge the student’s feelings without necessarily agreeing with their actions.

Use empathetic statements like, “I see you’re frustrated,” to validate their emotions; Offer choices whenever possible, providing a sense of control. Redirect the student’s focus by suggesting a break or a different activity.

Avoid power struggles and focus on finding a mutually acceptable solution. Remember, de-escalation aims to reduce tension and restore a calm environment.

Consistent and Fair Consequences

Establishing clear, predictable consequences is crucial for effective classroom management. Consequences should be logical and directly related to the misbehavior, ensuring students understand the connection between their actions and the outcome. Fairness dictates that consequences are applied equitably to all students, avoiding favoritism or bias.

Consistency is paramount; enforce rules and consequences every time, regardless of the student or situation. A tiered system, starting with minor interventions and escalating as needed, can be effective.

Document all disciplinary actions and communicate with parents or guardians regarding significant issues.

Managing Technology in the Classroom

Digital devices require clear guidelines for responsible use, addressing distractions like cellphones and promoting focused learning through blended instruction strategies.

Addressing Cellphone Distractions

The pervasive presence of cellphones presents a significant challenge to classroom focus and engagement. Dance Teacher Web’s behavior management guide specifically addresses this growing issue, offering practical, evidence-based strategies for educators; Establishing clear expectations regarding cellphone use is paramount; policies should outline when devices are permitted – if at all – and the consequences for violations.

Consider designated “phone zones” or collection points during instruction. Integrate digital devices purposefully into lessons when appropriate, transforming potential distractions into learning tools. Proactive measures, coupled with consistent enforcement, are crucial for minimizing disruptions and maximizing student attention. Remember, the goal isn’t to eliminate technology, but to harness its power responsibly within the learning environment.

Integrating Digital Devices Responsibly

Modern K-12 classrooms increasingly utilize laptops, tablets, and smartphones to support research, collaboration, and blended learning initiatives. However, successful integration requires careful planning and clear guidelines. Rather than viewing devices solely as distractions, educators should leverage their potential to enhance instruction and student engagement.

Establish acceptable use policies that outline appropriate online behavior, digital citizenship, and academic integrity. Design lessons that actively incorporate digital tools, fostering a purposeful learning experience. Model responsible technology use yourself, and teach students how to navigate the digital world safely and ethically. When implemented thoughtfully, digital devices can be powerful assets in the classroom.

Establishing Guidelines for Technology Use

Clear, concise guidelines are crucial for managing technology effectively in the classroom. These should address acceptable websites, app usage, and digital communication protocols. Specifically outline consequences for misuse, such as off-task browsing or cyberbullying. Consider a tiered approach, starting with verbal warnings and escalating to device confiscation or parental contact.

Communicate these expectations explicitly to students and parents, ensuring everyone understands the rules. Regularly review and update the guidelines as technology evolves. Emphasize digital citizenship, responsible online behavior, and respect for intellectual property. A well-defined framework minimizes distractions and promotes a focused learning environment.

Addressing Specific Behavioral Challenges

This section details strategies for handling defiance, non-compliance, attention deficits, and aggressive behaviors, promoting a safe and productive learning atmosphere.

Dealing with Defiance and Non-Compliance

Addressing defiance and non-compliance requires a calm, consistent, and understanding approach. Initially, ensure clear expectations and rules are established and communicated effectively to all students. When a student exhibits defiant behavior, avoid engaging in power struggles; instead, acknowledge their feelings while firmly restating the expectation.

Employ logical consequences that are directly related to the misbehavior, and consistently apply them. Offer choices whenever possible to give students a sense of control. Proactive strategies, such as building positive relationships and providing opportunities for success, can significantly reduce instances of defiance. Document patterns of behavior and collaborate with parents and school counselors for tailored support plans.

Supporting Students with Attention Deficit Disorders

Students with Attention Deficit Disorders (ADD/ADHD) often require specific classroom accommodations to thrive. Minimize distractions by providing a quiet workspace and breaking down tasks into smaller, manageable steps. Offer frequent breaks to allow for movement and refocusing. Utilize visual aids and checklists to support organization and task completion.

Positive reinforcement and clear, concise instructions are crucial. Collaborate with parents and special education staff to implement individualized education programs (IEPs) effectively. Patience and understanding are key, recognizing that inattentive or impulsive behaviors are not intentional defiance, but rather symptoms of the disorder.

Managing Aggressive Behavior

Aggressive behavior in the classroom demands a calm, measured response prioritizing safety. Immediately address the situation, separating the student from others and ensuring a secure environment. Avoid escalating the conflict through raised voices or confrontational postures. Focus on de-escalation techniques, such as active listening and acknowledging the student’s feelings.

Establish clear consequences for aggressive acts, consistently applied and communicated. Collaborate with school counselors and administrators to understand the underlying causes of the behavior and develop a behavior intervention plan. Document all incidents thoroughly, and prioritize restorative practices when appropriate, focusing on repairing harm and rebuilding relationships.

Creating a Visual Management System

Utilize classroom displays and visual cues to reinforce expectations, track behavior, and provide reminders, fostering a structured and predictable learning environment.

Classroom Display Prototypes for Behavior Management

Researchers have been actively exploring innovative visual systems to aid teachers in implementing effective behavior strategies. These prototypes often involve clearly defined charts or boards that visually represent expected behaviors and consequences.

A common approach includes a tiered system, showcasing positive behaviors leading to rewards, and conversely, outlining disruptive actions with corresponding consequences. Color-coding is frequently employed to quickly signal behavior status – green for good, yellow for warning, and red for requiring intervention.

These displays aren’t merely decorative; they serve as constant, non-verbal reminders for students, promoting self-regulation and accountability. The goal is to create a transparent system where expectations are visible and understood by all, ultimately contributing to a more focused and productive learning atmosphere.

Utilizing Visual Cues and Reminders

Beyond comprehensive display prototypes, integrating smaller, targeted visual cues can significantly enhance classroom management. These cues act as subtle prompts, redirecting student attention and reinforcing expected behaviors without disrupting the flow of instruction.

Examples include hand signals for requesting assistance, quiet signals to regain focus, or posted checklists outlining task expectations. Visual timers can help students understand time constraints and manage their work effectively.

The key is consistency and clarity. Students need to understand the meaning of each cue. These reminders minimize verbal corrections, fostering a more positive and less reactive classroom environment, ultimately promoting student independence and self-regulation.

Collaboration and Communication

Effective behavior management thrives on strong partnerships with parents, guardians, counselors, administrators, and colleagues, ensuring consistent support for students.

Working with Parents and Guardians

Establishing open and consistent communication with parents and guardians is paramount for successful classroom management. Regular updates, whether through emails, phone calls, or conferences, keep families informed about their child’s behavior and progress;

Proactively sharing positive observations alongside areas for improvement fosters a collaborative partnership. When challenges arise, approach conversations with empathy and a focus on finding solutions together.

Clearly explain classroom expectations and consequences, ensuring alignment between school and home. Encourage parental involvement in supporting behavioral goals and strategies. Remember, a united front significantly enhances a student’s likelihood of positive behavioral change and academic success.

Collaborating with School Counselors and Administrators

Effective classroom management often requires a team approach. School counselors offer valuable expertise in understanding student behavior and developing individualized support plans. Don’t hesitate to seek their guidance when addressing complex behavioral challenges or identifying underlying issues.

Administrators play a crucial role in providing resources and ensuring consistent school-wide policies. Keep them informed of persistent behavioral concerns and collaborate on strategies for intervention.

Regular communication with both counselors and administrators fosters a supportive network, allowing for a coordinated and comprehensive response to student needs, ultimately creating a safer and more productive learning environment.

Seeking Support from Colleagues

Classroom management can be challenging, and you are not alone! Building a strong professional learning community within your school is invaluable. Share experiences, strategies, and challenges with colleagues to gain fresh perspectives and practical advice.

Observe experienced teachers and learn from their successful techniques. Collaborative problem-solving can lead to innovative solutions tailored to your specific classroom context.

Mentorship opportunities, peer observations, and informal discussions can provide ongoing support and encouragement, fostering a sense of shared responsibility for student success and well-being.

Legal and Ethical Considerations

Adherence to school policies, student privacy, and confidentiality are paramount when implementing behavior management strategies, ensuring fair and responsible practices.

Understanding School Policies and Procedures

Navigating the complexities of school-wide behavior expectations is crucial for consistent and legally sound classroom management. Teachers must thoroughly familiarize themselves with the student handbook, disciplinary guidelines, and any specific policies related to student conduct and safety.

These documents often outline procedures for addressing disruptive behavior, reporting incidents, and involving parents or administrators. Understanding these protocols ensures that interventions are aligned with school-wide initiatives and protect both the teacher and the student.

Furthermore, awareness of legal considerations, such as student rights and due process, is essential. Ignoring established policies can lead to legal challenges and compromise the effectiveness of classroom management efforts. Proactive knowledge empowers educators to respond appropriately and ethically.

Maintaining Student Privacy and Confidentiality

Upholding student privacy is a paramount ethical and legal responsibility for all educators; Discussions about a student’s behavior, especially those involving sensitive information or disciplinary actions, must remain confidential. Sharing details with unauthorized individuals – including other students or even colleagues without a need to know – is a breach of trust and potentially illegal.

Documentation of behavioral incidents should be handled securely and accessed only by those directly involved in supporting the student. Teachers must adhere to school policies regarding data protection and comply with relevant privacy laws.

Respecting a student’s dignity and maintaining confidentiality fosters a safe and supportive learning environment.

Resources and Further Learning

Explore recommended books, articles, and online resources to deepen your understanding of classroom management and enhance your teaching practices continually.

Recommended Books and Articles

For a foundational understanding, Robert Marzano’s Classroom Management That Works offers research-backed strategies for effective management. Educators seeking practical guidance will benefit from resources provided by Dance Teacher Web, specifically their behavior management guide addressing cellphone distractions.

Further exploration into understanding student behavior can be found in articles examining the challenges teachers face when implementing behavior strategies, as researched by institutions like the University of Michigan. Staying current with evolving digital learning landscapes is crucial; explore resources detailing responsible integration of technology in K-12 classrooms.

These resources provide a starting point for continuous professional development and refinement of classroom management techniques, ultimately fostering a positive and productive learning environment for all students.

Online Resources for Classroom Management

Numerous online platforms offer valuable support for educators navigating classroom management. Websites dedicated to K-12 education frequently host articles and webinars on fostering positive learning environments and addressing disruptive behaviors. Dance Teacher Web provides specific resources tackling cellphone distractions, a growing concern in modern classrooms.

University research institutions, like the University of Michigan, often publish findings on effective behavior management strategies accessible online. Podcasts, such as those hosted by Ericka Cruz Guevarra, offer contextual analysis of educational challenges.

Exploring these digital resources allows teachers to stay informed, share best practices, and continuously improve their classroom management skills.

bug out bag list pdf

Bug Out Bag List: A Comprehensive Guide

Essential checklists, like those from Valley Food Storage and Mountain House, offer printable guides for 72-hour kits, updated for 2023.

Creek Stewart provides free downloadable gear lists and training videos, aiding in disaster preparedness. Experts emphasize FEMA’s recommended supplies;

Bug Out Bags, often called Go Bags, are meticulously prepared survival kits designed for swift evacuation during emergencies. These aren’t simply backpacks; they represent a proactive approach to personal safety and self-reliance when facing unforeseen disasters. Resources like Valley Food Storage highlight the importance of having a well-stocked bag, offering downloadable checklists and comprehensive survival guides, specifically a bug out bag list pdf.

The core concept revolves around readiness – being able to quickly gather essential supplies and leave a potentially dangerous situation. Experts, including Creek Stewart, emphasize the need for a 72-hour kit, providing free videos and downloadable gear lists to aid in preparation. Mountain House echoes this sentiment, referencing FEMA’s recommended disaster supplies as a foundation for a robust bug out bag.

Understanding the contents and purpose of a Bug Out Bag is the first step towards enhanced preparedness, ensuring you and your loved ones are equipped to handle challenging circumstances.

Why You Need a Bug Out Bag

Unpredictable events – natural disasters, widespread emergencies, or even localized crises – can disrupt daily life, demanding immediate evacuation. A Bug Out Bag ensures you’re not caught unprepared. Having a pre-packed kit, guided by resources offering a bug out bag list pdf, provides a crucial head start when time is of the essence.

Relying on emergency services alone can be risky during large-scale events; self-sufficiency becomes paramount. Valley Food Storage stresses preparation for evacuation, while Mountain House emphasizes the importance of a 72-hour supply, aligning with FEMA recommendations. Creek Stewart’s free resources further underscore this need.

A Bug Out Bag isn’t about fearing the worst; it’s about responsible preparedness, offering peace of mind and the ability to protect yourself and your family when faced with adversity.

Determining Bag Size and Weight

Selecting the right bag size and managing weight are critical for portability and endurance. A bug out bag list pdf often doesn’t specify size, leaving it to individual needs. Consider the duration of potential evacuation – a 72-hour kit (as recommended by FEMA and highlighted in Mountain House checklists) requires a different capacity than a longer-term setup.

Generally, a 40-60 liter backpack strikes a balance between capacity and manageability. Weight should ideally be no more than 20% of your body weight to prevent strain and injury. Prioritize essential items, utilizing resources like those from Valley Food Storage to streamline your packing list.

Regularly assess and adjust your bag’s contents, removing unnecessary items to maintain a reasonable weight. Remember, a lighter bag means greater mobility and increased survivability.

Essential Bug Out Bag Components

Core items, detailed in bug out bag list pdf guides, include water, food, shelter, first aid, and tools – vital for 72-hour survival.

Water: Purification and Storage

Hydration is paramount; a bug out bag list pdf will emphasize carrying enough water for at least three days, ideally one gallon per person daily. However, weight considerations necessitate prioritizing purification methods. Essential tools include water filters – Sawyer Mini or LifeStraw are popular choices – capable of removing bacteria and protozoa.

Water purification tablets, offering a lightweight backup, are also crucial. Consider including a durable, collapsible water container like a Platypus or CamelBak for storage. Boiling water remains a reliable, albeit fuel-dependent, purification technique. Remember to pack a metal container suitable for boiling. Beyond immediate consumption, water is needed for hygiene and first aid, so plan accordingly. Proper storage prevents contamination and ensures a safe water supply during emergencies.

Food: Non-Perishable Options

A comprehensive bug out bag list pdf prioritizes calorie-dense, non-perishable food items. Focus on foods requiring minimal preparation and no refrigeration. Excellent choices include energy bars, freeze-dried meals (Mountain House is a popular brand), and ready-to-eat meals (MREs).

Nuts, seeds, and dried fruits provide sustained energy and essential nutrients. Consider including canned goods, but be mindful of the added weight. Don’t forget a manual can opener! Electrolyte replacement packets are vital for maintaining hydration and preventing fatigue. Aim for a three-day supply, but extend it if possible. Proper food storage in waterproof packaging is crucial to prevent spoilage and maintain nutritional value during prolonged emergencies.

Shelter and Warmth

A well-prepared bug out bag list pdf must address shelter and thermal regulation. A lightweight, waterproof tarp provides versatile protection from the elements. Consider a compact emergency bivy sack or sleeping bag rated for temperatures lower than expected in your region.

Essential items include a space blanket for immediate warmth and a fire starter (discussed elsewhere) for sustained heat. Don’t underestimate the importance of extra socks – wet feet can lead to hypothermia. A small, portable tent offers more substantial shelter, but adds weight. Prioritize items that offer multiple uses; a tarp can also collect rainwater. Proper insulation is key to survival in cold environments, so pack accordingly.

First Aid and Medical Supplies

A comprehensive bug out bag list pdf necessitates a robust first aid kit. Include bandages of various sizes, antiseptic wipes, pain relievers, and blister treatment. Essential medications, both prescription and over-the-counter, should be included with clear labeling and dosage instructions.

Consider adding trauma dressings, a tourniquet, and chest seals for severe injuries, alongside gloves and a CPR mask for safe assistance. Don’t forget items like tweezers, scissors, and safety pins. A first aid manual provides crucial guidance in emergency situations. Prioritize addressing potential injuries specific to your environment. Regularly check expiration dates and replenish supplies to ensure readiness.

Tools and Navigation

Essential tools, like knives and multi-tools, are vital; maps, compasses, and GPS devices aid navigation, as detailed in bug out bag list pdf guides.

Cutting Tools: Knives and Multi-Tools

A robust knife is arguably the most crucial tool within any bug out bag, serving countless purposes from shelter building to food preparation and self-defense. Prioritize a full-tang fixed blade knife for durability, ensuring it can withstand rigorous use. Consider a blade length between 4-6 inches, striking a balance between versatility and portability.

Multi-tools, like Leatherman or Gerber options, offer a compact solution for a variety of tasks. They consolidate pliers, screwdrivers, saws, and other useful implements into a single, easily carried package. While not a replacement for a dedicated knife, a multi-tool significantly expands your capabilities. Bug out bag list pdf resources consistently highlight both fixed blade knives and multi-tools as essential components.

Sharpening tools are equally important; a dull knife is a dangerous knife. Include a sharpening stone or a pocket-sized sharpener to maintain your blade’s effectiveness. Remember to practice safe knife handling techniques before relying on these tools in an emergency situation. Proper maintenance ensures your cutting tools remain reliable when you need them most.

Fire Starting Methods

Reliable fire starting is paramount for warmth, cooking, water purification, and signaling in a survival scenario. Multiple redundant methods are crucial, as a single point of failure could be life-threatening. A butane lighter provides a quick and easy flame, but fuel can deplete. Therefore, include a ferrocerium rod (“ferro rod”) and striker – these work even when wet and have a long lifespan.

Waterproof matches, stored in a waterproof container, offer another dependable option. Consider preparing DIY fire starters like cotton balls soaked in petroleum jelly or commercially available fire starter cubes. Bug out bag list pdf guides consistently emphasize the importance of redundancy in fire starting capabilities.

Tinder is equally vital. Natural tinder like birch bark or dry grass can be used, but carrying commercially prepared tinder ensures success even in damp conditions. Practice using your chosen methods beforehand to build proficiency and confidence.

Navigation: Maps, Compass, and GPS

Effective navigation is critical when bugging out, as relying solely on technology is risky. A topographic map of your area, ideally waterproofed, provides a comprehensive overview of terrain and potential routes. Complement this with a baseplate compass and the knowledge to use it effectively – learn to take bearings and orient yourself. Bug out bag list pdf resources consistently highlight these as foundational skills.

A GPS device can be a valuable supplement, but remember it requires batteries and is susceptible to signal loss or EMP events. Pre-load maps onto the device and carry extra batteries. Consider a solar charger for extended use;

Understanding map reading and compass skills is paramount; practice regularly. Don’t solely depend on electronic devices; proficiency with traditional methods is essential for true self-reliance.

Clothing and Personal Items

Bug out bag list pdf guides stress durable, weather-appropriate clothing, plus hygiene essentials. Prioritize layers, moisture-wicking fabrics, and copies of vital personal documents.

Appropriate Clothing for All Weather

Selecting clothing for your bug out bag, as detailed in many bug out bag list pdf resources, requires careful consideration of potential weather conditions. Prioritize layering systems to adapt to fluctuating temperatures – a base layer for moisture-wicking, an insulating mid-layer for warmth, and a waterproof/windproof outer shell for protection.

Include durable, long-sleeved shirts and pants for protection against insects, scratches, and the sun. Don’t forget sturdy, broken-in hiking boots, along with several pairs of moisture-wicking socks to prevent blisters. A wide-brimmed hat offers sun protection, while a warm hat and gloves are crucial for colder climates.

Consider packing extra underwear and a bandana, which has multiple uses. Focus on clothing made from materials like merino wool or synthetic fabrics, as they retain warmth even when wet and dry quickly. Remember to choose colors that blend with the environment for increased concealment if necessary.

Personal Hygiene Items

Maintaining personal hygiene during a bug-out situation, often outlined in comprehensive bug out bag list pdf guides, is crucial for health and morale. Include a travel-sized toothbrush, toothpaste, biodegradable soap, and a quick-drying towel. Don’t overlook feminine hygiene products, if applicable, and toilet paper – consider storing it in a waterproof bag.

Hand sanitizer is essential for preventing the spread of germs when water is scarce. Pack wet wipes for quick cleanups and a small mirror for medical checks or grooming. Consider including lip balm with SPF to protect against sun and wind.

A small first-aid kit dedicated to hygiene, containing antiseptic wipes and blister treatment, is also beneficial. Remember to prioritize lightweight and multi-purpose items to minimize weight and maximize space within your bag. Proper hygiene can significantly reduce the risk of illness.

Important Documents (Copies)

A well-prepared bug out bag list pdf consistently emphasizes the inclusion of crucial document copies. Never rely on originals, as loss or damage could create significant problems. Include copies of identification – driver’s licenses, passports, and birth certificates – sealed in waterproof bags.

Also, copy insurance cards (health, auto, home), medical records (especially prescriptions and allergies), and financial documents like bank account details and credit card information. Consider including copies of deeds, titles, and wills;

Digital backups on a USB drive are helpful, but physical copies are vital if electronic access is unavailable. Store these documents alongside other essential supplies, ensuring they remain protected from the elements. Having these readily available can streamline recovery efforts post-disaster.

Security and Self-Defense

Bug out bag list pdf resources suggest considering legal self-defense tools and signaling devices for emergencies, prioritizing personal safety and communication capabilities;

Self-Defense Tools (Legal Considerations)

Selecting self-defense tools for your bug out bag requires careful consideration of local and federal laws. A bug out bag list pdf should not dictate specific items, but rather prompt research into legality. Pepper spray, for instance, faces restrictions in some states, while knives have varying blade length limitations.

Firearms, if legally owned and carried with proper permits, are a potent option, but demand extensive training and responsible storage. Non-lethal options like personal alarms or tactical flashlights can deter attackers without escalating the situation. Always prioritize de-escalation and avoidance.

Understanding “castle doctrine” and self-defense laws in your potential bug-out locations is crucial. A pdf checklist should include a reminder to verify legal compliance before including any self-defense item. Ignoring these considerations could lead to severe legal repercussions during an already stressful event.

Signaling Devices

Effective signaling is paramount in a survival scenario, and a comprehensive bug out bag list pdf should prioritize multiple methods. A whistle is lightweight and requires minimal effort to operate, capable of carrying sound over considerable distances. Signal mirrors utilize sunlight to create a flashing beacon visible to aircraft or distant search parties.

Brightly colored flags or cloths can mark your location, while flares provide a powerful visual signal, especially at night. Consider a hand-crank or solar-powered radio for receiving emergency broadcasts and potentially transmitting a distress call.

A pdf checklist should remind you to include extra batteries for any electronic devices. Knowing how to use these tools effectively is as important as possessing them; practice signaling techniques beforehand. Prioritize devices that don’t rely on infrastructure, ensuring communication even when networks are down.

Additional Considerations

Downloadable bug out bag list pdf resources highlight lighting and communication needs; radios and chargers are vital for staying informed and connected.

Lighting: Flashlights and Headlamps

Reliable lighting is paramount within any comprehensive bug out bag, especially considering potential power outages during emergencies. Several resources, including downloadable bug out bag list PDFs, consistently emphasize the inclusion of both flashlights and headlamps. Flashlights provide a focused beam for distance, while headlamps offer hands-free operation – invaluable when navigating challenging terrain or performing tasks in the dark.

Consider LED technology for extended battery life and durability. Pack extra batteries, or explore options like hand-crank or solar-powered lights to eliminate reliance on disposable power sources. A red-light filter can preserve night vision and minimize detection. Prioritize waterproof and impact-resistant models for longevity. Don’t underestimate the psychological comfort a reliable light source provides during stressful situations; it’s a crucial component of preparedness.

Communication: Radios and Chargers

Maintaining communication during a disaster is vital, and a bug out bag list PDF will invariably highlight radios as essential. NOAA weather radios provide critical updates on impending threats, while two-way radios facilitate contact with family or groups. Hand-crank or solar-powered radios eliminate the need for batteries, ensuring functionality when power is unavailable.

Alongside radios, portable chargers are crucial for keeping essential devices operational. Power banks capable of charging smartphones and other USB-powered equipment are highly recommended. Consider a solar charger for renewable energy. Don’t forget the necessary charging cables! Prioritize durable, waterproof options. Effective communication can be the difference between safety and peril, making these items non-negotiable additions to your preparedness kit.

Downloadable Bug Out Bag Checklists & Guides

Numerous resources offer downloadable bug out bag list PDFs to streamline your preparation. Valley Food Storage provides a comprehensive survival guide including a printable checklist, ensuring you don’t overlook vital items. Creek Stewart’s website features free downloadable gear lists and training videos, enhancing your understanding of essential equipment.

Mountain House references FEMA’s recommended 72-hour disaster supplies kit as a foundation for a bug out bag checklist. These guides typically categorize items – water, food, shelter, first aid, tools – for organized packing. Utilizing a PDF checklist minimizes errors and promotes efficiency. Regularly review and update your list based on your specific needs and potential scenarios. A well-prepared checklist is your first step towards effective disaster readiness.

yeast free food list pdf

Yeast-Free Diet: A Comprehensive Food List

A yeast-free diet aims to minimize yeast and mold intake‚ alongside reducing carbohydrates—especially sugars—which fuel yeast growth. This guide offers food suggestions‚
lasting eight weeks‚ with careful reintroduction of foods afterward‚ monitoring for symptom recurrence.

Embarking on a yeast-free diet involves carefully selecting foods to minimize yeast and mold consumption‚ alongside limiting carbohydrates. This dietary approach targets reducing the “food” source for yeast‚ particularly simple sugars‚ aiming to control overgrowth. It’s not merely elimination; it’s a strategic reduction focused on sustaining overall health. This guide provides a foundational understanding and a practical list to navigate this dietary shift effectively for eight weeks.

Why Follow a Yeast-Free Diet?

A yeast-free diet is undertaken to reduce the intake of foods containing yeast or mold‚ like baked goods and mushrooms. More importantly‚ it restricts carbohydrates‚ especially sugars‚ as these directly nourish yeast‚ sustaining its growth within the body. Reducing this fuel source can help manage yeast-related symptoms and promote a healthier internal balance‚ offering potential relief and improved well-being.

Duration of the Diet & Reintroduction

Strict adherence to the yeast-free diet is recommended for a period of eight weeks. Following this initial phase‚ a slow and deliberate reintroduction of previously avoided foods is advised. Careful monitoring for any returning symptoms is crucial; if symptoms reappear‚ the reintroduced food should be eliminated from the diet permanently to maintain optimal health and well-being.

Foods to Enjoy on a Yeast-Free Diet

Enjoy a variety of low-carbohydrate vegetables‚ whole fruits‚ meats‚ seafood‚ nuts‚ seeds‚ and oils to nourish your body while minimizing yeast-feeding foods.

Low-Carbohydrate Vegetables

Prioritize fiber-rich‚ nutrient-packed‚ low-calorie‚ and low-carbohydrate vegetables for optimal health on a yeast-free diet. Enjoy these fresh or frozen‚ cooked or raw: asparagus‚ beet greens‚ bell peppers‚ broccoli‚ cabbage‚ carrots‚ cauliflower‚ celery‚ collard greens‚ eggplant‚ lettuce (all varieties)‚ parsnips‚ radishes‚ rutabaga‚ shallots‚ snow peas‚ soybeans‚ spinach‚ string beans‚ Swiss chard‚ and fresh tomatoes.

Asparagus

Asparagus is a fantastic addition to a yeast-free diet‚ offering a wealth of essential nutrients while remaining low in carbohydrates and calories. This versatile vegetable can be enjoyed both fresh and frozen‚ prepared through cooking or consumed raw‚ providing a delightful and healthy option for your meals.

Beet Greens

Beet greens are a nutritional powerhouse and perfectly suited for a yeast-free eating plan. These leafy greens are low in carbohydrates and calories‚ yet packed with fiber and vital nutrients. Enjoy them fresh or frozen‚ cooked to your liking‚ offering a vibrant and healthful component to your diet.

Bell Peppers

Bell peppers are a fantastic addition to a yeast-free diet‚ offering both flavor and essential nutrients. Being low in carbohydrates and calories‚ they provide fiber without fueling yeast overgrowth. Enjoy these versatile vegetables fresh or frozen‚ incorporated into various dishes for a colorful and healthy meal.

Broccoli

Broccoli is a superb choice for those following a yeast-free dietary plan‚ contributing vital nutrients while remaining low in carbohydrates. This fiber-rich vegetable supports overall health without providing substantial fuel for yeast. Enjoy broccoli fresh or frozen‚ cooked to your preference‚ as a beneficial component of your meals.

Cabbage

Cabbage is an excellent addition to a yeast-free diet‚ offering essential nutrients with a minimal carbohydrate load. This versatile vegetable can be enjoyed fresh or frozen‚ prepared in various ways to suit your taste. Its low-calorie and fiber-rich profile makes it a healthy and supportive choice for managing yeast levels.

Carrots

Carrots are a fantastic choice for those following a yeast-free dietary plan‚ providing vital nutrients while remaining relatively low in carbohydrates and calories. Enjoy them fresh or frozen‚ cooked or raw‚ as part of a balanced approach to reducing yeast-sustaining foods; They contribute fiber and essential vitamins to your diet.

Cauliflower

Cauliflower is an excellent vegetable to incorporate into a yeast-free diet‚ offering essential nutrients with a low carbohydrate content. Enjoy it fresh or frozen‚ prepared in various ways – steamed‚ roasted‚ or even riced – to add variety to your meals. It’s a versatile and healthy choice supporting your dietary goals.

Celery

Celery is a fantastic addition to a yeast-free eating plan‚ providing fiber and vital nutrients while remaining low in carbohydrates and calories. This crisp vegetable can be enjoyed raw as a snack‚ added to salads‚ or lightly cooked in various dishes. It’s a refreshing and healthy option for sustained energy.

Collard Greens

Collard greens are a nutrient-rich‚ low-carbohydrate vegetable perfectly suited for a yeast-free diet; These leafy greens offer essential vitamins and fiber‚ contributing to overall health and well-being. Enjoy them fresh or frozen‚ and cooked to your preference – steaming or sautéing preserves their valuable nutrients effectively.

Eggplant

Eggplant is a versatile‚ low-carbohydrate vegetable that fits seamlessly into a yeast-free eating plan. This wonderful addition to your diet provides essential nutrients and fiber‚ supporting a healthy gut. Enjoy eggplant fresh or frozen‚ prepared through baking‚ grilling‚ or sautéing for a delicious and nutritious meal.

Lettuce (All Varieties)

Lettuce‚ in all its diverse forms‚ is a fantastic choice for a yeast-free diet‚ offering minimal carbohydrates and valuable nutrients. Whether you prefer romaine‚ iceberg‚ or butter lettuce‚ it’s a crisp and refreshing base for salads or a healthy wrap alternative. Enjoy it fresh‚ contributing to a fiber-rich diet.

Parsnips

Parsnips are a wonderful addition to a yeast-free eating plan‚ categorized as a low-carbohydrate vegetable. These root vegetables provide essential nutrients and fiber while remaining relatively low in calories. Enjoy parsnips roasted‚ boiled‚ or mashed as a flavorful and healthy side dish‚ supporting your dietary goals.

Radishes

Radishes are excellent choices for a yeast-free diet‚ fitting comfortably within the low-carbohydrate vegetable group. They offer a crisp texture and a slightly peppery flavor‚ adding variety to your meals. Enjoy radishes raw in salads‚ or lightly sautéed‚ providing essential nutrients without significantly impacting carbohydrate intake.

Rutabaga

Rutabaga is a fantastic addition to a yeast-free eating plan‚ categorized as a low-carbohydrate vegetable. This root vegetable boasts a subtly sweet and earthy flavor‚ offering valuable fiber and essential nutrients. Rutabaga can be roasted‚ mashed‚ or added to stews‚ providing a satisfying and healthy component to your diet.

Shallots

Shallots are a welcomed ingredient within a yeast-free dietary approach‚ fitting comfortably into the low-carbohydrate vegetable category. These members of the onion family deliver a milder‚ more delicate flavor than traditional onions‚ enhancing various dishes. Enjoy shallots sautéed‚ roasted‚ or used as a flavorful base for soups and sauces.

Snow Peas

Snow peas are a fantastic addition to a yeast-free diet‚ categorized as a low-carbohydrate vegetable‚ providing essential nutrients and fiber. Their crisp texture and subtly sweet flavor make them versatile for stir-fries‚ salads‚ or simply enjoyed as a fresh snack. They contribute to a healthy and balanced meal plan.

Soybeans

Soybeans are included within the list of low-carbohydrate vegetables suitable for a yeast-free dietary approach‚ offering a valuable protein source. They can be incorporated into various dishes‚ providing essential nutrients and fiber. Enjoy soybeans as a versatile ingredient‚ supporting a balanced and nourishing meal plan during the diet.

Spinach

Spinach is a fantastic addition to a yeast-free diet‚ categorized as a low-carbohydrate vegetable packed with essential nutrients. Enjoy it fresh or frozen‚ cooked or raw‚ to benefit from its fiber content and overall health-promoting properties. Spinach contributes to a balanced diet while minimizing yeast-feeding carbohydrates.

String Beans

String beans are a welcomed component of a yeast-free eating plan‚ falling into the category of low-carbohydrate vegetables. They provide valuable fiber and essential nutrients‚ supporting overall health without significantly contributing to yeast growth. Enjoy string beans fresh or frozen‚ prepared in various ways‚ for a nutritious meal.

Swiss Chard

Swiss chard is a fantastic addition to a yeast-free diet‚ categorized as a low-carbohydrate vegetable offering substantial nutritional benefits. It’s packed with fiber and essential nutrients‚ contributing to a healthy lifestyle while minimizing fuel for yeast. Enjoy Swiss chard cooked or fresh‚ enhancing your meals with its vibrant flavor.

Tomatoes (Fresh)

Fresh tomatoes are a welcome component of a yeast-free eating plan‚ falling into the category of low-carbohydrate vegetables. They provide essential nutrients and fiber‚ supporting overall health without significantly contributing to yeast sustenance. Enjoy them raw in salads or lightly cooked‚ adding a burst of flavor to your diet.

Fruits (Whole Fruits Preferred)

While many fruits contain carbohydrates‚ they remain a valuable part of a healthy diet when following a yeast-free regimen. Prioritize consuming whole fruits to benefit from their fiber and nutrients. However‚ strictly avoid fruit juices like apple or orange juice‚ as these deliver a concentrated carbohydrate load that can encourage yeast growth.

Meats and Seafood

When adhering to a yeast-free diet‚ a variety of meats and seafood options are readily available and encouraged. Enjoy choices like chicken‚ shellfish – including shrimp‚ lobster‚ and crab – and lean cuts of veal. Tofu serves as an excellent plant-based protein source‚ and wild game is also permissible‚ contributing to a balanced nutritional intake.

Chicken

Chicken is a fantastic protein choice while following a yeast-free dietary plan. It’s naturally free of yeast and molds‚ making it a safe and versatile option for meals. Whether grilled‚ baked‚ roasted‚ or incorporated into soups and salads‚ chicken provides essential nutrients without contributing to yeast overgrowth. Ensure preparation methods remain simple and avoid yeast-containing marinades.

Shellfish (Shrimp‚ Lobster‚ Crab)

Shellfish‚ including shrimp‚ lobster‚ and crab‚ are excellent additions to a yeast-free diet. These seafood options are naturally devoid of yeast and mold‚ offering a delicious source of protein. Enjoy them steamed‚ grilled‚ or baked‚ ensuring they are prepared without any yeast-containing ingredients or sauces. They contribute valuable nutrients while adhering to dietary restrictions.

Tofu

Tofu is a versatile plant-based protein source suitable for a yeast-free dietary approach. It naturally lacks yeast and mold‚ making it a beneficial inclusion. When selecting tofu‚ ensure it hasn’t been processed with any yeast-containing marinades or additives. Enjoy it stir-fried‚ baked‚ or added to soups for a nutritious and compliant meal option.

Veal

Veal‚ a tender and lean meat‚ is perfectly acceptable within the parameters of a yeast-free diet. As a naturally yeast-free protein source‚ it provides essential nutrients without contributing to yeast overgrowth. Ensure veal is prepared without any yeast-containing ingredients in marinades‚ breadings‚ or sauces to maintain dietary compliance and enjoy its benefits.

Wild Game

Wild game‚ encompassing meats like venison and bison‚ is a suitable protein choice for a yeast-free dietary approach. Naturally free from yeast and mold‚ these lean options contribute valuable nutrients without promoting yeast proliferation. As with all meats‚ verify preparation methods exclude yeast-containing additives‚ ensuring adherence to the diet’s principles.

Nuts‚ Seeds‚ and Oils

Nuts‚ seeds‚ and oils provide essential fats and nutrients while adhering to a yeast-free diet. Enjoy Brazil nuts‚ flaxseed‚ pumpkin seeds‚ and walnuts. Opt for oils like canola‚ corn‚ olive‚ and sunflower oil. These choices are naturally yeast-free and support overall health‚ contributing to a balanced nutritional intake during the dietary period.

Brazil Nuts

Brazil nuts are a fantastic addition to a yeast-free dietary plan‚ offering a satisfying crunch and valuable nutritional benefits. These nuts are naturally free from yeast and mold‚ making them a safe and healthy snack option. They provide essential selenium‚ magnesium‚ and healthy fats‚ supporting overall well-being during the diet’s duration.

Flaxseed

Flaxseed is a superb inclusion in a yeast-free diet‚ providing a wealth of health advantages without contributing to yeast overgrowth. This seed is naturally yeast-free and boasts a rich profile of omega-3 fatty acids‚ fiber‚ and lignans. Incorporate flaxseed into smoothies or use it in baking (with yeast-free recipes) for added nutrition.

Canola Oil

Canola oil is a suitable oil choice for individuals adhering to a yeast-free dietary plan‚ as it doesn’t contain yeast or contribute to its proliferation. It’s a versatile cooking oil with a neutral flavor‚ making it ideal for various culinary applications. Ensure it’s pure canola oil without added ingredients that might contain hidden yeasts.

Corn Oil

Corn oil is generally considered safe for a yeast-free diet‚ offering a readily available and affordable option for cooking and salad dressings. Like canola oil‚ it doesn’t inherently promote yeast growth. However‚ always check the label to confirm the absence of any added ingredients or processing aids that could introduce yeast or mold contamination.

Olive Oil

Olive oil is a fantastic choice for a yeast-free diet‚ providing healthy fats and flavor without contributing to yeast overgrowth. Both extra virgin and refined olive oils are permissible‚ though opting for cold-pressed varieties minimizes processing. As with all oils‚ scrutinize the label to ensure no hidden yeast-containing additives have been incorporated during production or packaging.

Pumpkin Seeds

Pumpkin seeds are a nutritious and satisfying snack perfectly suited for a yeast-free dietary approach. They deliver essential minerals‚ healthy fats‚ and protein without contributing to carbohydrate intake that could feed yeast. Ensure seeds are unroasted and unsalted‚ avoiding any coatings or flavorings that might contain hidden yeast or sugars.

Sunflower Oil

Sunflower oil is a beneficial addition to a yeast-free diet‚ providing a healthy fat source for cooking and salad dressings. It’s a suitable alternative to oils that might contain hidden ingredients or promote yeast growth due to carbohydrate content. Opt for cold-pressed‚ unrefined varieties to maximize nutritional value and purity.

Walnuts

Walnuts are a fantastic nut choice for those following a yeast-free dietary plan‚ offering essential fats and nutrients without contributing to yeast overgrowth. They provide a satisfying snack and can be incorporated into various recipes. Ensure they are raw or dry-roasted‚ avoiding those with added sugars or coatings.

Foods to Avoid on a Yeast-Free Diet

Certain foods‚ like high-carbohydrate vegetables—artichokes‚ avocados‚ beans‚ peas‚ potatoes‚ and sweet potatoes—should be limited due to their yeast-feeding properties.

High-Carbohydrate Vegetables

When following a yeast-free diet‚ limiting high-carbohydrate vegetables is crucial‚ as these provide fuel for yeast overgrowth. Specifically‚ avoid artichokes‚ known for their complex carb content‚ and avocados‚ despite their health benefits.
Additionally‚ all beans and peas should be restricted‚ alongside potatoes and sweet potatoes‚ due to their substantial starch levels. Careful avoidance supports dietary goals.

Artichoke

Artichokes are generally excluded from a yeast-free diet due to their relatively high carbohydrate content. While nutritious and offering various health benefits‚ their carbohydrate load can contribute to yeast proliferation within the system.
Therefore‚ individuals adhering to this dietary approach should avoid consuming artichokes in any form‚ prioritizing lower-carb vegetable alternatives for optimal results.

Avocado

Avocados‚ despite their healthy fat content‚ are typically avoided on a strict yeast-free diet because of their carbohydrate levels. Although a beneficial food overall‚ the carbohydrates present can potentially feed yeast growth‚ counteracting the diet’s goals.
Individuals following this plan should limit or exclude avocados‚ focusing on low-carbohydrate vegetable choices instead to maintain dietary compliance.

Beans & Peas

Beans and peas are generally not recommended on a yeast-free diet due to their relatively high carbohydrate content. These legumes contain sugars that can contribute to yeast overgrowth‚ hindering the diet’s objective of reducing yeast fuel sources.
Strict adherence to the diet necessitates avoiding beans and peas‚ prioritizing lower-carb vegetable options for optimal results and symptom management.

Potatoes

Potatoes are considered a high-carbohydrate vegetable and are therefore typically avoided when following a yeast-free diet. Their starch content readily breaks down into sugars‚ providing a substantial food source for yeast and potentially exacerbating yeast-related symptoms.
Choosing lower-carbohydrate alternatives is crucial for maintaining the diet’s effectiveness and achieving desired health outcomes.

Sweet Potatoes

Similar to white potatoes‚ sweet potatoes are categorized as high-carbohydrate vegetables and are generally restricted on a yeast-free diet. Their natural sugars provide nourishment for yeast‚ potentially hindering the diet’s goal of reducing yeast overgrowth and associated health issues. Opting for low-carb vegetable choices is recommended.

aduana de cuba cantidad de artículos permitidos pdf

Recent updates‚ including Decreto-Ley 108 & 101‚ significantly impact travelers. New import policies‚ effective January 1‚ 2025‚ demand careful attention to permitted quantities and potential penalties.

As of March 24‚ 2026‚ travelers to Cuba face a dynamically evolving customs landscape. Recent legislative changes‚ notably Decreto-Ley 108 (published January 21‚ 2024) and Decreto-Ley 101 (effective January 1‚ 2025)‚ have reshaped import regulations. These updates‚ stemming from a 30-year overhaul of Cuban customs law‚ aim to modernize procedures while maintaining existing benefits.

Currently‚ heightened scrutiny is being applied to goods originating from locations like Miami‚ with increased penalties for items deemed “propaganda” or violating import restrictions. Travelers should be aware that valuation methods for imported goods have also been altered‚ impacting potential tax liabilities. Staying informed about these changes is crucial to avoid fines or confiscation.

Overview of Recent Changes (Decreto-Ley 108 & 101)

Decreto-Ley 108‚ enacted in January 2024‚ represents a comprehensive modernization of Cuban customs regulations after three decades. It aims to streamline processes and clarify existing laws. Simultaneously‚ Decreto-Ley 101‚ effective January 1‚ 2025‚ introduced significant changes to importation policies for travelers‚ particularly concerning valuation and permitted quantities.

Key alterations include revised valuation methods for imported goods‚ potentially impacting duty payments. Increased vigilance regarding items considered “propaganda” or politically sensitive materials is also evident. These decrees collectively signal a stricter enforcement of customs regulations‚ demanding travelers exercise greater caution and thorough preparation to avoid penalties and ensure compliance.

Permitted Items & Quantities ― General Guidelines

Travelers may bring personal effects‚ clothing‚ toiletries‚ and gifts within specified limits. Updated regulations‚ Decreto-Ley 101 & 108‚ govern allowed values and quantities.

Personal Effects: Clothing & Toiletries

Cuban Customs generally permits travelers to bring reasonable quantities of personal effects‚ including clothing and toiletries‚ for personal use without incurring duties. This encompasses items such as apparel‚ shoes‚ and personal hygiene products. However‚ these items must be demonstrably intended for the traveler’s own use and not for commercial purposes.

While specific quantity limits aren’t rigidly defined for everyday clothing‚ excessive amounts that suggest intent to resell may be scrutinized. Toiletries should be in reasonable travel sizes. New regulations‚ stemming from Decreto-Ley 108‚ emphasize that customs officials retain the discretion to assess whether the quantity of personal effects is justifiable for the duration of the stay. Travelers should retain receipts as proof of purchase‚ if available‚ to support their declarations.

Gifts & Samples: Allowed Values & Restrictions

Bringing gifts and commercial samples into Cuba is permitted‚ but subject to strict valuation and restrictions under current customs regulations. Generally‚ gifts with a declared value not exceeding 50 USD per item are allowed without incurring significant duties. However‚ exceeding this value may trigger taxes and require detailed documentation‚ including invoices.

Commercial samples must be clearly identified as such and accompanied by supporting documentation from the exporting company. Decreto-Ley 101 impacts valuation methods‚ potentially increasing scrutiny of declared values. Items deemed as propaganda or politically sensitive are strictly prohibited‚ regardless of value. Travelers should be prepared to declare all gifts and samples accurately to avoid penalties and potential confiscation.

Medications & Medical Devices

Travelers entering Cuba with personal medications and medical devices require careful adherence to customs regulations. Prescription medications are permitted‚ but must be accompanied by a valid prescription from a licensed physician‚ clearly stating the medication’s name‚ dosage‚ and intended use. Quantities should not exceed a reasonable supply for the duration of the stay.

Medical devices‚ such as wheelchairs or glucose monitors‚ are generally allowed with supporting documentation from the manufacturer or a medical professional. It’s crucial to declare all medications and devices on the customs declaration form (Forma Única Aduanera). Failure to declare or exceeding permitted quantities may result in confiscation or penalties. Ensure medications are in their original packaging.

Food Items: Restrictions & Allowed Quantities

Cuban customs impose restrictions on importing food items to protect local agriculture and public health. Travelers are generally permitted to bring a limited quantity of non-perishable food items for personal consumption. This typically includes sealed‚ commercially packaged goods like canned foods‚ pasta‚ and cereals. Quantities should be reasonable and clearly declared on the customs form.

However‚ fresh fruits‚ vegetables‚ meat products‚ and dairy are often subject to strict regulations or outright prohibition due to potential disease transmission or support for local producers. It’s advisable to check the latest official guidelines before traveling‚ as regulations can change. Undeclared or prohibited food items may be confiscated.

Specific Item Limits & Regulations

Detailed limits apply to alcohol‚ tobacco‚ electronics‚ and appliances. Travelers must adhere to quantity restrictions and be prepared for potential taxes or valuation assessments.

Alcoholic Beverages: Quantity Limits & Taxes

Cuban customs regulations impose specific limits on the quantity of alcoholic beverages travelers can import for personal use. Generally‚ visitors are permitted to bring in up to three liters of alcoholic beverages without incurring substantial duties. However‚ exceeding this limit will result in the assessment of taxes‚ potentially significantly increasing the cost.

The tax rate varies depending on the type of alcohol and its alcoholic content. It’s crucial to retain purchase receipts as proof of value for customs assessment. Failure to declare alcohol accurately or exceeding the allowed quantity can lead to confiscation and fines. Travelers should be aware that these regulations are strictly enforced‚ particularly with increased scrutiny following recent legislative changes (Decreto-Ley 108 & 101).

Tobacco Products: Cigars‚ Cigarettes & Regulations

Cuba‚ renowned for its tobacco‚ has specific regulations regarding the importation of cigars and cigarettes by travelers. Currently‚ individuals are generally allowed to bring in up to 50 cigars or five packets of cigarettes for personal consumption without facing excessive taxes. Quantities exceeding this threshold are subject to import duties‚ calculated based on weight and value.

It’s essential to declare all tobacco products upon arrival and retain proof of purchase. Undeclared or excessive amounts can result in confiscation and financial penalties. Recent updates to customs law (Decreto-Ley 108 & 101) emphasize stricter enforcement of these regulations. Travelers should be mindful of these rules to avoid complications during customs clearance‚ especially given increased scrutiny.

Electronics: Laptops‚ Cameras & Mobile Phones

Travelers entering Cuba with personal electronics like laptops‚ cameras‚ and mobile phones generally face minimal restrictions‚ provided these items are for personal use. There’s typically no strict limit on the number of devices a traveler can bring‚ but customs officials may assess the value of these goods.

While personal use is generally accepted‚ bringing multiple identical items might raise suspicion of commercial intent‚ potentially leading to duties. It’s crucial to retain purchase receipts as proof of value. Recent changes in valuation methods (Decreto-Ley 101) may impact duty calculations. Declaring all electronics on the customs form (Forma Única Aduanera) is highly recommended to avoid potential issues and ensure smooth clearance.

Household Appliances: Restrictions & Valuation

Importing household appliances into Cuba is subject to stricter regulations than personal electronics. While small‚ personal-use appliances may be permitted‚ larger or multiple items are often viewed as commercial imports‚ triggering duties and potential restrictions. Decreto-Ley 101 significantly impacts valuation.

Customs officials will carefully assess the value of appliances‚ potentially using methods different from the purchase price. Accurate invoices and receipts are essential to support declared values. Bringing in items like refrigerators or washing machines without proper declaration can lead to confiscation and fines. Travelers should be prepared for scrutiny and potential valuation adjustments based on Cuban customs guidelines.

Prohibited Items & Potential Penalties

Cuba strictly prohibits propaganda‚ political materials‚ weapons‚ ammunition‚ and illegal drugs. Violations can result in severe fines‚ confiscation‚ and potential legal consequences for travelers.

Propaganda & Political Materials

Cuban customs authorities rigorously enforce prohibitions against the importation of materials deemed subversive or politically sensitive. This includes‚ but isn’t limited to‚ literature‚ pamphlets‚ audio recordings‚ and digital media that criticizes the Cuban government or promotes opposing ideologies. Recent reports emphasize increased scrutiny of items originating from Miami‚ reflecting heightened concerns regarding potential political influence.

Travelers attempting to bring in such materials face significant penalties‚ potentially including confiscation of the items‚ substantial fines‚ and even legal repercussions. The definition of “propaganda” is broadly interpreted‚ so caution is advised. It’s crucial to avoid carrying anything that could be construed as challenging the established political system‚ even unintentionally.

Weapons & Ammunition

The importation of weapons and ammunition into Cuba is strictly prohibited under all circumstances; This encompasses firearms of any kind‚ including pistols‚ rifles‚ and shotguns‚ as well as ammunition‚ explosives‚ and related components. Even seemingly innocuous items like replica weapons or self-defense tools (pepper spray‚ stun guns) are subject to immediate confiscation and severe penalties.

Cuban customs officials maintain a zero-tolerance policy regarding weapons. Travelers attempting to bring in prohibited items‚ regardless of intent‚ risk substantial fines‚ imprisonment‚ and a permanent ban from entering the country. Declaring such items does not guarantee permission for entry; it will simply expedite the confiscation process and potential legal action.

Illegal Drugs & Substances

Cuba maintains a strict prohibition on the importation of all illegal drugs and substances. This includes‚ but is not limited to‚ narcotics like cocaine‚ heroin‚ and marijuana‚ as well as synthetic drugs and psychoactive substances. Penalties for possessing or trafficking illegal drugs in Cuba are exceptionally severe‚ potentially resulting in lengthy prison sentences and substantial fines.

Even the possession of small quantities for personal use is considered a criminal offense. Cuban authorities actively enforce these regulations‚ and travelers should be aware that customs inspections are thorough. Attempting to conceal drugs‚ regardless of quantity‚ will significantly exacerbate the penalties. There are no exceptions‚ and declaring these items offers no legal protection.

Restricted Agricultural Products

The importation of certain agricultural products into Cuba is heavily restricted to protect domestic agriculture and prevent the introduction of pests and diseases. This includes fresh fruits‚ vegetables‚ seeds‚ plants‚ and certain processed food items containing agricultural components. Restrictions are in place due to biosecurity concerns and support for local farmers.

Travelers should anticipate rigorous inspection of any food items they attempt to bring into the country. Undeclared or prohibited agricultural products will be confiscated‚ and fines may be imposed. Specific regulations can change‚ so it’s crucial to verify current allowances before travel. Generally‚ commercially packaged and processed foods are viewed more favorably than fresh produce‚ but even these may be subject to limitations.

Customs Declaration Requirements

Travelers must complete the ‘Forma Única Aduanera‚’ declaring all items and monetary value. Accurate documentation‚ including invoices and receipts‚ is essential for smooth clearance.

Completing the Customs Form (Forma Única Aduanera)

The ‘Forma Única Aduanera’ (Single Customs Form) is crucial for entry. Travelers must declare all items brought into Cuba‚ even those seemingly insignificant. This form requires detailed information about personal effects‚ gifts‚ and any goods intended for commercial purposes. Accuracy is paramount; discrepancies can lead to delays‚ fines‚ or even confiscation.

The form asks for a comprehensive list of items‚ their quantities‚ and estimated values. Be prepared to provide specific details‚ avoiding vague descriptions. Ensure all sections are completed legibly and truthfully. Electronic submission may be available at some entry points‚ but a physical copy is generally required. Retain a copy of the completed form for your records throughout your stay in Cuba‚ as it may be requested upon departure.

Declaration of Monetary Value

Cuban Customs requires a full declaration of any currency or traveler’s checks exceeding USD 5‚000. This includes US dollars‚ Euros‚ or any other convertible currency. Failure to declare accurately can result in confiscation of the undeclared funds. The declaration is made on the ‘Forma Única Aduanera’ and must reflect the exact amount being brought into the country.

It’s vital to understand that this declaration isn’t a tax‚ but a reporting requirement. Upon departure‚ any remaining undeclared currency above the limit must also be declared to avoid penalties. Keep all exchange receipts and banking documentation as supporting evidence. Accurate reporting prevents legal complications and ensures a smooth travel experience.

Supporting Documentation (Invoices‚ Receipts)

Maintaining comprehensive documentation is crucial for navigating Cuban Customs. Travelers should retain all original invoices‚ receipts‚ and purchase confirmations for imported goods. These documents substantiate the declared value of items‚ particularly electronics‚ appliances‚ and gifts‚ aiding in accurate valuation by customs officials.

Having proof of purchase helps avoid disputes regarding item value and potential overestimation of taxes. For medications‚ a doctor’s prescription is essential. Regarding gifts‚ a clear indication of the gift’s nature and value is required. Proper documentation streamlines the customs process and minimizes the risk of fines or confiscation‚ ensuring a hassle-free entry or exit.

New Regulations Regarding Importation (Effective January 1‚ 2025)

Decreto-Ley 101 introduced significant changes to import policies‚ impacting travelers with revised valuation methods and stricter regulations on permitted goods and quantities.

Impact of Decreto-Ley 101 on Travelers

Decreto-Ley 101 fundamentally alters the landscape for travelers bringing goods into Cuba. Previously‚ a more lenient approach existed regarding personal belongings and gifts. However‚ this legislation introduces stricter controls and a more rigorous valuation process for imported items. Travelers departing from cities like Miami must now be acutely aware of these changes to avoid substantial penalties.

The decree focuses heavily on preventing the introduction of “propaganda” and materials deemed politically sensitive‚ leading to increased scrutiny of travelers’ belongings. Furthermore‚ the valuation methods have been revised‚ potentially increasing taxes and duties on imported goods. Understanding the specific quantity limits for items like alcohol and tobacco is now crucial‚ as exceeding these limits can result in confiscation and fines. Detailed information is available on the official Cuban Customs website.

Changes in Valuation Methods for Imported Goods

Decreto-Ley 101 introduces significant shifts in how Cuban Customs assesses the value of imported goods. Previously‚ valuation was often based on declared prices‚ but the new regulations emphasize a more comprehensive approach. Customs officials now have greater authority to determine the “real” value of items‚ potentially using market prices or comparable goods as benchmarks.

This change impacts travelers bringing in electronics‚ appliances‚ and even gifts. Under-declaring the value of items is now considered a serious offense‚ leading to fines and confiscation. Accurate invoices and receipts are essential to support declared values. The updated framework aims to increase revenue collection and prevent undervaluation schemes‚ requiring travelers to be meticulously prepared with documentation proving the true cost of their belongings.

Penalties for Non-Compliance

Non-compliance with Cuban Customs regulations can result in substantial fines‚ confiscation of goods‚ and potentially‚ legal repercussions for travelers.

Fines & Confiscation of Goods

Cuban Customs authorities are increasingly strict regarding undeclared or prohibited items. Fines levied for non-compliance vary based on the infraction’s severity and the value of the goods. Travelers attempting to import items exceeding permitted quantities‚ or bringing in prohibited goods like propaganda materials‚ face significant financial penalties.

Furthermore‚ all undeclared or prohibited items are subject to immediate confiscation. This means travelers risk losing their goods without compensation. Confiscation extends to items deemed to be for commercial purposes when imported under a traveler’s allowance. Recent legislation‚ particularly Decreto-Ley 108‚ empowers customs officials to enforce these penalties rigorously‚ emphasizing the importance of accurate declarations.

Potential Legal Consequences

Beyond fines and confiscation‚ serious customs violations in Cuba can lead to legal repercussions. Attempting to import prohibited items‚ especially those deemed a threat to national security – like unauthorized political materials or weaponry – may result in detention and investigation. Travelers could face criminal charges and potential imprisonment‚ depending on the nature and severity of the offense.

Decreto-Ley 108 strengthens the legal framework for customs enforcement‚ granting authorities broader powers to prosecute violations. Repeat offenders or those involved in large-scale smuggling operations are particularly vulnerable. It’s crucial to understand that Cuban law prioritizes protecting its sovereignty and economic interests‚ leading to strict penalties for those who disregard customs regulations.

Resources & Further Information

For detailed regulations and updates‚ consult the official Cuban Customs website. Direct contact with Cuban Customs authorities provides clarification on specific import requirements and procedures.

Official Cuban Customs Website

The official website of Cuban Customs (Aduana de Cuba) is the primary source for the most current and comprehensive information regarding travel regulations. While a direct‚ easily navigable English version can be challenging to locate‚ the site – often accessible through Cuban government portals – publishes official decrees like Decreto-Ley 108 and 101. These documents detail permitted items‚ quantities‚ and valuation methods.

Travelers should prioritize reviewing these official publications‚ even utilizing translation tools if necessary‚ to ensure compliance. The website frequently updates information regarding import restrictions‚ particularly concerning propaganda‚ agricultural products‚ and monetary declarations. Regularly checking for updates is crucial‚ as regulations are subject to change. Look for downloadable PDFs outlining specific allowances.

Contacting Cuban Customs Authorities

Directly contacting Cuban Customs can provide clarification on specific regulations‚ particularly regarding permitted quantities detailed in documents like Decreto-Ley 101 and 108. However‚ communication in English may be limited‚ so utilizing a translator is highly recommended. Contact information is often scarce online‚ but inquiries can be directed through the Cuban Ministry of Finance and Prices‚ which oversees customs operations.

Travelers experiencing difficulties finding information on the official website should attempt to contact Cuban consulates or embassies in their country. These diplomatic missions may offer assistance or provide contact details for relevant customs officials. Be prepared to provide specific details about your travel plans and the items you intend to import to receive accurate guidance.

foreign exchange manual

Forex Manual: A Comprehensive Guide

Forex trading offers access to a vast global market‚ enabling individuals to capitalize on currency fluctuations and economic shifts with diligent study.

Understanding forex futures‚ exchange rates‚ and day trading strategies are crucial for success‚ alongside careful consideration of geopolitical events.

This manual provides a foundational understanding‚ covering everything from currency pairs to risk management‚ empowering traders to navigate this dynamic landscape.

What is Forex Trading?

Forex trading‚ short for foreign exchange trading‚ fundamentally involves the buying and selling of currencies with the aim of profiting from fluctuations in their exchange rates. It’s a decentralized‚ global marketplace‚ making it the largest and most liquid financial market in the world‚ trading trillions of dollars daily.

Unlike stock exchanges‚ forex doesn’t have a central location; transactions occur electronically over-the-counter (OTC). This accessibility allows individuals‚ banks‚ financial institutions‚ and governments to participate. Traders speculate on whether a currency’s value will increase or decrease relative to another.

The core concept revolves around currency pairs – for example‚ EUR/USD (Euro versus US Dollar). If a trader believes the Euro will strengthen against the Dollar‚ they ‘buy’ the pair. Conversely‚ if they anticipate a decline‚ they ‘sell’ it. Profit is realized when the exchange rate moves in the predicted direction. Understanding global economics‚ government policies‚ and consumer behavior is vital for informed trading decisions.

The History of Forex Markets

The roots of the forex market trace back to the collapse of the Bretton Woods system in 1971. Prior to this‚ exchange rates were largely fixed. The Bretton Woods agreement established a system of fixed exchange rates pegged to the US dollar‚ which was‚ in turn‚ convertible to gold.

However‚ economic pressures and imbalances led to its abandonment‚ ushering in an era of floating exchange rates. This transition marked the birth of the modern forex market as we know it. Initially‚ trading was primarily conducted by banks and large financial institutions.

The 1980s witnessed the introduction of electronic trading platforms‚ increasing accessibility and liquidity. The 1990s saw further growth with the rise of the internet‚ opening the market to retail traders. Today‚ the forex market continues to evolve‚ driven by technological advancements and increasing globalization‚ becoming a cornerstone of international finance.

Key Forex Terminology

Understanding forex terminology is paramount for successful trading; Currency pairs‚ like EUR/USD‚ represent the exchange rate between two currencies; the first is the base currency‚ the second the quote currency. A pip (percentage in point) is the smallest price movement a currency pair can make.

Lots define the size of a trade – standard‚ mini‚ and micro lots are common. Leverage allows traders to control larger positions with a smaller capital outlay‚ amplifying both potential profits and losses. Margin is the collateral required to open and maintain a leveraged position.

Familiarity with these terms‚ alongside concepts like spreads (the difference between buy and sell prices) and bid/ask prices‚ is essential for interpreting market data and executing informed trading decisions. Mastering this vocabulary unlocks a deeper understanding of the forex landscape.

Pips and Lots

In forex trading‚ a pip represents the smallest incremental price change in a currency pair. For most pairs‚ it’s the fourth decimal place (e.g.‚ 0.0001). However‚ for JPY pairs‚ it’s the second decimal place (e.g.‚ 0.01). Understanding pip value is crucial for calculating potential profit or loss.

A lot is a standardized unit of trading‚ representing the amount of currency you’re buying or selling. A standard lot is 100‚000 units of the base currency‚ a mini lot is 10‚000 units‚ and a micro lot is 1‚000 units.

The size of the lot directly impacts the potential profit and risk. Traders choose lot sizes based on their risk tolerance and account size. Calculating pip value per lot is essential for effective risk management.

Leverage and Margin

Leverage in forex trading allows traders to control a larger position with a smaller amount of capital. It’s expressed as a ratio‚ like 1:50 or 1:100‚ meaning you can control $50‚000 or $100‚000 with $1‚000. While it amplifies potential profits‚ it also magnifies potential losses.

Margin is the collateral required by the broker to open and maintain a leveraged position. It’s a percentage of the total position value. Insufficient margin can lead to a margin call‚ forcing you to deposit more funds or close your position.

Understanding leverage and margin is vital for risk management. High leverage can quickly deplete your account‚ so use it cautiously and always calculate potential risks before entering a trade.

Currency Pairs: Majors‚ Minors‚ and Exotics

Currency pairs are quoted as a combination of two currencies‚ representing the exchange rate between them. The first currency is the base currency‚ and the second is the quote currency. Understanding these pairings is fundamental to forex trading.

Major pairs involve the most traded currencies: EUR/USD‚ USD/JPY‚ GBP/USD‚ and USD/CHF. They typically have the tightest spreads and highest liquidity. Minor pairs‚ also known as crosses‚ don’t include the US dollar‚ like EUR/GBP or AUD/JPY.

Exotic pairs involve a major currency paired with a currency from an emerging economy‚ such as USD/TRY or EUR/ZAR. They often have wider spreads and higher volatility‚ presenting both opportunities and risks.

Forex Market Participants

Central banks‚ commercial banks‚ and individual retail traders collectively drive the forex market‚ influencing liquidity and price discovery through diverse strategies.

These entities interact‚ creating a complex ecosystem where economic policies and speculative trading converge to shape currency valuations globally.

Central Banks

Central banks are pivotal players in the forex market‚ wielding significant influence through monetary policy and intervention strategies. These institutions‚ such as the Federal Reserve in the US or the European Central Bank‚ manage a nation’s currency‚ credit conditions‚ and overall economic stability.

They directly impact exchange rates by adjusting interest rates‚ implementing quantitative easing‚ or directly intervening in the currency markets by buying or selling their own currency. These actions aim to stabilize the national currency‚ control inflation‚ and promote economic growth.

Furthermore‚ central bank announcements and policy decisions are closely watched by traders worldwide‚ often triggering substantial market volatility. Their reserves of foreign currencies are also substantial‚ allowing them to influence exchange rates when deemed necessary. Understanding central bank behavior is therefore crucial for any forex trader seeking to interpret market movements and formulate effective trading strategies.

Commercial Banks

Commercial banks form a substantial backbone of the forex market‚ facilitating a large volume of currency transactions for their clients. These institutions act as intermediaries‚ executing trades on behalf of corporations‚ governments‚ and other financial institutions‚ contributing significantly to overall market liquidity.

They profit from the spread between the buying and selling prices of currencies‚ and also provide forex services like currency exchange‚ international payments‚ and hedging solutions. Large commercial banks often have dedicated forex trading desks‚ employing skilled traders to manage their currency positions and capitalize on market opportunities.

Their activities are driven by client demand and their own proprietary trading strategies. Consequently‚ monitoring the actions of major commercial banks can offer valuable insights into prevailing market sentiment and potential future price movements‚ making them key observers for forex traders.

Retail Traders

Retail traders represent individual investors who participate in the forex market through online brokers‚ utilizing platforms for currency speculation. While each individual trader’s volume is relatively small‚ collectively they constitute a significant and growing force within the forex ecosystem‚ contributing to market depth and volatility.

Driven by diverse motivations – from supplemental income to full-time trading – retail traders employ various strategies‚ including day trading‚ swing trading‚ and scalping‚ often leveraging educational resources and analytical tools. Access to the market has been democratized by technology‚ allowing participation from around the globe.

However‚ retail trading carries inherent risks‚ demanding discipline‚ knowledge‚ and robust risk management techniques. Success hinges on understanding market dynamics‚ employing sound strategies‚ and controlling emotional biases‚ making continuous learning essential.

Fundamental Analysis in Forex

Fundamental analysis assesses economic indicators‚ geopolitical events‚ and interest rate decisions to determine currency value‚ influencing trading decisions and market predictions.

Analyzing GDP‚ inflation‚ and employment data provides insights into a nation’s economic health‚ impacting currency strength and potential investment opportunities.

Economic Indicators: GDP‚ Inflation‚ and Employment

Gross Domestic Product (GDP) is a primary indicator of a country’s economic health‚ reflecting the total value of goods and services produced; strong GDP growth typically strengthens a currency.

Inflation‚ measured by changes in the Consumer Price Index (CPI)‚ impacts purchasing power and central bank policy; high inflation can devalue a currency‚ prompting interest rate hikes.

Employment data‚ including the unemployment rate and non-farm payrolls‚ signals economic strength; robust job growth often correlates with a stronger currency‚ indicating a healthy economy.

Traders closely monitor these indicators released by governmental bodies‚ like the Bureau of Labor Statistics‚ to anticipate market movements and adjust their trading strategies accordingly.

Understanding the interplay between these indicators is crucial; for example‚ rising inflation coupled with stagnant GDP might signal stagflation‚ impacting currency valuations;

Analyzing these economic releases requires considering their historical context‚ revisions‚ and potential impact on central bank monetary policy decisions‚ influencing forex market dynamics.

Geopolitical Events and Their Impact

Geopolitical events‚ encompassing political instability‚ conflicts‚ and international relations‚ significantly influence currency valuations by introducing uncertainty and risk aversion into the market.

Events like elections‚ referendums (e.g;‚ Brexit)‚ and trade wars can trigger substantial currency fluctuations as investors reassess economic and political landscapes.

Political instability in a country often leads to capital flight‚ weakening its currency as investors seek safer havens‚ such as the US dollar or Japanese yen.

Trade disputes and tariffs can disrupt supply chains and economic growth‚ impacting currencies of involved nations; escalating tensions often increase volatility.

Traders must closely monitor global news and geopolitical developments‚ assessing their potential impact on currency pairs and adjusting their strategies accordingly.

Understanding the interconnectedness of global economies and the ripple effects of geopolitical events is vital for successful forex trading and risk management.

Interest Rate Decisions

Interest rate decisions made by central banks are paramount in forex trading‚ directly impacting currency values and capital flows. Higher interest rates typically attract foreign investment‚ increasing demand for the currency and strengthening its value.

Conversely‚ lower interest rates can discourage investment‚ leading to currency depreciation. Traders meticulously analyze central bank statements and economic forecasts to anticipate rate changes.

Central banks‚ like the Federal Reserve (US) or the European Central Bank (ECB)‚ adjust rates to manage inflation and stimulate economic growth‚ influencing forex markets.

Unexpected rate hikes or cuts can cause significant market volatility‚ presenting both opportunities and risks for traders. Understanding the rationale behind these decisions is crucial.

Monitoring economic indicators – such as inflation‚ GDP‚ and employment – helps predict potential rate movements and informs trading strategies. Staying informed is key.

Forex traders must integrate interest rate expectations into their analysis to make informed decisions and manage risk effectively in the dynamic currency market.

Technical Analysis in Forex

Technical analysis utilizes historical price data‚ chart patterns‚ and technical indicators to forecast future price movements‚ aiding traders in identifying opportunities.

Analyzing support and resistance levels‚ moving averages‚ RSI‚ and MACD provides insights into market sentiment and potential entry/exit points.

Chart Patterns: Head and Shoulders‚ Double Top/Bottom

Chart patterns are visually recognizable formations on price charts that suggest potential future price movements‚ offering valuable insights for forex traders. Recognizing these patterns is a cornerstone of technical analysis.

The Head and Shoulders pattern is a bearish reversal signal‚ indicating a potential shift from an uptrend to a downtrend. It features three peaks‚ with the middle peak (the “head”) being higher than the two outer peaks (“shoulders”).

Conversely‚ the Double Top is another bearish pattern‚ characterized by two peaks at roughly the same price level‚ suggesting resistance. A Double Bottom is its bullish counterpart‚ signaling a potential reversal from a downtrend to an uptrend‚ with two troughs at similar price points.

Successful identification requires confirming volume and a clear breakdown or breakout from key levels. These patterns aren’t foolproof‚ but they provide probabilistic advantages when combined with other technical indicators and risk management strategies.

Technical Indicators: Moving Averages‚ RSI‚ MACD

Technical indicators are mathematical calculations based on price and volume data‚ designed to forecast future price movements and identify potential trading opportunities in the forex market. They complement chart pattern analysis.

Moving Averages (MAs) smooth out price data to create a single flowing line‚ helping to identify trends. Common types include Simple Moving Averages (SMAs) and Exponential Moving Averages (EMAs)‚ with EMAs giving more weight to recent prices.

The Relative Strength Index (RSI) is a momentum oscillator measuring the magnitude of recent price changes to evaluate overbought or oversold conditions. Values above 70 suggest overbought‚ while below 30 indicate oversold.

The Moving Average Convergence Divergence (MACD) shows the relationship between two moving averages‚ generating buy and sell signals. Combining these indicators enhances trading precision and confirms potential trends.

Support and Resistance Levels

Support and resistance levels are key price points where the price tends to stop and reverse. Identifying these levels is fundamental to technical analysis in the forex market‚ aiding in trade entry and exit decisions.

Support levels represent price floors where buying pressure is strong enough to prevent further declines. Traders often look to buy near support‚ anticipating a bounce. Conversely‚ resistance levels mark price ceilings where selling pressure halts upward movement.

These levels aren’t precise but rather zones. Broken support often becomes resistance‚ and vice versa. Combining these levels with chart patterns and technical indicators‚ like moving averages‚ can improve accuracy.

Successfully identifying and utilizing support and resistance can significantly enhance trading strategies‚ allowing for strategic placement of stop-loss and take-profit orders‚ maximizing potential gains and minimizing risk.

Forex Trading Strategies

Forex strategies encompass day trading‚ swing trading‚ and scalping‚ each demanding unique skillsets and time commitments for profitable currency speculation.

Effective strategies require robust risk management‚ technical analysis‚ and adaptation to ever-changing market dynamics for consistent results.

Day Trading

Day trading in the forex market involves opening and closing positions within the same trading day‚ aiming to profit from small price movements. This high-frequency approach demands intense focus‚ quick decision-making‚ and a thorough understanding of technical analysis.

Successful forex day traders often utilize charting tools‚ monitoring multiple currency pairs simultaneously‚ and employing strategies like scalping or breakout trading. Leverage is frequently used to amplify potential gains‚ but it also significantly increases risk;

It’s crucial to have a well-defined trading plan‚ including precise entry and exit points‚ and strict risk management rules‚ such as utilizing stop-loss orders. Staying informed about economic news and geopolitical events impacting currency values is also paramount. Day trading isn’t suitable for beginners due to its inherent volatility and demands.

Furthermore‚ understanding market liquidity and spread fluctuations is essential for maximizing profitability and minimizing slippage during trade execution.

Swing Trading

Swing trading in the forex market focuses on capturing price “swings” that typically last more than a day‚ but less than several weeks. This strategy aims to profit from larger price movements than day trading‚ requiring less screen time and a more patient approach.

Swing traders analyze charts for patterns‚ utilizing technical indicators like moving averages and RSI to identify potential entry and exit points. Fundamental analysis‚ considering economic indicators and geopolitical events‚ also plays a role in predicting market direction.

Effective risk management is vital‚ employing stop-loss orders to limit potential losses and take-profit orders to secure gains. Position sizing should be carefully calculated to avoid overexposure to risk. Unlike day trading‚ swing trades are often held overnight‚ exposing traders to gap risk.

Successful swing traders combine technical and fundamental analysis‚ adapting their strategies to changing market conditions.

Scalping

Scalping is an advanced forex trading strategy aiming to profit from very small price changes‚ often holding positions for just seconds or minutes. It requires intense focus‚ quick decision-making‚ and a high degree of discipline‚ capitalizing on minor fluctuations in currency pairs.

Scalpers rely heavily on technical analysis‚ utilizing fast-moving indicators and level 2 data to identify fleeting opportunities. Tight spreads and low commissions are crucial‚ as profitability depends on accumulating small gains from numerous trades.

Risk management is paramount; stop-loss orders are essential to limit losses‚ given the rapid trade execution. High leverage is often employed‚ amplifying both profits and risks. Scalping is not suitable for beginners due to its demanding nature.

Successful scalpers develop a robust trading plan and consistently execute it‚ adapting to fast-paced market dynamics.

Risk Management in Forex

Effective risk management is paramount in forex trading‚ utilizing stop-loss and take-profit orders alongside strategic position sizing for capital preservation.

Stop-Loss Orders

Stop-loss orders are essential tools for managing risk in forex trading‚ automatically closing a trade when the price reaches a predetermined level. This limits potential losses‚ protecting your capital from significant downturns and emotional decision-making.

Strategically placing stop-loss orders involves identifying key support and resistance levels on your charts. A common approach is to set the stop-loss slightly below a support level for long positions‚ or above a resistance level for short positions.

Consider market volatility when setting your stop-loss; wider spreads or increased price fluctuations may necessitate a wider stop-loss to avoid being prematurely triggered. Remember that a well-placed stop-loss isn’t about predicting market failure‚ but rather defining your risk tolerance and protecting your investment.

Different types of stop-loss orders exist‚ including market and limit orders‚ each with its own advantages and disadvantages depending on your trading strategy and market conditions.

Take-Profit Orders

Take-profit orders are crucial for securing profits in forex trading‚ automatically closing a trade when the price reaches a specified target level. They remove the emotional element of deciding when to exit a winning trade‚ ensuring you capitalize on favorable price movements.

Identifying appropriate take-profit levels often involves analyzing chart patterns and resistance levels. Setting a take-profit just before a significant resistance level can maximize profits while acknowledging potential price reversals;

Consider your risk-reward ratio when setting take-profit levels; a common guideline is to aim for a reward at least twice the size of your risk. This ensures that your winning trades outweigh your losing trades over time.

Like stop-loss orders‚ take-profit orders can be market or limit orders‚ each offering different execution guarantees. Utilizing these orders consistently contributes to a disciplined and profitable trading approach.

Position Sizing

Position sizing is a cornerstone of effective risk management in forex trading‚ determining the appropriate trade volume based on your account balance and risk tolerance. It prevents substantial losses from a single trade‚ safeguarding your capital.

A common rule of thumb is to risk no more than 1-2% of your trading capital on any single trade. This percentage dictates the maximum potential loss you’re willing to accept. Calculating position size involves considering the pip value‚ currency pair‚ and desired risk percentage.

Factors like leverage significantly impact position sizing; higher leverage allows for larger positions but also amplifies risk. Always prioritize capital preservation over potential profits.

Proper position sizing ensures that even a series of losing trades won’t deplete your account‚ allowing you to remain in the market and capitalize on future opportunities. It’s a fundamental skill for long-term success.

Choosing a Forex Broker

Selecting a broker requires careful evaluation of regulation‚ security‚ trading platforms‚ and cost-effectiveness‚ including spreads and commissions for optimal trading.

Regulation and Security

Prioritizing regulation and security is paramount when selecting a Forex broker‚ safeguarding your funds and ensuring fair trading practices. Reputable brokers operate under the oversight of stringent financial authorities‚ such as the Financial Conduct Authority (FCA) in the UK‚ the Commodity Futures Trading Commission (CFTC) in the US‚ or similar bodies in other jurisdictions.

These agencies enforce rules regarding capital adequacy‚ transparency‚ and ethical conduct‚ providing a layer of protection for traders. Verify a broker’s regulatory status through the official website of the relevant authority. Look for segregation of client funds‚ meaning your deposits are held in separate accounts from the broker’s operational funds‚ preventing misuse in case of insolvency.

Robust security measures‚ including encryption of sensitive data and two-factor authentication‚ are also essential to protect your account from unauthorized access. Research the broker’s history and reputation‚ seeking feedback from other traders and checking for any disciplinary actions or complaints. A well-regulated and secure broker fosters trust and allows you to focus on trading with confidence.

Trading Platforms

Choosing the right trading platform is crucial for a seamless and efficient Forex trading experience. Popular platforms like MetaTrader 4 (MT4) and MetaTrader 5 (MT5) are widely used due to their user-friendly interfaces‚ comprehensive charting tools‚ and support for automated trading through Expert Advisors (EAs).

Consider factors like platform compatibility (desktop‚ web‚ mobile)‚ available technical indicators‚ order execution speed‚ and the availability of educational resources. Some brokers offer proprietary platforms with unique features‚ but ensure they meet your specific needs and preferences. A platform should provide real-time market data‚ customizable charts‚ and a variety of order types.

Ease of use and reliability are paramount. Test the platform’s demo account to familiarize yourself with its functionalities before risking real capital. Look for platforms that offer robust security features and responsive customer support. A well-designed trading platform empowers you to analyze markets‚ execute trades‚ and manage your positions effectively.

Spreads and Commissions

Understanding spreads and commissions is vital for calculating your true trading costs. The spread represents the difference between the bid and ask price of a currency pair; it’s essentially the broker’s initial profit. Spreads can be fixed or variable‚ with variable spreads fluctuating based on market volatility. Lower spreads generally benefit traders‚ reducing the cost of entry and exit.

Commissions are fees charged by the broker for executing trades‚ often a fixed amount per lot traded. Some brokers offer commission-free trading‚ but this is typically reflected in wider spreads. Carefully compare the total cost – spread plus commission – across different brokers.

Consider your trading style when evaluating these costs. Frequent traders‚ like scalpers‚ are particularly sensitive to spreads‚ while swing traders may prioritize other factors. Transparency is key; brokers should clearly disclose their pricing structure. Minimizing these costs directly impacts your profitability.

indesit my time washing machine manual

Indesit My Time Washing Machine Manual: A Comprehensive Guide

This manual details operation of your Indesit My Time washer, covering controls like the WASH CYCLE, SPIN SPEED, and TEMPERATURE knobs, plus the START/PAUSE function.

Understanding Your Indesit My Time Washer

Your Indesit My Time washing machine is designed for efficient and reliable laundry care. Familiarizing yourself with its components and functions will ensure optimal performance and longevity. This washer incorporates advanced features, indicated by the control panel’s buttons and indicator lights, allowing for customized wash cycles.

The machine’s operation revolves around selecting appropriate wash cycles, spin speeds, and temperatures based on fabric type and soil level. Understanding the detergent dispenser drawer’s compartments – for pre-wash detergent, main wash detergent, and fabric softener – is crucial for effective cleaning. The START/PAUSE and ON/OFF buttons control the washing process, while the delay timer offers convenient scheduling options. Regularly consulting this manual will help you maximize your washing experience.

Model Identification & Key Features

Identifying your specific Indesit My Time model is essential for accessing accurate support and replacement parts. Locate the model number on the machine’s rear panel or within the door jamb. Key features include a variety of wash cycles tailored to different fabric types – cotton, synthetics, delicates, and wool – alongside energy-saving Eco Wash programs.

The machine boasts adjustable spin speeds to minimize fabric damage and a convenient delay timer for scheduled washes. Indicator lights on the control panel clearly display the wash cycle progress and any error codes. The door lock function enhances safety during operation. These features combine to deliver a versatile and user-friendly laundry solution.

Control Panel Overview

The Indesit My Time control panel is intuitively designed for ease of use. Central to operation are the WASH CYCLE selection knob, allowing program choice, and the SPIN SPEED knob, controlling the final spin intensity. A TEMPERATURE setting knob adjusts the wash water temperature. The START/PAUSE button initiates or temporarily halts a cycle.

An ON/OFF button manages power, with a potential power-saving mode. The display panel utilizes indicator lights to signal cycle progress, door lock status, and any detected errors. Buttons with indicator lights provide clear feedback on selected settings, ensuring optimal control over each wash.

WASH CYCLE Selection Knob

The WASH CYCLE selection knob is the primary control for choosing the appropriate wash program for your laundry. Rotating this knob allows you to select from a variety of cycles, tailored to different fabric types and soil levels. Options typically include settings for cottons, synthetics, delicates, and woolens.

Carefully consider the fabric composition and care label instructions before selecting a cycle. Utilizing the correct program ensures effective cleaning while protecting your garments from damage. The knob’s clear markings and intuitive design simplify the selection process, offering a user-friendly experience.

SPIN SPEED Knob

The SPIN SPEED knob controls the intensity of the final spin cycle, directly impacting the moisture content remaining in your laundry. Lower spin speeds are gentler on delicate fabrics, minimizing wrinkles and preventing damage, but leave clothes wetter. Higher spin speeds extract more water, reducing drying time, but can cause increased wrinkling.

Adjusting the spin speed allows you to customize the wash cycle to suit different fabric types. Options are usually presented in revolutions per minute (RPM). Always check garment care labels for recommended spin speed limitations to avoid shrinking or stretching.

TEMPERATURE Setting Knob

The TEMPERATURE setting knob allows precise control over the water temperature used during the wash cycle. Selecting the appropriate temperature is crucial for effective cleaning and fabric care. Lower temperatures (cold or 30°C) are ideal for delicate items and preventing color fading, while higher temperatures (60°C or 90°C) are best for heavily soiled laundry and sanitizing.

Refer to garment care labels for temperature recommendations. Using excessively high temperatures can damage certain fabrics, causing shrinkage or color loss. The knob typically offers options ranging from cold wash to a high-temperature sanitize cycle.

START/PAUSE Button Functionality

The START/PAUSE button is central to operating your Indesit My Time washing machine. Pressing this button initiates the selected wash cycle, bringing the machine to life. During operation, a single press on the START/PAUSE button will temporarily halt the cycle – a useful feature for adding forgotten items.

Pressing the button again resumes the cycle from where it left off. The indicator light associated with this button illuminates when the machine is actively running. If an error occurs, the machine will pause, and the indicator light may flash, signaling a problem requiring attention. Always ensure the door is securely locked before starting a cycle.

ON/OFF Button & Power Saving Mode

The ON/OFF button controls the main power supply to your Indesit My Time washing machine. Pressing this button completely shuts down the appliance, disconnecting it from the electrical outlet – crucial for safety during maintenance or extended periods of non-use. Some models incorporate a power-saving mode.

This mode activates automatically after a period of inactivity, reducing energy consumption. It minimizes standby power usage, contributing to lower electricity bills and a smaller environmental footprint. The display panel will typically indicate when power-saving mode is active. Remember to fully switch off the machine before cleaning or performing any repairs.

Display Panel Indicators

The Indesit My Time washing machine’s display panel utilizes indicator lights to communicate the machine’s status. A “DOOR LOCKED” indicator illuminates when the door is securely fastened, preventing accidental opening during operation. The “PROGRESS” indicator shows the current stage of the wash cycle, providing a visual timeline.

Additional lights signal selected options like temperature or spin speed. Error codes, if any, will also appear on the display, assisting in troubleshooting. Familiarize yourself with these indicators to understand the machine’s operation and quickly identify potential issues. Refer to the troubleshooting section for error code definitions.

Detergent Dispenser Drawer

The Indesit My Time washing machine features a multi-compartment detergent dispenser drawer, crucial for optimal wash results. This drawer is typically located on the control panel. It’s divided into sections for pre-wash detergent, main wash detergent, and fabric softener.

Always use the correct type of detergent for each compartment, following the detergent manufacturer’s instructions. Compartment 1 is for pre-wash detergent, used for heavily soiled items. Compartment 2 accepts the main wash detergent. Finally, Compartment 3 is dedicated to fabric softener, releasing it during the final rinse cycle for softer clothes.

Compartment 1: Pre-Wash Detergent

Compartment 1 within the Indesit My Time detergent dispenser is specifically designated for pre-wash detergent. This compartment is utilized when you select a wash cycle that includes a pre-wash phase, ideal for garments with significant dirt or staining. Using pre-wash detergent helps loosen stubborn soils before the main wash cycle begins, enhancing cleaning performance.

Only add pre-wash detergent if the selected program includes a pre-wash option. Overusing detergent can lead to residue buildup and reduced washing efficiency. Refer to your detergent packaging for appropriate dosage levels for pre-wash applications. Ensure the compartment is not overfilled.

Compartment 2: Main Wash Detergent

Compartment 2 of the Indesit My Time washing machine’s dispenser is dedicated to the main wash detergent. This is where you add detergent for the primary cleaning phase of every wash cycle, unless a pre-wash cycle is also selected. The amount of detergent needed depends on the load size, water hardness, and the level of soiling of your laundry.

Always follow the detergent manufacturer’s instructions for dosage. Using too much detergent won’t necessarily result in cleaner clothes and can leave residue. Liquid or powder detergent can be used in this compartment. Ensure the compartment is easily accessible for convenient detergent addition before each wash.

Compartment 3: Fabric Softener

Compartment 3 in the Indesit My Time washing machine’s detergent dispenser is specifically designed for fabric softener. This compartment releases the softener during the final rinse cycle, leaving your clothes feeling softer and reducing static cling. It’s crucial not to overfill this compartment, as concentrated fabric softener can cause staining or leave a residue on your garments.

Always dilute fabric softener with water according to the manufacturer’s instructions before pouring it into this compartment. Avoid direct contact of undiluted softener with fabrics. The maximum fill line is clearly marked within the compartment – do not exceed it.

Wash Cycle Programs

The Indesit My Time washing machine offers a variety of wash cycle programs tailored to different fabric types and soiling levels. These include programs for Cotton, Synthetics, Delicates/Wool, and a Quick Wash option for lightly soiled items needing a fast refresh. An Eco Wash program prioritizes energy efficiency, using lower temperatures and optimized wash cycles.

Selecting the appropriate program ensures optimal cleaning performance and protects your clothes. Refer to the garment care labels for guidance. The machine’s control panel allows easy selection of the desired program, adjusting wash duration and intensity to suit your laundry needs.

Cotton Wash Program Details

The Cotton Wash program is designed for robust, everyday cotton items like t-shirts, underwear, and bed linen. It utilizes a more vigorous wash action and higher temperatures – typically ranging from 40°C to 90°C – to effectively remove dirt and stains. This program is ideal for heavily soiled cottons, ensuring thorough cleaning.

Users can often adjust the intensity of the Cotton Wash, selecting options for pre-wash or extra rinse cycles. Always check garment care labels before using high temperatures, as some cotton items may shrink or fade. This program provides a reliable and efficient clean for your cotton laundry.

Synthetics Wash Program Details

The Synthetics Wash program caters to fabrics like polyester, nylon, acrylics, and blends. It employs a gentler wash action and lower temperatures – typically between 30°C and 60°C – to protect these materials from damage. This program prevents shrinking, stretching, and color fading commonly associated with synthetic fibers.

Adjustable settings often include spin speed reduction for delicate synthetics. It’s crucial to consult garment care labels, as some synthetics require specific washing instructions. Utilizing the Synthetics program ensures your synthetic clothing remains in excellent condition, maintaining its shape, color, and overall quality through careful cleaning.

Delicate/Wool Wash Program Details

The Delicate/Wool Wash program is specifically designed for items requiring extra care, such as silk, lace, and wool garments. This cycle utilizes a very gentle wash action with minimal agitation to prevent stretching, shrinking, or damage to delicate fibers. Water temperatures are kept consistently low, typically around 30°C, to safeguard fabric integrity.

A reduced spin speed is automatically selected to minimize creasing and distortion. Always check garment care labels before using this program, and consider using a specialized wool or delicate detergent. Proper use of this cycle extends the lifespan of your most treasured, fragile clothing items.

Quick Wash Program – Time Saving Options

The Quick Wash program offers a convenient solution for lightly soiled laundry, providing a full wash cycle in a significantly reduced timeframe – typically under 30 minutes. This program is ideal for refreshing clothes that haven’t accumulated heavy dirt or stains. It utilizes a higher water flow rate and optimized wash actions to achieve effective cleaning in less time.

While efficient, remember that the Quick Wash cycle may not be suitable for heavily soiled items or those requiring intensive cleaning. Select this option when time is of the essence and your laundry doesn’t demand a full-length wash cycle.

Eco Wash Program – Energy Efficiency

The Eco Wash program is specifically designed to minimize energy and water consumption, making it an environmentally responsible choice for your laundry needs. This cycle operates at a lower temperature, typically around 20°C or 30°C, and utilizes optimized wash actions to deliver effective cleaning results while reducing your carbon footprint.

Although the Eco Wash cycle may have a longer duration compared to other programs, the significant savings in energy and water make it a sustainable option. It’s best suited for normally soiled laundry and contributes to lower utility bills and a greener lifestyle.

Delay Timer Function

The Indesit My Time washing machine features a convenient Delay Timer function, allowing you to schedule wash cycles to start at a later, more convenient time. This is particularly useful for taking advantage of off-peak electricity rates or ensuring laundry is finished when you’re home. The delay timer can be set in increments, typically ranging from 1 to 24 hours, providing flexibility to suit your schedule.

Using the delay timer allows you to pre-load the machine with detergent and laundry, then set the timer to begin the wash cycle automatically at your desired time, offering enhanced convenience and control over your laundry routine.

Using the Wash Cycle Delay Timer

To utilize the Delay Timer, first select your desired wash cycle, temperature, and spin speed. Then, press the DELAY TIMER button repeatedly to set the desired delay duration, typically displayed on the function display. Each press increases the delay time, usually in hourly increments. Ensure the START/PAUSE button isn’t illuminated before setting the delay.

Once the delay time is set, press the START/PAUSE button. The indicator light for the delay timer will illuminate, confirming activation. The machine will automatically begin the wash cycle after the specified delay period. Remember to check the detergent dispenser drawer is correctly loaded before initiating the delayed start.

Safety Precautions & Warnings

Always ensure the washing machine is properly grounded for electrical safety. Never attempt to repair the appliance yourself; contact qualified service personnel. Keep children away from the machine during operation, utilizing the child lock feature if available to prevent accidental program changes.

Avoid overloading the drum, as this can damage the machine and reduce washing efficiency. Do not wash items that have been exposed to flammable liquids. Regularly check the power cord for damage and never operate the machine if it’s compromised. Disconnect the appliance from the power supply before cleaning or maintenance.

Electrical Safety Guidelines

Prioritize electrical safety when using your Indesit My Time washing machine. Ensure the voltage supplied matches the appliance’s rating label. Never operate the machine with a damaged power cord or plug; replace immediately. Avoid using extension cords or multi-plugs, as they can overload the circuit.

The appliance must be properly grounded to prevent electric shock; Do not touch the power cord or appliance with wet hands. Disconnect the machine from the power supply before cleaning, maintenance, or during thunderstorms. If the machine malfunctions electrically, immediately disconnect it and contact a qualified technician for repair.

Child Lock Feature (If Applicable)

Certain Indesit My Time washing machine models feature a child lock function, enhancing safety by preventing unintended operation. This feature typically involves pressing and holding specific buttons simultaneously – consult your model’s specific instructions for the correct combination.

When activated, the child lock disables the control panel buttons, preventing changes to the wash cycle or settings. To deactivate, repeat the button combination; Always ensure the child lock is disengaged when you intend to use the machine. This feature is crucial in households with young children, minimizing risks associated with accidental appliance activation.

Avoiding Overloading the Machine

To ensure optimal performance and longevity of your Indesit My Time washing machine, avoid overloading the drum. Overloading restricts garment movement, hindering effective cleaning and potentially damaging the machine’s components. Refer to your machine’s specifications for the maximum load capacity, typically measured in kilograms.

Distribute items evenly within the drum to maintain balance during the spin cycle. Uneven loads can cause excessive vibration and noise, potentially leading to damage. Always leave sufficient space for clothes to move freely. Respecting the load limits preserves the machine’s efficiency and prevents unnecessary wear and tear.

Troubleshooting Common Issues

Encountering problems with your Indesit My Time washer? This section addresses frequent concerns. If the machine doesn’t start, verify the power supply and ensure the door is securely closed. Drainage issues often stem from a blocked filter – regular cleaning is crucial. Error codes displayed on the panel indicate specific faults; consult the full manual for interpretations.

A door lock malfunction might prevent cycles from initiating. If this occurs, try restarting the machine. Always disconnect the power before attempting any internal checks. For persistent issues, contacting a qualified technician is recommended to avoid further damage or safety hazards.

Machine Not Starting

If your Indesit My Time washing machine fails to start, begin with the simplest checks. Confirm the power cord is firmly plugged into a working outlet. Verify the door is completely closed and latched; the machine won’t operate if the door isn’t secured. Check your home’s circuit breaker or fuse box to ensure the circuit hasn’t tripped or blown.

Also, ensure the START/PAUSE button has been properly pressed after selecting a wash cycle. If these steps don’t resolve the issue, there might be an internal fault requiring professional attention. Do not attempt to disassemble the machine yourself.

Drainage Problems & Error Codes

Drainage issues with your Indesit My Time washer often manifest as standing water in the drum. First, check the drain hose for kinks or obstructions. Ensure the hose isn’t inserted too far into the drainpipe, which can cause siphoning. A clogged drain filter is a common culprit; refer to the ‘Filter Cleaning Procedure’ section for instructions.

Error codes displayed on the machine’s panel indicate specific problems. Consult the full manual (available on ManualsLib) for a comprehensive list and their meanings. Common codes relate to drainage faults or issues with the water inlet. Note the code before contacting support.

Door Lock Malfunction

If the door of your Indesit My Time washing machine won’t unlock after a cycle, a malfunction in the door lock mechanism is likely. The machine prioritizes safety, preventing opening during operation. Do not force the door open, as this could cause damage. First, ensure the machine is completely powered off and unplugged from the electrical outlet.

Sometimes, simply restarting the machine can reset the lock. If the problem persists, a faulty door lock switch or wiring may require professional attention. Refer to the machine’s display for any error codes related to the door lock, and consult the full manual for troubleshooting guidance.

Cleaning & Maintenance

Regular cleaning ensures optimal performance and longevity of your Indesit My Time washing machine. Begin by cleaning the detergent dispenser drawer frequently to prevent residue buildup, which can affect wash results. Wipe down the drum and rubber seal after each wash to remove moisture and prevent mold growth.

Crucially, the filter requires periodic cleaning to remove lint and debris. Consult your manual for the filter’s location and cleaning procedure. A clean filter ensures proper drainage. Avoid harsh chemicals; use a damp cloth and mild detergent for all surfaces. Consistent maintenance prevents issues and keeps your machine running efficiently.

Cleaning the Detergent Dispenser

To clean the detergent dispenser, first, remove it from the washing machine – usually by pressing a release button or lever. Rinse each compartment (pre-wash, main wash, and fabric softener) thoroughly under warm running water to dissolve any accumulated detergent or softener residue. Use a small brush, like an old toothbrush, to scrub away stubborn deposits.

Ensure all traces of detergent are removed, as buildup can cause blockages and affect wash performance. Once clean, dry the dispenser completely before reinserting it into the machine. Regular cleaning, ideally monthly, prevents issues and maintains optimal detergent distribution.

Cleaning the Drum & Rubber Seal

Regularly cleaning the drum and rubber seal prevents mold and mildew growth, ensuring fresh laundry. Run an empty hot wash cycle with a washing machine cleaner or a cup of white vinegar monthly. After the cycle, wipe down the drum’s interior with a clean, damp cloth.

Pay close attention to the rubber seal around the door; this area traps moisture and debris. Carefully inspect the folds for any visible mold or residue. Use a diluted bleach solution (follow product instructions) or a specialized rubber cleaner to disinfect the seal, then wipe dry.

Filter Cleaning Procedure

The filter prevents debris from clogging the drain pump. Locate the filter access panel, usually at the bottom front of the machine. Have a shallow container and towels ready to catch any spilled water. Carefully open the panel and unscrew the filter cap – water will drain out.

Remove any lint, coins, buttons, or other objects from the filter. Rinse the filter thoroughly under running water, ensuring all debris is removed. Inspect the filter housing for obstructions. Reinsert the cleaned filter, securely tightening the cap to prevent leaks. Close the access panel.

Technical Specifications

This Indesit My Time washing machine operates on a standard 220-240V AC power supply, with a typical power consumption varying based on the selected wash cycle. Maximum wash load capacity ranges depending on the program, generally between 5 to 9 kilograms. Spin speeds are adjustable, reaching up to 1400 RPM for efficient water extraction.

Dimensions are approximately 85cm (height) x 60cm (width) x 59.5cm (depth). Water inlet pressure should be between 0.1 and 1.0 MPa. The machine’s energy efficiency class is typically rated ‘A’ or higher, promoting responsible energy usage. Please refer to the product label for precise details.

samsung hw-q990c manual

The Samsung HW-Q990C delivers immersive Dolby Atmos sound, simplifying home theater setup without compromising audio quality. It’s a flagship model, offering a premium experience.

Overview of the Soundbar

The Samsung HW-Q990C is a top-tier 11.1.4 channel soundbar designed to provide a truly cinematic audio experience within your home. It eliminates the complexity of a traditional multi-speaker system while delivering room-filling, powerful sound. This model, the latest iteration in Samsung’s Q-series, is lauded for its authoritative and large-scale soundstage, coupled with a remarkably smooth and mellow sonic character.

Its ease of setup makes it ideal for users seeking high-performance audio without extensive installation. The HW-Q990C aims to redefine home entertainment with its advanced features and impressive capabilities, offering a complete audio solution.

Key Features and Specifications

The Samsung HW-Q990C boasts an impressive 11.1.4 channel configuration, delivering a truly immersive sound experience with 456W of total power (200W subwoofer). Key features include Dolby Atmos and DTS:X support for three-dimensional audio, alongside SpaceFit Sound+ technology for optimized calibration to your room’s acoustics.

It incorporates Auto EQ for automatic sound adjustments and offers Voice Enhance and Night Mode for clearer dialogue and quieter listening. Wireless connectivity options include Bluetooth, and the soundbar is compatible with voice control assistants. The unit is available in a sleek grey finish.

Setting Up Your HW-Q990C

Initial setup involves unboxing components, connecting to your TV, and wirelessly pairing the subwoofer and rear speakers for a complete surround sound system.

Unboxing and Component Check

Carefully unpack the HW-Q990C soundbar, wireless subwoofer, and rear speakers. Verify all components are present: the soundbar unit itself, the subwoofer, two rear speakers, a power cord for each unit, an HDMI cable, the remote control, batteries, and the Quick Setup Guide. Inspect each item for any physical damage sustained during shipping.

Retain the original packaging for potential future transport or warranty claims. The included documentation, such as the full user manual (available online), provides detailed information about each component and their functions. Ensure you have all necessary parts before proceeding with the connection process to avoid interruptions.

Connecting to Your TV

Connect the Samsung HW-Q990C to your TV using the provided HDMI cable. Utilize the HDMI eARC (Enhanced Audio Return Channel) port on both the soundbar and your TV for optimal audio performance, supporting Dolby Atmos and DTS:X. Alternatively, an optical connection is available, though it may have limitations.

Power on both the TV and the soundbar. The soundbar may automatically detect the TV and switch to the appropriate input. If not, manually select the correct HDMI input on the soundbar using the remote control. Confirm audio output settings on your TV are set to HDMI eARC or optical, depending on your connection method.

Wireless Subwoofer and Rear Speaker Pairing

To pair the wireless subwoofer and rear speakers, ensure the soundbar is powered on. Locate the ‘Pairing’ button on the rear of the subwoofer and hold it until the LED indicator flashes. Repeat this process for each rear speaker. The soundbar should automatically detect and connect to the subwoofer and speakers.

If automatic pairing fails, access the ‘Settings’ menu on the SmartThings app or soundbar interface and manually initiate the pairing process. Confirm successful connection by checking the LED indicators on each component; a solid light indicates a stable connection.

Understanding the Control Options

Control the HW-Q990C via the remote, SmartThings app, or voice commands. These options provide convenient access to settings and sound modes for personalized audio.

Remote Control Functions

The Samsung HW-Q990C’s remote offers comprehensive control over your sound experience. Key buttons include power, volume adjustment, and source selection. Dedicated sound mode buttons allow quick access to presets like Dolby Atmos and DTS:X. You can navigate the settings menu to fine-tune audio parameters. The remote also facilitates Bluetooth pairing and subwoofer level adjustments.

Furthermore, the remote enables control of connected devices, streamlining your entertainment setup. Its intuitive layout ensures ease of use, even in low-light conditions. Explore the various functions to unlock the full potential of your soundbar and customize the audio to your preferences.

Using the SmartThings App

The SmartThings app expands control of your HW-Q990C beyond the remote. After connecting the soundbar, the app provides a user-friendly interface for adjusting settings. You can access advanced audio options, including equalizer adjustments and SpaceFit Sound+ calibration. The app also allows for firmware updates, ensuring optimal performance and access to new features.

Moreover, SmartThings enables seamless integration with other Samsung devices within your smart home ecosystem. Monitor soundbar status, control playback, and customize settings remotely. The app simplifies setup and offers a centralized hub for managing your entire audio experience.

Voice Control Compatibility

The HW-Q990C boasts built-in voice control compatibility, enhancing hands-free operation. It works seamlessly with voice assistants like Amazon Alexa and Google Assistant, allowing you to control playback, adjust volume, and switch sound modes using simple voice commands. This feature adds convenience and accessibility to your home theater experience.

To enable voice control, connect the soundbar to your smart home network and follow the setup instructions within the SmartThings app. Once configured, simply speak your commands, and the HW-Q990C will respond accordingly, providing a truly immersive and intuitive audio experience.

Sound Modes and Customization

The HW-Q990C offers Dolby Atmos, DTS:X, Auto EQ calibration, Voice Enhance, and Night Mode for a tailored listening experience.

Dolby Atmos and DTS:X Support

The Samsung HW-Q990C excels in immersive audio thanks to its robust Dolby Atmos and DTS:X support. This 11;1.4 channel configuration creates a truly three-dimensional soundscape, enveloping listeners with overhead sound effects and enhanced clarity. Dolby Atmos places sounds precisely within a spherical space, while DTS:X adapts to your room’s acoustics for optimal performance.

These technologies work in tandem to deliver a cinematic experience within your home. The soundbar’s up-firing speakers, combined with the wireless rear speakers, project sound upwards, simulating the height channels crucial for a realistic Atmos experience. Enjoy movies, games, and music with a newfound level of depth and realism;

Auto EQ Calibration

The HW-Q990C features Samsung’s Auto EQ calibration technology, designed to optimize sound output for your specific room’s acoustics. This automated process analyzes your room’s characteristics – size, shape, and furnishings – to deliver a balanced and accurate audio experience. Simply initiate the calibration through the SmartThings app, and the soundbar will emit test tones to measure the room’s response.

Based on these measurements, Auto EQ automatically adjusts the soundbar’s equalizer settings, ensuring optimal clarity, bass response, and overall sound quality. This eliminates the need for manual adjustments and guarantees a tailored listening experience, regardless of your room’s unique properties.

Voice Enhance Mode & Night Mode

The Samsung HW-Q990C provides dedicated sound modes to enhance specific listening scenarios. Voice Enhance mode clarifies dialogue, making voices more distinct and easier to understand – ideal for movies and TV shows with complex soundtracks or quiet speech. This feature boosts vocal frequencies, ensuring you never miss a word;

Night Mode reduces dynamic range, minimizing loud sounds and maximizing quiet ones. This allows you to enjoy immersive audio at lower volumes, preventing disturbance to others while still experiencing a rich soundscape. Both modes are easily accessible through the remote control or the SmartThings app, offering convenient customization.

Advanced Audio Settings

Fine-tune your audio experience with channel level adjustments, a customizable equalizer, and Samsung’s SpaceFit Sound+ technology for optimized sound.

Adjusting Channel Levels

The Samsung HW-Q990C allows precise control over individual speaker channels, enabling a truly personalized soundstage. Access the settings through the SmartThings app or the soundbar’s on-screen menu. You can independently increase or decrease the volume of each channel – front, center, rear, and subwoofer – to perfectly match your room’s acoustics and your listening preferences.

This feature is particularly useful if certain sounds seem too prominent or are lost in the mix. Experiment with subtle adjustments to achieve optimal clarity and balance. Remember to save your customized settings for future listening sessions, ensuring a consistently tailored audio experience. Careful channel leveling enhances immersion and overall sound quality.

Equalizer Settings

The Samsung HW-Q990C provides a comprehensive equalizer to fine-tune the audio output to your exact liking. Accessible via the SmartThings app, the EQ allows adjustments across various frequency bands. Users can boost or reduce specific frequencies – bass, mid-range, and treble – to emphasize desired sounds or correct imbalances.

Pre-set EQ modes, like ‘Movie’ or ‘Music’, offer quick adjustments, but the custom EQ provides granular control. Experiment with different settings to optimize sound for various content types. Save personalized profiles for different listening scenarios. Mastering the EQ unlocks the full potential of the soundbar’s audio capabilities, delivering a truly immersive experience.

SpaceFit Sound+ Technology

Samsung’s SpaceFit Sound+ technology optimizes audio output based on your room’s acoustics. Utilizing the TV’s microphone, it analyzes the room’s dimensions and surfaces to calibrate the soundbar for peak performance. This automated process ensures balanced and clear audio, regardless of room size or furniture arrangement.

SpaceFit Sound+ goes beyond basic calibration, adapting to changes in the room. Run the calibration periodically to maintain optimal sound quality. It works seamlessly with Auto EQ, creating a truly customized listening experience. This innovative feature eliminates guesswork, delivering professional-grade sound in your home theater.

Troubleshooting Common Issues

Common problems include no sound, Bluetooth connectivity issues, and subwoofer synchronization. Refer to the manual for solutions and ensure proper connections for optimal performance.

No Sound Output

If experiencing no sound, first verify the power cord is securely connected to both the soundbar and a working electrical outlet. Ensure the TV audio output is set to the correct source – typically HDMI ARC or eARC. Double-check the HDMI cable connection between the TV and soundbar, trying a different cable if necessary.

Confirm the soundbar isn’t muted and the volume is at a reasonable level. Test with a different audio source (like Bluetooth) to isolate the issue. If using an optical cable, ensure it’s firmly plugged in. Consult the manual’s troubleshooting section for specific error codes or further assistance, potentially requiring a system reset.

Bluetooth Connection Problems

If Bluetooth pairing fails, ensure the soundbar is in Bluetooth pairing mode – typically activated via the remote control; Verify Bluetooth is enabled on your source device (phone, tablet, etc.) and that it’s within range of the soundbar (approximately 30 feet). Remove any previously paired devices from the soundbar’s Bluetooth memory, then attempt pairing again.

Restart both the soundbar and your source device. Interference from other wireless devices can sometimes cause issues; try moving them away. Check for firmware updates for the soundbar, as these often include Bluetooth connectivity improvements. Refer to the manual for specific Bluetooth troubleshooting steps.

Subwoofer Synchronization Issues

If the subwoofer isn’t connecting or frequently disconnects, initiate the pairing process again. Place the subwoofer within 30 feet of the soundbar, ensuring a clear line of sight, free from obstructions. Confirm the subwoofer is powered on and not in standby mode. Resetting both the soundbar and subwoofer can often resolve synchronization problems – consult the manual for reset procedures.

Check for potential interference from other wireless devices. Ensure the subwoofer’s AC power cable is securely connected. Firmware updates can also address synchronization bugs; verify the soundbar has the latest version installed;

Maintenance and Care

Regularly clean the soundbar with a soft, dry cloth. Keep the firmware updated for optimal performance and to address potential issues proactively.

Cleaning Instructions

To ensure the longevity and optimal appearance of your Samsung HW-Q990C soundbar, consistent cleaning is recommended. Always power off the device and disconnect it from the power outlet before commencing any cleaning procedures. Use a soft, dry cloth to gently wipe the exterior surfaces of the soundbar, subwoofer, and rear speakers.

Avoid using harsh chemicals, abrasive cleaners, or excessive moisture, as these can damage the finish or internal components. For stubborn marks, lightly dampen the cloth with water and wring it out thoroughly before wiping. Ensure no water enters the speaker openings. Regularly dust the speaker grilles with a soft brush or vacuum cleaner attachment to maintain clear sound quality.

Firmware Updates

Maintaining up-to-date firmware on your Samsung HW-Q990C is crucial for optimal performance and access to the latest features. Updates often include bug fixes, improved compatibility, and enhanced sound quality. Firmware updates are typically delivered over-the-air via the SmartThings app.

Ensure your soundbar is connected to a Wi-Fi network and the SmartThings app is installed on your smartphone. The app will notify you when updates are available. Follow the on-screen instructions to download and install the firmware. Do not power off the soundbar during the update process, as this could cause damage.

Safety Information and Warranty

To ensure safe operation of your Samsung HW-Q990C, avoid exposing it to direct sunlight, extreme temperatures, or humidity. Do not place the soundbar near flammable materials or liquids. Ensure adequate ventilation around the device to prevent overheating.

Samsung provides a limited warranty covering defects in materials and workmanship. The warranty period varies by region; consult your purchase documentation for specific details. The warranty does not cover damage caused by misuse, accidents, or unauthorized modifications. Retain your proof of purchase for warranty claims.

kubota manual pdf

Understanding Kubota Manuals: A Comprehensive Guide

Kubota manuals‚ often available as PDF downloads‚ are essential resources for owners and technicians alike‚ providing detailed instructions for operation‚ maintenance‚ and repair․

What are Kubota Manuals?

Kubota manuals are detailed guides created by the manufacturer to assist users with all aspects of their equipment‚ frequently distributed as convenient PDF documents․ These resources encompass a wide range of information‚ from basic operational instructions and routine maintenance schedules to in-depth troubleshooting procedures and complex repair guides․ They are specifically tailored to each Kubota model‚ ensuring accuracy and relevance․

Whether you own a tractor‚ excavator‚ lawn mower‚ or any other Kubota machine‚ the corresponding manual serves as an invaluable tool․ These manuals often include parts diagrams‚ wiring schematics‚ and fault code explanations‚ empowering both experienced mechanics and novice users to effectively diagnose and resolve issues․ Accessing a Kubota manual PDF allows for easy storage‚ portability‚ and quick reference‚ making it a crucial asset for any Kubota owner․

Types of Kubota Manuals Available

Kubota manuals come in several key types‚ often accessible as PDF downloads․ Operator’s manuals provide instructions for safe and efficient machine operation‚ covering controls‚ safety features‚ and basic maintenance․ Workshop service manuals are far more comprehensive‚ detailing repair procedures‚ component disassembly/assembly‚ and diagnostic steps․ These are essential for technicians․

Parts catalogs list every component of a machine with detailed diagrams and part numbers‚ crucial for ordering replacements․ Wiring diagrams are vital for electrical troubleshooting․ Many resources‚ like PDFmanual4trucks․com‚ offer these as free PDFs․ Nova International Ltd focuses on digital download-only manuals‚ reducing environmental impact․ Finding the correct Kubota manual PDF type ensures you have the information needed for your specific task‚ whether it’s daily use or complex repairs․

Where to Find Kubota Manuals Online

Kubota manual PDFs are readily available through official websites‚ third-party providers like PDFmanual4trucks․com and Nova International‚ and even the Internet Archive․

Official Kubota Website Resources

Kubota’s official website serves as a primary hub for accessing Kubota manual PDFs‚ though navigation can sometimes be complex․ While a comprehensive‚ freely accessible archive isn’t always immediately apparent‚ dealers often provide links or direct access to specific manuals for registered owners․

Users may need to register an account and provide their machine’s serial number to unlock access to relevant documentation․ This ensures that owners receive the correct PDF manual tailored to their specific model and year of manufacture․ The official resources prioritize accuracy and completeness‚ offering the most up-to-date information directly from the manufacturer․

However‚ be prepared for potential limitations in search functionality and the possibility of encountering paywalled content for certain advanced service manuals․ Exploring the “Support” or “Resources” sections of the Kubota website is a good starting point for locating the desired PDF documentation․

Third-Party Websites Offering Kubota Manuals (PDFmanual4trucks․com‚ Nova International Ltd)

Several third-party websites specialize in providing Kubota manual PDFs‚ offering alternatives to the official Kubota resources․ PDFmanual4trucks․com boasts a large collection of free downloadable manuals‚ including workshop‚ repair‚ and service guides‚ wiring diagrams‚ and fault code information for various Kubota machines – tractors‚ excavators‚ and lawn mowers․

Nova International Ltd focuses on digital downloads‚ emphasizing environmental responsibility by exclusively offering manuals in PDF format․ They provide a convenient way to access documentation quickly‚ with options to contact representatives directly․ While these sites offer convenience‚ verifying the accuracy and completeness of the PDF is crucial․

Always compare information with official sources when possible‚ and be cautious of potentially outdated or incomplete manuals․ These platforms can be valuable resources‚ but due diligence is recommended․

Internet Archive for Kubota Manuals

The Internet Archive serves as a valuable repository for historical and often hard-to-find Kubota manual PDFs․ It provides access to digitized versions of workshop service manuals‚ offering a unique resource for owners of older Kubota equipment․ Specifically‚ the Internet Archive hosts the workshop service manual for Kubota Tractor Models BX1800 and BX2200‚ available for free download‚ borrowing‚ and streaming․

This platform operates on a non-profit basis‚ preserving digital information for public access․ While the quality of scans may vary‚ it’s an excellent option when official sources are unavailable or costly․ Users can contribute to the archive‚ potentially expanding the collection of Kubota documentation․

Remember to check the manual’s date and model compatibility before relying on information found on the Internet Archive․

Specific Kubota Manuals & Models

Kubota offers dedicated manual PDFs for various models‚ including the BX1800‚ BX2200 tractors‚ the V2403-T engine‚ and the L4400 tractor‚ aiding in specific repairs․

Kubota BX1800 & BX2200 Tractor Workshop Service Manuals

Kubota BX1800 and BX2200 tractor workshop service manuals‚ readily available as PDF downloads from resources like the Internet Archive‚ are invaluable for owners tackling repairs and maintenance․ These comprehensive guides detail every aspect of these popular compact tractors‚ from routine servicing procedures – oil changes‚ filter replacements – to complex overhauls of the engine‚ transmission‚ and hydraulic systems․

The PDF format allows for easy searching of specific components or procedures‚ and convenient printing of relevant sections․ Diagrams and illustrations are included‚ clarifying assembly and disassembly processes․ These manuals empower both experienced mechanics and DIY enthusiasts to confidently address mechanical issues‚ saving on costly repair bills and ensuring the longevity of their Kubota tractors․ Accessing these manuals digitally provides a sustainable and efficient solution for tractor maintenance․

Kubota V2403-T Engine Service Manual

The Kubota V2403-T engine service manual‚ frequently found as a downloadable PDF‚ is a critical resource for anyone working on machinery powered by this robust diesel engine․ This manual serves as a complete guide‚ detailing everything from basic maintenance – like valve adjustments and injector checks – to in-depth troubleshooting and complete engine rebuilds․

Available online‚ the PDF version offers convenient access to detailed diagrams‚ specifications‚ and step-by-step instructions․ It’s designed to help users understand the engine’s intricate workings‚ diagnose problems efficiently‚ and perform repairs accurately․ Whether you’re a professional mechanic or a dedicated owner‚ this manual ensures you have the information needed to keep your V2403-T engine running smoothly and reliably‚ maximizing its lifespan and performance․

Kubota L4400 Tractor Service Manual

The Kubota L4400 tractor service manual‚ commonly accessible as a PDF download‚ is an indispensable tool for maintaining and repairing this popular compact tractor․ This comprehensive manual provides detailed instructions covering all aspects of the L4400‚ from routine maintenance procedures – such as oil changes and filter replacements – to complex repairs involving the engine‚ transmission‚ hydraulics‚ and electrical systems․

Obtaining the PDF version allows for easy access on any device‚ making troubleshooting and repairs more convenient․ It includes exploded views‚ parts lists‚ and clear step-by-step guides‚ empowering both experienced mechanics and DIY enthusiasts to confidently address any mechanical issue․ Utilizing this manual ensures proper servicing‚ extends the tractor’s life‚ and maintains optimal performance for years to come․

Key Information Found in Kubota Manuals

Kubota manuals‚ often in PDF format‚ detail troubleshooting‚ wiring diagrams‚ fault codes‚ and comprehensive repair procedures for optimal machine upkeep․

Troubleshooting Common Issues

Kubota manuals‚ readily available as PDF downloads‚ are invaluable when diagnosing and resolving operational problems․ These guides offer systematic approaches to identifying the root cause of malfunctions‚ saving time and reducing repair costs․ They typically include detailed flowcharts and diagnostic tables‚ guiding users through a series of checks to pinpoint the issue․

Commonly addressed issues within these manuals range from engine starting difficulties and hydraulic system failures to electrical problems and transmission concerns․ The PDF format allows for easy searching of specific symptoms or error codes․ Furthermore‚ manuals often provide clear explanations of potential causes‚ accompanied by step-by-step instructions for implementing effective solutions․ Accessing these resources empowers both experienced mechanics and novice owners to tackle repairs confidently and efficiently‚ minimizing downtime and maximizing equipment performance․

Wiring Diagrams & Fault Codes

Kubota manuals‚ particularly in PDF format‚ contain comprehensive wiring diagrams crucial for electrical system diagnosis and repair․ These diagrams illustrate the intricate network of wires‚ connectors‚ and components‚ enabling users to trace circuits and identify potential faults․ Alongside the diagrams‚ PDF manuals frequently list fault codes – alphanumeric identifiers that pinpoint specific issues detected by the machine’s onboard diagnostic system․

Understanding these codes‚ often explained in detail within the manual‚ significantly speeds up troubleshooting․ The manuals provide interpretations of each code‚ suggesting possible causes and recommended repair procedures․ This information is invaluable for resolving electrical malfunctions efficiently․ Having readily accessible PDF versions of these diagrams and codes allows technicians to quickly diagnose and rectify electrical problems‚ minimizing downtime and ensuring optimal machine functionality․

Repair and Service Procedures

Kubota manuals‚ readily available as PDF downloads‚ offer step-by-step repair and service procedures for virtually every component of Kubota machinery․ These procedures are meticulously detailed‚ often accompanied by exploded views and illustrations‚ guiding technicians through disassembly‚ inspection‚ repair‚ and reassembly processes․ The PDF format ensures easy access and portability of this critical information․

From routine maintenance tasks like oil changes and filter replacements to complex overhauls of engines and transmissions‚ the manuals provide clear instructions․ Torque specifications‚ recommended tools‚ and safety precautions are consistently highlighted․ Utilizing these PDF guides empowers both professional mechanics and informed owners to perform repairs confidently and correctly‚ extending the lifespan and maintaining the performance of their Kubota equipment․

Digital vs․ Physical Kubota Manuals

Kubota manual PDFs offer convenient access‚ portability‚ and cost-effectiveness‚ while physical copies provide a tactile experience and offline availability․

Advantages of PDF Downloads

Kubota manual PDFs present numerous benefits over traditional printed versions․ Immediate access is a key advantage; once downloaded‚ the manual is available instantly‚ eliminating shipping delays․ Portability is another significant plus – easily stored on laptops‚ tablets‚ or smartphones‚ these digital manuals accompany you wherever work takes you․

Cost savings are substantial‚ as PDF versions are often more affordable than physical copies‚ and eliminate shipping costs․ Furthermore‚ PDFs are searchable‚ allowing quick location of specific information using keywords․ Zoom functionality enhances readability‚ particularly for detailed diagrams and wiring schematics․

Environmentally‚ PDF downloads reduce paper consumption‚ aligning with sustainable practices․ Nova International Ltd specifically highlights their commitment to reducing their environmental footprint by offering manuals digitally only․ The ease of backup and sharing (within licensing terms) also adds to their practicality‚ making Kubota manual PDFs a modern and efficient solution․

Availability & Environmental Considerations

Kubota manual PDFs are widely accessible through various online platforms․ Websites like PDFmanual4trucks․com offer a vast library of free downloads‚ including workshop‚ repair‚ and service manuals‚ alongside wiring diagrams and fault codes․ Nova International Ltd provides digital downloads exclusively‚ emphasizing a commitment to sustainability․ The Internet Archive also hosts Kubota tractor manuals‚ like those for the BX1800 and BX2200 models‚ offering free access through borrowing and streaming․

Choosing PDF formats significantly reduces the environmental impact compared to printed manuals․ This minimizes paper consumption‚ deforestation‚ and the carbon footprint associated with manufacturing and shipping․ Digital distribution supports eco-friendly practices‚ aligning with growing environmental awareness․

Nova International’s dedication to digital-only manuals exemplifies this shift towards sustainability‚ offering a practical and responsible solution for Kubota owners and technicians seeking readily available documentation․

Using Kubota Manuals Effectively

Kubota manual PDFs require careful review of safety precautions and understanding the manual’s organization for efficient troubleshooting and successful repair procedures․

Safety Precautions

Kubota manual PDFs emphasize crucial safety protocols before undertaking any maintenance or repair work․ Always disconnect the battery’s negative terminal to prevent accidental starting during electrical system procedures․ Wear appropriate personal protective equipment (PPE)‚ including safety glasses‚ gloves‚ and sturdy footwear‚ to shield against potential hazards like fluids or moving parts․

Never work under equipment supported only by jacks; always use jack stands․ Be mindful of hot surfaces‚ especially after engine operation‚ and allow components to cool before handling․ When dealing with fuel or hydraulic systems‚ work in a well-ventilated area and avoid open flames․ Properly dispose of used fluids according to local regulations․ Consult the Kubota manual PDF for specific warnings related to your model‚ ensuring a safe working environment and preventing injuries․

Understanding Manual Organization

Kubota manual PDFs typically follow a logical structure for easy navigation․ Expect sections dedicated to safety‚ specifications‚ operation‚ maintenance‚ and detailed repair procedures․ A comprehensive table of contents allows quick access to specific topics․ Diagrams and illustrations are extensively used to clarify complex assemblies and procedures‚ enhancing understanding․

Troubleshooting guides are often organized by symptom‚ leading you through diagnostic steps․ Wiring diagrams are usually found in a dedicated section‚ crucial for electrical repairs․ Parts lists‚ often with exploded views‚ aid in identifying and ordering replacement components․ Familiarizing yourself with this organization within the Kubota manual PDF will significantly improve your efficiency when performing tasks‚ saving time and frustration․

cuisinart coffee dcc 1200 manual

Cuisinart DCC 1200 Manual: A Comprehensive Guide

This guide details the Cuisinart DCC 1200, offering insights into its features, setup, brewing, maintenance, and safety—a 25-page resource!

Explore PDF manuals, parts diagrams, and warranty details for optimal use, alongside currency conversion tools and exchange rates.

Welcome to the world of convenient and flavorful coffee brewing with the Cuisinart DCC 1200! This programmable coffee maker is designed to deliver a consistently delicious cup, tailored to your preferences. This comprehensive manual serves as your guide, unlocking the full potential of your new appliance.

The DCC 1200 boasts a 12-cup capacity, making it ideal for families or those who enjoy entertaining. Numerous online resources, including detailed PDF manuals (often 25 pages in length), are readily available to assist you. These resources cover everything from initial setup and cleaning to advanced programming features. You’ll find information on parts diagrams to help with maintenance and potential replacements.

Understanding your coffee maker is key to enjoying its benefits. This manual will walk you through each step, ensuring a seamless brewing experience. Don’t hesitate to explore the available documentation – it’s your pathway to perfect coffee, every time!

Key Features and Specifications

The Cuisinart DCC 1200 distinguishes itself through a suite of user-friendly features designed for optimal coffee brewing. Primarily, it’s a 12-cup programmable coffee maker, offering convenience and capacity. Key functionalities include 24-hour programmability, allowing you to wake up to freshly brewed coffee. The ‘Brew Pause’ feature lets you interrupt the brewing cycle for an immediate cup, while the ‘Bold’ setting enhances flavor intensity.

Specifications include a self-cleaning function, simplifying maintenance. The included water filter improves coffee taste by removing impurities. Online PDF manuals detail these features, often spanning 25 pages. The DCC 1200 is designed for household use only. Understanding these specifications, detailed in available documentation, ensures you maximize your brewing experience and maintain optimal performance.

Setting Up Your Cuisinart DCC 1200

Initial setup involves cleaning and water filter installation, detailed in the manual, ensuring optimal performance and flavor—a crucial first step!

Initial Setup and Cleaning

Before your first brew with the Cuisinart DCC 1200, thorough initial setup and cleaning are essential for optimal performance and to ensure the purest coffee flavor. Begin by removing all packaging materials and inspecting the coffee maker for any shipping damage. Wash the carafe, filter basket, and permanent filter (if included) with warm, soapy water; rinse thoroughly.

Next, wipe down the exterior of the coffee maker with a damp cloth. It’s recommended to run a full brewing cycle with water only – without coffee grounds – to cleanse the internal components. This initial cycle helps remove any residual manufacturing residue. Discard the water after the cycle completes. Refer to the manual’s detailed instructions for specific cleaning recommendations and safety precautions. Proper initial cleaning contributes significantly to the longevity and quality of your coffee brewing experience.

Water Filter Installation and Maintenance

Utilizing the Cuisinart DCC 1200’s water filter significantly enhances coffee taste by reducing chlorine, odors, and impurities. Installation involves soaking the filter in water for five minutes, then securely inserting it into the filter compartment within the water reservoir. Ensure a snug fit to prevent unfiltered water from passing through.

Regular maintenance is crucial for filter effectiveness. The manual recommends replacing the filter approximately every two months, or after 60 brewing cycles, depending on water quality. Consistent filter replacement guarantees optimal water purification and preserves the coffee maker’s performance. Ignoring filter maintenance can lead to diminished coffee flavor and potential scaling within the machine. Always refer to the Cuisinart documentation for specific filter type and replacement guidelines.

Brewing with the DCC 1200

Master the Cuisinart DCC 1200 with its intuitive control panel, programmable features, and versatile brewing options—regular, bold, and specialty—for perfect coffee!

Understanding the Control Panel

The Cuisinart DCC 1200’s control panel is designed for intuitive operation, offering a range of features at your fingertips. Key buttons include the power switch, used to turn the coffee maker on and off, and the ‘Brew’ button, initiating the brewing cycle. The ‘Program’ button allows for setting automated brew times, ensuring fresh coffee is ready when you are.

Digital displays clearly show the current time, programmed brew time, and selected brewing options. Buttons for brew strength – regular or bold – let you customize your coffee’s intensity. The ‘Auto-Off’ function, adjustable via the control panel, determines how long the warming plate stays active after brewing. Specialty settings, if available, are also accessed through this interface.

Navigating the panel is straightforward; refer to the manual for specific button combinations and functions. Understanding these controls unlocks the full potential of your DCC 1200, allowing you to consistently brew coffee tailored to your preferences.

Programming the Coffee Maker

Programming the Cuisinart DCC 1200 allows for automated brewing, waking you to the aroma of freshly brewed coffee. Begin by pressing the ‘Program’ button; the display will flash, indicating programming mode. Use the hour and minute buttons to set your desired brew start time. Confirm your selection by pressing ‘Program’ again.

Ensure the coffee maker is loaded with water and a filter before programming. The auto-brew function will activate at the set time, initiating the brewing process. To cancel a programmed brew, press the ‘Program’ button once; the display will revert to the current time.

Refer to the manual for detailed instructions and troubleshooting tips. Consistent programming ensures a seamless coffee experience, delivering a perfect cup precisely when you need it. This feature maximizes convenience and simplifies your morning routine.

Brewing Options: Regular, Bold, and Specialty

The Cuisinart DCC 1200 offers versatile brewing options to cater to diverse preferences. The ‘Regular’ setting delivers a classic, balanced cup of coffee, ideal for everyday enjoyment. For a richer, more intense flavor, select the ‘Bold’ option, which slows down the brewing process, extracting maximum flavor from the grounds.

The ‘Specialty’ setting is designed for smaller batches, ensuring optimal flavor concentration when brewing less than a full carafe. Experiment with different coffee grinds and amounts to fine-tune your brew. Remember to consult the manual for recommended coffee-to-water ratios for each setting.

These options allow you to customize your coffee experience, achieving the perfect cup tailored to your taste. Enjoy exploring the nuances of each brewing style!

Care and Maintenance

Regular cleaning, descaling, and troubleshooting are vital for maintaining peak performance and longevity of your Cuisinart DCC 1200 coffee maker.

Cleaning Procedures: Daily, Weekly, and Monthly

Daily care involves rinsing the carafe, brew basket, and filter holder with warm, soapy water after each use, ensuring no coffee residue remains. Weekly cleaning requires a more thorough wash of these components in the dishwasher (top rack recommended) or by hand, paying attention to any stubborn stains.

Monthly maintenance necessitates a deeper clean, including wiping down the exterior of the coffee maker with a damp cloth. Inspect the spray head for clogs and clean as needed. Don’t forget to check the water reservoir for any mineral buildup. Consistent adherence to these cleaning schedules will guarantee optimal brewing performance and extend the lifespan of your Cuisinart DCC 1200, preventing potential issues and maintaining coffee quality.

Remember to always unplug the coffee maker before cleaning!

Descaling the Coffee Maker

Descaling is crucial for removing mineral buildup that affects brewing performance and coffee taste. The Cuisinart DCC 1200 requires descaling every three to six months, depending on water hardness. Use a commercial descaling solution or a mixture of equal parts white vinegar and water.

Fill the water reservoir with the descaling solution, then run a full brewing cycle without coffee grounds. Repeat with fresh water two to three times to rinse thoroughly, ensuring no descaling solution remains. This process removes calcium deposits, restoring optimal water flow and brewing temperature. Regular descaling extends the life of your coffee maker and guarantees consistently delicious coffee. Ignoring this step can lead to reduced efficiency and potential damage.

Always refer to the full manual for specific descaling instructions!

Troubleshooting Common Issues

If your Cuisinart DCC 1200 isn’t brewing, check the power cord and ensure the carafe is properly positioned. A blinking “Clean” indicator suggests descaling is needed – follow the descaling instructions in the manual. If coffee drips slowly, mineral buildup may be the culprit, again requiring descaling.

For weak coffee, increase the coffee grounds used or select the “Bold” brew setting. If the coffee maker overflows, avoid overfilling the water reservoir or using too much coffee. Ensure the water filter is correctly installed. Refer to the comprehensive manual for detailed solutions to these and other potential problems. Remember to unplug the unit before any inspection or cleaning!

Contact Cuisinart support if issues persist.

Safety Precautions

Always unplug before cleaning, avoid immersing the base in water, and use caution with hot surfaces—essential guidelines for safe Cuisinart DCC 1200 operation.

Important Safety Instructions

To reduce the risk of fire, electric shock, or injury, carefully read and follow these crucial safety instructions before operating your Cuisinart DCC 1200 coffee maker. Never immerse the appliance base, cord, or plug in water or other liquids. Close supervision is necessary when the appliance is used near children. Avoid touching hot surfaces; use handles or knobs.

Always unplug the coffee maker from the electrical outlet when not in use and before cleaning. Allow it to cool completely before disassembling or cleaning. Do not operate the appliance with a damaged cord or plug, or after it malfunctions. Household use only; avoid using outdoors. Use only genuine Cuisinart replacement parts.

Be cautious when handling hot liquids and steam. Do not remove the carafe during the brewing cycle. Ensure the coffee maker is placed on a stable, heat-resistant surface. Regularly inspect the power cord for damage and discontinue use if any damage is found. Following these precautions ensures safe and enjoyable coffee brewing.

Electrical Safety Guidelines

To ensure safe operation of your Cuisinart DCC 1200, adhere to these electrical safety guidelines. This appliance is designed for 120V AC outlets only. Never use an extension cord unless absolutely necessary, and then only a heavy-duty cord rated for the appliance’s wattage. Avoid running the cord under carpeting or near heat sources.

Always unplug the coffee maker before cleaning or performing maintenance. Do not operate the appliance with a damaged cord or plug; contact Cuisinart customer support for assistance. If the appliance malfunctions or exhibits any unusual behavior, immediately unplug it and discontinue use. Never attempt to repair the appliance yourself.

Ensure the electrical outlet is properly grounded. Avoid using the coffee maker in damp or wet environments. Regularly inspect the power cord for any signs of damage. Following these guidelines minimizes the risk of electrical hazards and ensures long-lasting performance.

Parts Diagram and Replacement

Identify key components using the detailed diagram, and easily locate replacement parts for your Cuisinart DCC 1200 to maintain optimal brewing performance.

Identifying Key Components

Understanding the Cuisinart DCC 1200’s anatomy is crucial for effective maintenance and troubleshooting. The caraffe, typically glass, is designed for optimal heat retention. The water reservoir, clearly marked with level indicators, ensures accurate brewing volumes.

The filter basket accommodates standard paper filters or a reusable gold-tone filter. Pay attention to the showerhead, responsible for evenly saturating the coffee grounds; The control panel features buttons for programming, brew strength selection (regular, bold), and initiating the brewing cycle.

Internally, the heating element is vital for reaching the ideal brewing temperature. The self-cleaning function relies on a specific internal pathway; Locate the water filter holder and understand its role in purifying water. Finally, familiarize yourself with the power cord and its connection point for safe operation. Diagrams within the manual visually pinpoint each component’s location.

Where to Find Replacement Parts

Securing replacement parts for your Cuisinart DCC 1200 is straightforward. The official Cuisinart website is the primary source, offering a dedicated parts section searchable by model number. Numerous online retailers, including Amazon and eBay, stock common components like carafes, filters, and filter baskets.

Authorized Cuisinart service centers can also fulfill parts requests and provide expert assistance. Retailers specializing in appliance parts, such as AppliancePartsPros, are valuable resources. When ordering, have your model number readily available to ensure compatibility.

Always prioritize genuine Cuisinart parts to maintain performance and warranty validity. Compare prices across vendors and factor in shipping costs. Consider checking local appliance repair shops; they may stock frequently needed items. Remember to verify return policies before purchasing.

Warranty Information

Cuisinart provides detailed warranty coverage for the DCC 1200, outlining terms, limitations, and procedures for claims—contact customer support!

Cuisinart Warranty Details

Cuisinart stands behind the quality of the DCC 1200 coffee maker with a limited consumer warranty, providing peace of mind to purchasers. Typically, this warranty covers defects in materials and workmanship under normal household use for a specified period, often ranging from one to three years from the original purchase date.

The warranty generally includes repair or replacement (at Cuisinart’s discretion) of the defective product. However, it does not cover damage resulting from misuse, abuse, accidents, alterations, or commercial use. Proof of purchase is essential for warranty service.

Furthermore, the warranty may not cover components subject to normal wear and tear, such as the carafe or filter. Customers are encouraged to register their product online to facilitate warranty claims. Detailed warranty information, including specific terms and conditions, can be found within the product’s documentation or on the official Cuisinart website.

Contacting Customer Support

Cuisinart provides multiple avenues for customers needing assistance with their DCC 1200 coffee maker. For immediate support, their dedicated customer service team is reachable via telephone during business hours. A comprehensive FAQ section and troubleshooting guides are readily available on the official Cuisinart website, addressing common issues and providing step-by-step solutions.

Customers can also submit inquiries through an online contact form, detailing their specific concerns and providing relevant product information. Email support is another option, ensuring a documented record of communication.

When contacting support, having the model number (DCC 1200) and proof of purchase readily available will expedite the process. Social media channels may also offer limited support and updates. Cuisinart strives to provide prompt and helpful assistance to ensure customer satisfaction.

black decker gh900 manual

Black & Decker GH900: A Comprehensive Guide

This guide provides detailed instructions for the Black & Decker GH900, referencing the 40-page instruction manual (catalog number GH3000)

The Black & Decker GH900 is an electric grass trimmer designed for home garden maintenance. This comprehensive guide, based on the official 40-page instruction manual (catalog number GH3000), will walk you through every aspect of its operation, from safe assembly to efficient trimming and long-term care.

Understanding your GH900 is crucial for optimal performance and safety. This trimmer offers a convenient solution for edging and trimming lawns, reaching areas difficult for traditional mowers. The manual details key information, ensuring users can confidently tackle various landscaping tasks.

Recent updates, as of February 5, 2026, and earlier dates like January 29th and 15th, 2026, haven’t altered the core functionality detailed in the GH3000 manual, focusing instead on other applications. This guide remains relevant for GH900 users.

Safety Precautions

Prior to operating the Black & Decker GH900, carefully review all safety instructions detailed within the GH3000 manual. Always disconnect the power supply before any maintenance or adjustments. Wear appropriate safety glasses to protect your eyes from flying debris during trimming operations.

Ensure the trimmer guard is securely attached before use, preventing accidental contact with the cutting string. Avoid operating the GH900 in wet conditions or near flammable materials. Keep bystanders, especially children and pets, at a safe distance during operation.

Never modify the trimmer or use unauthorized replacement parts. Regularly inspect the power cord for damage, and discontinue use if any defects are found. Following these precautions, as outlined in the manual, will ensure safe and effective operation, even with updates to other systems like Black Desert Online as of February 2026.

Package Contents

Upon opening your Black & Decker GH900 package (referenced in manual GH3000), verify all components are present. You should find the GH900 string trimmer itself, along with the pre-installed cutting head. A detailed instruction manual is included, crucial for safe operation and maintenance – even amidst Black Desert Online updates from January and February 2026.

The package also contains a trimmer guard, designed to protect the user from flying debris. A handle assembly is provided for comfortable control during trimming. Additionally, a spool of replacement cutting string is included to extend the trimmer’s lifespan.

Confirm the presence of all listed items before beginning assembly. If any parts are missing or damaged, contact Black & Decker customer support immediately. Retain the packaging for potential returns or warranty claims.

Assembly Instructions

Refer to the GH3000 manual for detailed steps; assembly involves attaching the guard and handle, preparing the unit for string loading and operation.

Attaching the Guard

The Black & Decker GH900 guard installation is a crucial first step, detailed within the GH3000 instruction manual. Carefully align the guard with the designated mounting points on the trimmer’s body. Ensure a secure fit, as the guard provides essential debris protection during operation. The manual likely illustrates the correct orientation and locking mechanism.

Proper guard attachment minimizes the risk of flying objects causing injury. Double-check that all locking features are engaged before proceeding. Refer to the diagrams in the manual for visual guidance. A loosely attached guard compromises safety and could detach during trimming. Always prioritize a firmly secured guard for optimal performance and user protection.

Handle Installation

The Black & Decker GH900 handle installation, as outlined in the GH3000 manual, is a straightforward process. Locate the handle components and the corresponding mounting points on the trimmer’s motor housing. Align the handle securely, ensuring a comfortable and ergonomic grip. The manual will likely depict the correct handle positioning and fastening method.

Typically, this involves inserting the handle into the designated slots and tightening screws or clamps. Verify that the handle is firmly attached and doesn’t wobble during use. A secure handle provides better control and reduces user fatigue. Consult the manual’s illustrations for precise guidance. Proper handle installation is vital for safe and efficient operation of the GH900.

String Loading

The Black & Decker GH900 string loading procedure, detailed within the GH3000 manual, requires careful attention. Begin by ensuring the trimmer is switched off and disconnected from any power source for safety. Locate the spool housing, typically with a release button or latch. The manual will illustrate the exact mechanism for your model.

Remove the empty spool and prepare the new trimmer line, adhering to the recommended diameter and length specified in the manual. Wind the line neatly and evenly onto the spool, following the directional arrows indicated on the housing. Proper winding prevents tangling and ensures smooth operation. Reinsert the loaded spool, secure the cover, and test the line feed. Refer to the manual’s diagrams for a visual guide.

Operating Instructions

Consult the GH3000 manual for detailed operating procedures, ensuring safe and effective use of the Black & Decker GH900 grass trimmer.

Starting the Trimmer

Before initiating operation, carefully review the comprehensive GH3000 instruction manual for detailed starting procedures specific to the Black & Decker GH900. Ensure the trimmer head is clear of obstructions and positioned on a stable surface. Verify the safety lock-out is engaged to prevent accidental activation during preparation.

Connect the trimmer to a suitable power source, confirming voltage compatibility as outlined in the manual’s technical specifications. Once connected, disengage the safety lock-out and firmly grasp the handle with both hands. Depress the trigger switch to initiate the motor, allowing it to reach full operating speed before commencing trimming.

Always maintain a secure grip and be mindful of the rotating trimmer head. Refer to the manual for specific guidance on initial start-up and troubleshooting potential issues.

Trimming Techniques

The Black & Decker GH900 instruction manual (GH3000) details effective trimming techniques for optimal results. Begin by establishing a comfortable and stable stance, ensuring a firm grip on the trimmer handle. Utilize a sweeping motion, guiding the trimmer head along the desired cutting path.

Avoid forcing the trimmer; allow the rotating string to naturally cut through the vegetation. For thicker growth, employ a slower, more deliberate pace, making multiple passes if necessary. Maintain a slight angle to the surface for cleaner cuts and reduced scalping.

Always prioritize safety, keeping the trimmer head clear of obstacles and bystanders. Consult the manual for specific recommendations regarding trimming different types of vegetation and achieving professional-looking results.

Edge Trimming

The Black & Decker GH900 manual (GH3000) provides guidance on achieving crisp, clean edges with your trimmer. Rotate the trimmer head to the vertical position for precise edging along sidewalks, driveways, and flowerbeds.

Maintain a consistent distance between the trimmer string and the edging surface to prevent damage. Employ a slow, controlled walking pace, allowing the string to neatly trim the grass along the edge.

For a more defined edge, consider making multiple passes, gradually increasing the trimming depth. Be mindful of any nearby obstacles, such as rocks or plants, and adjust your technique accordingly. Refer to the manual for safety precautions and optimal edging techniques for various surfaces.

Maintenance and Care

The GH900 manual (GH3000) details essential maintenance, including string replacement, cleaning procedures, and proper storage guidelines for longevity.

String Replacement

Replacing the trimmer string on your Black & Decker GH900 is a straightforward process, detailed within the comprehensive GH3000 instruction manual. First, ensure the trimmer is switched off and disconnected from the power source for safety. Access the spool compartment, typically located on the trimmer head, by following the manual’s illustrated steps.

Remove the empty spool and carefully unwind the old string. Prepare the new string, ensuring it’s the correct diameter and length as specified in the manual. Wind the new string onto the spool, following the directional arrows indicated on the spool housing – proper winding is crucial for reliable feeding.

Reinsert the loaded spool into the trimmer head, ensuring it clicks securely into place. Finally, reattach the trimmer head cover. Refer to the GH900 manual for visual guidance and specific instructions tailored to your model.

Cleaning the Trimmer

Maintaining a clean Black & Decker GH900, as detailed in the GH3000 manual, extends its lifespan and ensures optimal performance. Always disconnect the trimmer from the power source before cleaning. Wipe down the exterior surfaces with a damp cloth to remove grass clippings and debris. Avoid using harsh chemicals or abrasive cleaners, as these can damage the plastic components.

Pay particular attention to the trimmer head, removing any accumulated string fragments or plant matter. Inspect the air vents for blockages and clear them carefully. The spool compartment should also be periodically cleaned to prevent string tangling.

Refer to the GH900 manual for specific cleaning recommendations and diagrams. Regular cleaning, following the manual’s guidance, will keep your trimmer in excellent working condition.

Storage Guidelines

Proper storage, as outlined in the Black & Decker GH900’s GH3000 manual, is crucial for preserving the trimmer’s functionality and preventing damage. Before long-term storage, thoroughly clean the trimmer, removing all grass clippings and debris. Ensure the trimmer is completely dry to avoid corrosion.

Store the GH900 in a cool, dry place, away from direct sunlight and extreme temperatures. It’s best to store it indoors, such as in a garage or shed. Keep the trimmer out of reach of children and pets. Avoid storing it near flammable materials.

Consult the GH900 manual for specific storage recommendations. Following these guidelines will help maintain your trimmer’s condition and ensure it’s ready for use when needed.

Troubleshooting

Refer to the GH900 manual (GH3000) for solutions to common issues, including motor overheating, ensuring optimal performance and longevity of your trimmer.

Common Issues and Solutions

Consult the Black & Decker GH900 instruction manual (catalog number GH3000) for detailed troubleshooting guidance. If the trimmer fails to start, verify the power source and ensure proper assembly. A frequently reported issue involves string feeding problems; the manual details how to correctly load and advance the string.

Motor overheating can occur during extended use. The manual advises allowing the trimmer to cool down before resuming operation. If the issue persists, inspect the air vents for obstructions. For any electrical concerns, immediately disconnect the power and consult a qualified technician. Remember, the 40-page manual is your primary resource for resolving operational difficulties and maintaining your GH900 effectively.

Motor Overheating

The Black & Decker GH900 instruction manual (catalog number GH3000) addresses motor overheating as a potential issue. Prolonged, continuous use, especially in demanding conditions, can cause the motor to overheat. The manual recommends operating the trimmer in shorter bursts, allowing adequate cooling periods between uses.

Inspect the air vents regularly for debris accumulation, as blockages restrict airflow and contribute to overheating. Ensure the trimmer is used within its specified voltage and power limits, detailed in the manual’s technical specifications. If overheating persists despite these measures, discontinue use and consult a qualified service technician. Prioritize safety and refer to the 40-page manual for comprehensive guidance.

Technical Specifications

The GH900 manual (GH3000) details voltage and power requirements, alongside precise weight and dimensional measurements for optimal performance and usability.

Voltage and Power

The Black & Decker GH900’s instruction manual, catalog number GH3000, specifies critical voltage and power details for safe and efficient operation. While the provided snippets don’t explicitly state these values, understanding them is paramount. Users must consult the full 40-page manual to ascertain the correct voltage for their region, preventing damage to the trimmer or electrical hazards.

Power consumption details, also found within the manual, are essential for appropriate extension cord selection and circuit load management. Incorrect power supply can lead to reduced performance or even motor failure. The manual likely outlines the wattage or amperage draw of the GH900, enabling informed decisions regarding power source compatibility. Always prioritize referencing the official documentation for these crucial specifications.

Weight and Dimensions

The Black & Decker GH900 instruction manual (catalog number GH3000, spanning 40 pages) details the trimmer’s physical characteristics – its weight and dimensions. These specifications are vital for assessing maneuverability and storage requirements. While the provided text doesn’t list these values directly, the manual itself will contain precise measurements.

Knowing the weight helps users anticipate the physical exertion needed during prolonged trimming sessions, influencing user comfort and fatigue. Dimensions are crucial for determining if the trimmer will fit comfortably within designated storage spaces. The manual likely provides overall length, width, and height measurements. Referencing the official documentation ensures accurate understanding of the GH900’s size and weight, aiding in informed purchasing and usage decisions.

Warranty Information

The 40-page Black & Decker GH900 instruction manual (catalog number GH3000) is the primary source for detailed warranty information regarding this electric trimmer. It outlines the terms and conditions covering potential defects in materials or workmanship.

Typically, Black & Decker warranties specify a defined period – often one or two years – from the date of purchase. This coverage may include repair or replacement of faulty components, subject to certain limitations. The manual will detail what voids the warranty, such as misuse, unauthorized modifications, or normal wear and tear.

Retaining proof of purchase is crucial for claiming warranty service. The manual provides instructions on how to initiate a claim and where to find authorized service centers. Always consult the official manual for the most accurate and up-to-date warranty details specific to the GH900 model.