yeast free food list pdf

Yeast-Free Diet: A Comprehensive Food List

A yeast-free diet aims to minimize yeast and mold intake‚ alongside reducing carbohydrates—especially sugars—which fuel yeast growth. This guide offers food suggestions‚
lasting eight weeks‚ with careful reintroduction of foods afterward‚ monitoring for symptom recurrence.

Embarking on a yeast-free diet involves carefully selecting foods to minimize yeast and mold consumption‚ alongside limiting carbohydrates. This dietary approach targets reducing the “food” source for yeast‚ particularly simple sugars‚ aiming to control overgrowth. It’s not merely elimination; it’s a strategic reduction focused on sustaining overall health. This guide provides a foundational understanding and a practical list to navigate this dietary shift effectively for eight weeks.

Why Follow a Yeast-Free Diet?

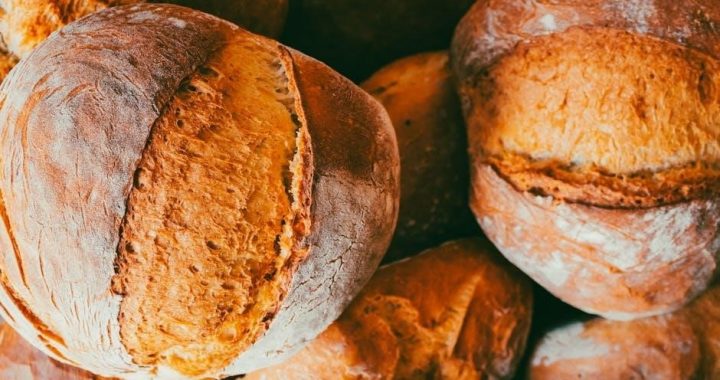
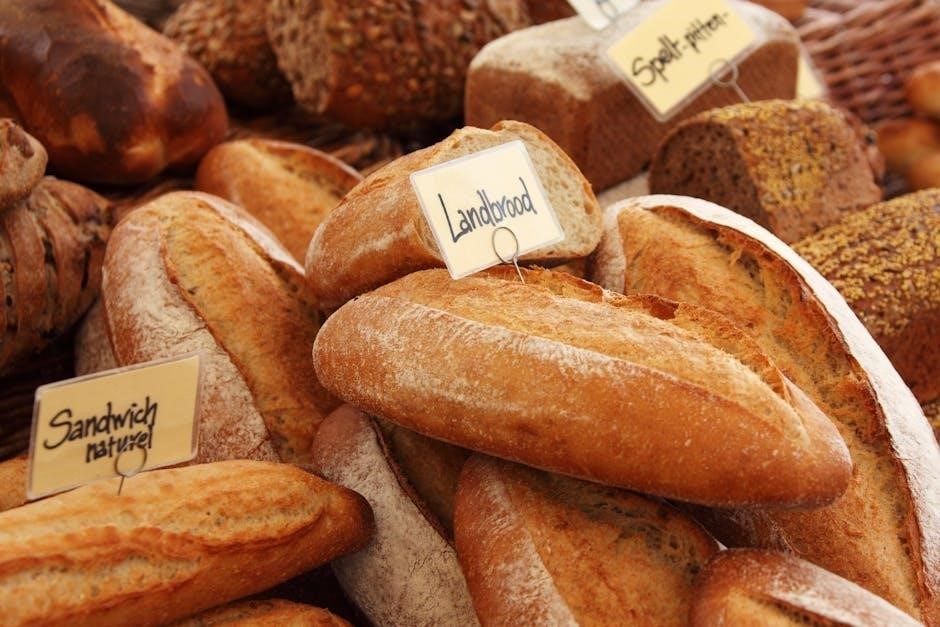
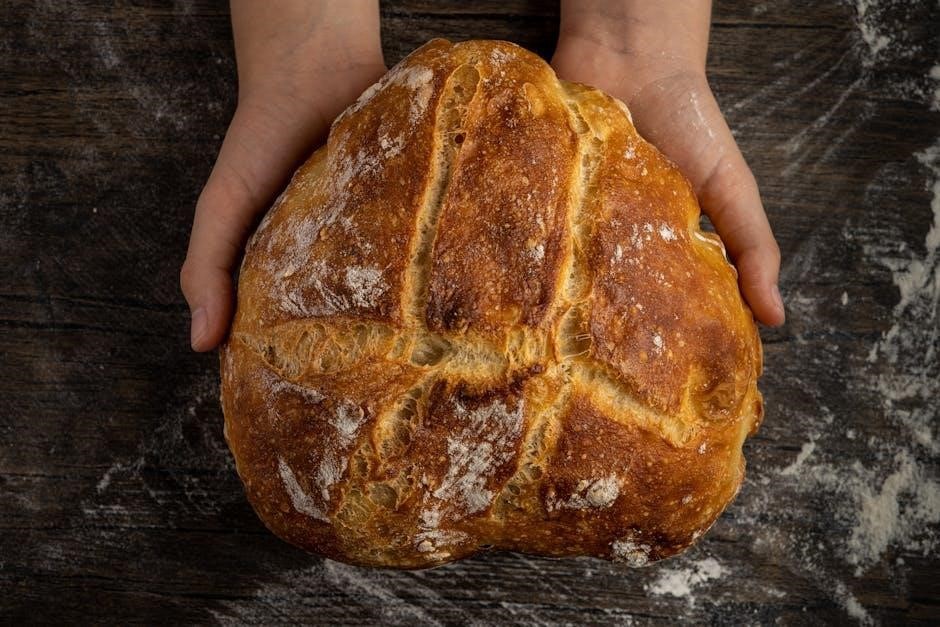
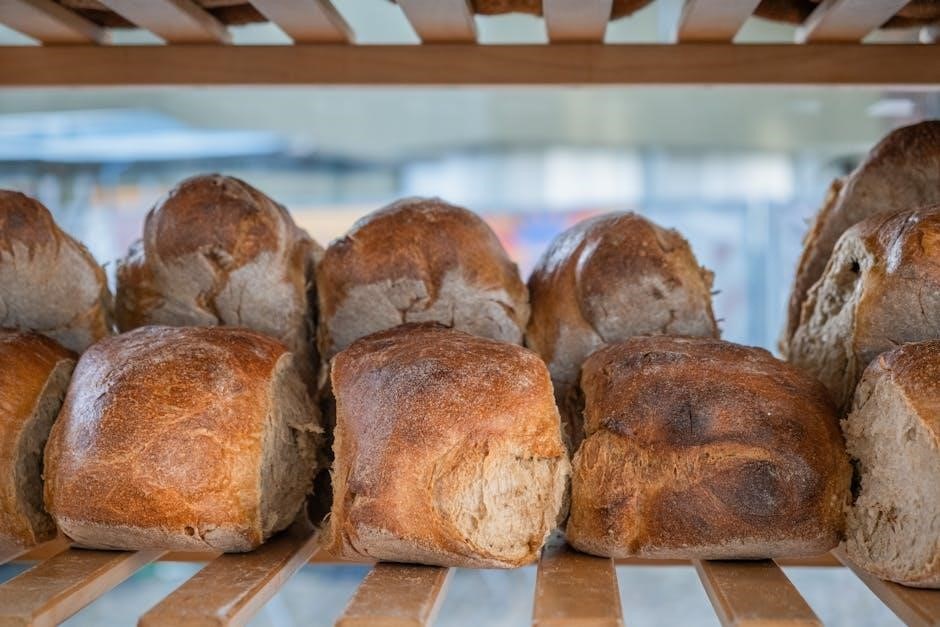
A yeast-free diet is undertaken to reduce the intake of foods containing yeast or mold‚ like baked goods and mushrooms. More importantly‚ it restricts carbohydrates‚ especially sugars‚ as these directly nourish yeast‚ sustaining its growth within the body. Reducing this fuel source can help manage yeast-related symptoms and promote a healthier internal balance‚ offering potential relief and improved well-being.

Duration of the Diet & Reintroduction

Strict adherence to the yeast-free diet is recommended for a period of eight weeks. Following this initial phase‚ a slow and deliberate reintroduction of previously avoided foods is advised. Careful monitoring for any returning symptoms is crucial; if symptoms reappear‚ the reintroduced food should be eliminated from the diet permanently to maintain optimal health and well-being.

Foods to Enjoy on a Yeast-Free Diet

Enjoy a variety of low-carbohydrate vegetables‚ whole fruits‚ meats‚ seafood‚ nuts‚ seeds‚ and oils to nourish your body while minimizing yeast-feeding foods.

Low-Carbohydrate Vegetables

Prioritize fiber-rich‚ nutrient-packed‚ low-calorie‚ and low-carbohydrate vegetables for optimal health on a yeast-free diet. Enjoy these fresh or frozen‚ cooked or raw: asparagus‚ beet greens‚ bell peppers‚ broccoli‚ cabbage‚ carrots‚ cauliflower‚ celery‚ collard greens‚ eggplant‚ lettuce (all varieties)‚ parsnips‚ radishes‚ rutabaga‚ shallots‚ snow peas‚ soybeans‚ spinach‚ string beans‚ Swiss chard‚ and fresh tomatoes.

Asparagus

Asparagus is a fantastic addition to a yeast-free diet‚ offering a wealth of essential nutrients while remaining low in carbohydrates and calories. This versatile vegetable can be enjoyed both fresh and frozen‚ prepared through cooking or consumed raw‚ providing a delightful and healthy option for your meals.

Beet Greens

Beet greens are a nutritional powerhouse and perfectly suited for a yeast-free eating plan. These leafy greens are low in carbohydrates and calories‚ yet packed with fiber and vital nutrients. Enjoy them fresh or frozen‚ cooked to your liking‚ offering a vibrant and healthful component to your diet.

Bell Peppers

Bell peppers are a fantastic addition to a yeast-free diet‚ offering both flavor and essential nutrients. Being low in carbohydrates and calories‚ they provide fiber without fueling yeast overgrowth. Enjoy these versatile vegetables fresh or frozen‚ incorporated into various dishes for a colorful and healthy meal.

Broccoli

Broccoli is a superb choice for those following a yeast-free dietary plan‚ contributing vital nutrients while remaining low in carbohydrates. This fiber-rich vegetable supports overall health without providing substantial fuel for yeast. Enjoy broccoli fresh or frozen‚ cooked to your preference‚ as a beneficial component of your meals.

Cabbage

Cabbage is an excellent addition to a yeast-free diet‚ offering essential nutrients with a minimal carbohydrate load. This versatile vegetable can be enjoyed fresh or frozen‚ prepared in various ways to suit your taste. Its low-calorie and fiber-rich profile makes it a healthy and supportive choice for managing yeast levels.

Carrots

Carrots are a fantastic choice for those following a yeast-free dietary plan‚ providing vital nutrients while remaining relatively low in carbohydrates and calories. Enjoy them fresh or frozen‚ cooked or raw‚ as part of a balanced approach to reducing yeast-sustaining foods; They contribute fiber and essential vitamins to your diet.

Cauliflower

Cauliflower is an excellent vegetable to incorporate into a yeast-free diet‚ offering essential nutrients with a low carbohydrate content. Enjoy it fresh or frozen‚ prepared in various ways – steamed‚ roasted‚ or even riced – to add variety to your meals. It’s a versatile and healthy choice supporting your dietary goals.

Celery

Celery is a fantastic addition to a yeast-free eating plan‚ providing fiber and vital nutrients while remaining low in carbohydrates and calories. This crisp vegetable can be enjoyed raw as a snack‚ added to salads‚ or lightly cooked in various dishes. It’s a refreshing and healthy option for sustained energy.

Collard Greens

Collard greens are a nutrient-rich‚ low-carbohydrate vegetable perfectly suited for a yeast-free diet; These leafy greens offer essential vitamins and fiber‚ contributing to overall health and well-being. Enjoy them fresh or frozen‚ and cooked to your preference – steaming or sautéing preserves their valuable nutrients effectively.

Eggplant

Eggplant is a versatile‚ low-carbohydrate vegetable that fits seamlessly into a yeast-free eating plan. This wonderful addition to your diet provides essential nutrients and fiber‚ supporting a healthy gut. Enjoy eggplant fresh or frozen‚ prepared through baking‚ grilling‚ or sautéing for a delicious and nutritious meal.

Lettuce (All Varieties)

Lettuce‚ in all its diverse forms‚ is a fantastic choice for a yeast-free diet‚ offering minimal carbohydrates and valuable nutrients. Whether you prefer romaine‚ iceberg‚ or butter lettuce‚ it’s a crisp and refreshing base for salads or a healthy wrap alternative. Enjoy it fresh‚ contributing to a fiber-rich diet.

Parsnips

Parsnips are a wonderful addition to a yeast-free eating plan‚ categorized as a low-carbohydrate vegetable. These root vegetables provide essential nutrients and fiber while remaining relatively low in calories. Enjoy parsnips roasted‚ boiled‚ or mashed as a flavorful and healthy side dish‚ supporting your dietary goals.

Radishes

Radishes are excellent choices for a yeast-free diet‚ fitting comfortably within the low-carbohydrate vegetable group. They offer a crisp texture and a slightly peppery flavor‚ adding variety to your meals. Enjoy radishes raw in salads‚ or lightly sautéed‚ providing essential nutrients without significantly impacting carbohydrate intake.

Rutabaga

Rutabaga is a fantastic addition to a yeast-free eating plan‚ categorized as a low-carbohydrate vegetable. This root vegetable boasts a subtly sweet and earthy flavor‚ offering valuable fiber and essential nutrients. Rutabaga can be roasted‚ mashed‚ or added to stews‚ providing a satisfying and healthy component to your diet.

Shallots

Shallots are a welcomed ingredient within a yeast-free dietary approach‚ fitting comfortably into the low-carbohydrate vegetable category. These members of the onion family deliver a milder‚ more delicate flavor than traditional onions‚ enhancing various dishes. Enjoy shallots sautéed‚ roasted‚ or used as a flavorful base for soups and sauces.

Snow Peas

Snow peas are a fantastic addition to a yeast-free diet‚ categorized as a low-carbohydrate vegetable‚ providing essential nutrients and fiber. Their crisp texture and subtly sweet flavor make them versatile for stir-fries‚ salads‚ or simply enjoyed as a fresh snack. They contribute to a healthy and balanced meal plan.

Soybeans

Soybeans are included within the list of low-carbohydrate vegetables suitable for a yeast-free dietary approach‚ offering a valuable protein source. They can be incorporated into various dishes‚ providing essential nutrients and fiber. Enjoy soybeans as a versatile ingredient‚ supporting a balanced and nourishing meal plan during the diet.

Spinach

Spinach is a fantastic addition to a yeast-free diet‚ categorized as a low-carbohydrate vegetable packed with essential nutrients. Enjoy it fresh or frozen‚ cooked or raw‚ to benefit from its fiber content and overall health-promoting properties. Spinach contributes to a balanced diet while minimizing yeast-feeding carbohydrates.

String Beans

String beans are a welcomed component of a yeast-free eating plan‚ falling into the category of low-carbohydrate vegetables. They provide valuable fiber and essential nutrients‚ supporting overall health without significantly contributing to yeast growth. Enjoy string beans fresh or frozen‚ prepared in various ways‚ for a nutritious meal.

Swiss Chard

Swiss chard is a fantastic addition to a yeast-free diet‚ categorized as a low-carbohydrate vegetable offering substantial nutritional benefits. It’s packed with fiber and essential nutrients‚ contributing to a healthy lifestyle while minimizing fuel for yeast. Enjoy Swiss chard cooked or fresh‚ enhancing your meals with its vibrant flavor.

Tomatoes (Fresh)

Fresh tomatoes are a welcome component of a yeast-free eating plan‚ falling into the category of low-carbohydrate vegetables. They provide essential nutrients and fiber‚ supporting overall health without significantly contributing to yeast sustenance. Enjoy them raw in salads or lightly cooked‚ adding a burst of flavor to your diet.

Fruits (Whole Fruits Preferred)

While many fruits contain carbohydrates‚ they remain a valuable part of a healthy diet when following a yeast-free regimen. Prioritize consuming whole fruits to benefit from their fiber and nutrients. However‚ strictly avoid fruit juices like apple or orange juice‚ as these deliver a concentrated carbohydrate load that can encourage yeast growth.

Meats and Seafood

When adhering to a yeast-free diet‚ a variety of meats and seafood options are readily available and encouraged. Enjoy choices like chicken‚ shellfish – including shrimp‚ lobster‚ and crab – and lean cuts of veal. Tofu serves as an excellent plant-based protein source‚ and wild game is also permissible‚ contributing to a balanced nutritional intake.

Chicken

Chicken is a fantastic protein choice while following a yeast-free dietary plan. It’s naturally free of yeast and molds‚ making it a safe and versatile option for meals. Whether grilled‚ baked‚ roasted‚ or incorporated into soups and salads‚ chicken provides essential nutrients without contributing to yeast overgrowth. Ensure preparation methods remain simple and avoid yeast-containing marinades.

Shellfish (Shrimp‚ Lobster‚ Crab)

Shellfish‚ including shrimp‚ lobster‚ and crab‚ are excellent additions to a yeast-free diet. These seafood options are naturally devoid of yeast and mold‚ offering a delicious source of protein. Enjoy them steamed‚ grilled‚ or baked‚ ensuring they are prepared without any yeast-containing ingredients or sauces. They contribute valuable nutrients while adhering to dietary restrictions.

Tofu

Tofu is a versatile plant-based protein source suitable for a yeast-free dietary approach. It naturally lacks yeast and mold‚ making it a beneficial inclusion. When selecting tofu‚ ensure it hasn’t been processed with any yeast-containing marinades or additives. Enjoy it stir-fried‚ baked‚ or added to soups for a nutritious and compliant meal option.

Veal

Veal‚ a tender and lean meat‚ is perfectly acceptable within the parameters of a yeast-free diet. As a naturally yeast-free protein source‚ it provides essential nutrients without contributing to yeast overgrowth. Ensure veal is prepared without any yeast-containing ingredients in marinades‚ breadings‚ or sauces to maintain dietary compliance and enjoy its benefits.

Wild Game

Wild game‚ encompassing meats like venison and bison‚ is a suitable protein choice for a yeast-free dietary approach. Naturally free from yeast and mold‚ these lean options contribute valuable nutrients without promoting yeast proliferation. As with all meats‚ verify preparation methods exclude yeast-containing additives‚ ensuring adherence to the diet’s principles.

Nuts‚ Seeds‚ and Oils

Nuts‚ seeds‚ and oils provide essential fats and nutrients while adhering to a yeast-free diet. Enjoy Brazil nuts‚ flaxseed‚ pumpkin seeds‚ and walnuts. Opt for oils like canola‚ corn‚ olive‚ and sunflower oil. These choices are naturally yeast-free and support overall health‚ contributing to a balanced nutritional intake during the dietary period.

Brazil Nuts

Brazil nuts are a fantastic addition to a yeast-free dietary plan‚ offering a satisfying crunch and valuable nutritional benefits. These nuts are naturally free from yeast and mold‚ making them a safe and healthy snack option. They provide essential selenium‚ magnesium‚ and healthy fats‚ supporting overall well-being during the diet’s duration.

Flaxseed

Flaxseed is a superb inclusion in a yeast-free diet‚ providing a wealth of health advantages without contributing to yeast overgrowth. This seed is naturally yeast-free and boasts a rich profile of omega-3 fatty acids‚ fiber‚ and lignans. Incorporate flaxseed into smoothies or use it in baking (with yeast-free recipes) for added nutrition.

Canola Oil

Canola oil is a suitable oil choice for individuals adhering to a yeast-free dietary plan‚ as it doesn’t contain yeast or contribute to its proliferation. It’s a versatile cooking oil with a neutral flavor‚ making it ideal for various culinary applications. Ensure it’s pure canola oil without added ingredients that might contain hidden yeasts.

Corn Oil

Corn oil is generally considered safe for a yeast-free diet‚ offering a readily available and affordable option for cooking and salad dressings. Like canola oil‚ it doesn’t inherently promote yeast growth. However‚ always check the label to confirm the absence of any added ingredients or processing aids that could introduce yeast or mold contamination.

Olive Oil

Olive oil is a fantastic choice for a yeast-free diet‚ providing healthy fats and flavor without contributing to yeast overgrowth. Both extra virgin and refined olive oils are permissible‚ though opting for cold-pressed varieties minimizes processing. As with all oils‚ scrutinize the label to ensure no hidden yeast-containing additives have been incorporated during production or packaging.

Pumpkin Seeds

Pumpkin seeds are a nutritious and satisfying snack perfectly suited for a yeast-free dietary approach. They deliver essential minerals‚ healthy fats‚ and protein without contributing to carbohydrate intake that could feed yeast. Ensure seeds are unroasted and unsalted‚ avoiding any coatings or flavorings that might contain hidden yeast or sugars.

Sunflower Oil

Sunflower oil is a beneficial addition to a yeast-free diet‚ providing a healthy fat source for cooking and salad dressings. It’s a suitable alternative to oils that might contain hidden ingredients or promote yeast growth due to carbohydrate content. Opt for cold-pressed‚ unrefined varieties to maximize nutritional value and purity.

Walnuts

Walnuts are a fantastic nut choice for those following a yeast-free dietary plan‚ offering essential fats and nutrients without contributing to yeast overgrowth. They provide a satisfying snack and can be incorporated into various recipes. Ensure they are raw or dry-roasted‚ avoiding those with added sugars or coatings.

Foods to Avoid on a Yeast-Free Diet

Certain foods‚ like high-carbohydrate vegetables—artichokes‚ avocados‚ beans‚ peas‚ potatoes‚ and sweet potatoes—should be limited due to their yeast-feeding properties.

High-Carbohydrate Vegetables

When following a yeast-free diet‚ limiting high-carbohydrate vegetables is crucial‚ as these provide fuel for yeast overgrowth. Specifically‚ avoid artichokes‚ known for their complex carb content‚ and avocados‚ despite their health benefits.
Additionally‚ all beans and peas should be restricted‚ alongside potatoes and sweet potatoes‚ due to their substantial starch levels. Careful avoidance supports dietary goals.

Artichoke

Artichokes are generally excluded from a yeast-free diet due to their relatively high carbohydrate content. While nutritious and offering various health benefits‚ their carbohydrate load can contribute to yeast proliferation within the system.
Therefore‚ individuals adhering to this dietary approach should avoid consuming artichokes in any form‚ prioritizing lower-carb vegetable alternatives for optimal results.

Avocado

Avocados‚ despite their healthy fat content‚ are typically avoided on a strict yeast-free diet because of their carbohydrate levels. Although a beneficial food overall‚ the carbohydrates present can potentially feed yeast growth‚ counteracting the diet’s goals.
Individuals following this plan should limit or exclude avocados‚ focusing on low-carbohydrate vegetable choices instead to maintain dietary compliance.

Beans & Peas

Beans and peas are generally not recommended on a yeast-free diet due to their relatively high carbohydrate content. These legumes contain sugars that can contribute to yeast overgrowth‚ hindering the diet’s objective of reducing yeast fuel sources.
Strict adherence to the diet necessitates avoiding beans and peas‚ prioritizing lower-carb vegetable options for optimal results and symptom management.

Potatoes

Potatoes are considered a high-carbohydrate vegetable and are therefore typically avoided when following a yeast-free diet. Their starch content readily breaks down into sugars‚ providing a substantial food source for yeast and potentially exacerbating yeast-related symptoms.
Choosing lower-carbohydrate alternatives is crucial for maintaining the diet’s effectiveness and achieving desired health outcomes.

Sweet Potatoes

Similar to white potatoes‚ sweet potatoes are categorized as high-carbohydrate vegetables and are generally restricted on a yeast-free diet. Their natural sugars provide nourishment for yeast‚ potentially hindering the diet’s goal of reducing yeast overgrowth and associated health issues. Opting for low-carb vegetable choices is recommended.

aduana de cuba cantidad de artículos permitidos pdf

Recent updates‚ including Decreto-Ley 108 & 101‚ significantly impact travelers. New import policies‚ effective January 1‚ 2025‚ demand careful attention to permitted quantities and potential penalties.

As of March 24‚ 2026‚ travelers to Cuba face a dynamically evolving customs landscape. Recent legislative changes‚ notably Decreto-Ley 108 (published January 21‚ 2024) and Decreto-Ley 101 (effective January 1‚ 2025)‚ have reshaped import regulations. These updates‚ stemming from a 30-year overhaul of Cuban customs law‚ aim to modernize procedures while maintaining existing benefits.

Currently‚ heightened scrutiny is being applied to goods originating from locations like Miami‚ with increased penalties for items deemed “propaganda” or violating import restrictions. Travelers should be aware that valuation methods for imported goods have also been altered‚ impacting potential tax liabilities. Staying informed about these changes is crucial to avoid fines or confiscation.

Overview of Recent Changes (Decreto-Ley 108 & 101)

Decreto-Ley 108‚ enacted in January 2024‚ represents a comprehensive modernization of Cuban customs regulations after three decades. It aims to streamline processes and clarify existing laws. Simultaneously‚ Decreto-Ley 101‚ effective January 1‚ 2025‚ introduced significant changes to importation policies for travelers‚ particularly concerning valuation and permitted quantities.

Key alterations include revised valuation methods for imported goods‚ potentially impacting duty payments. Increased vigilance regarding items considered “propaganda” or politically sensitive materials is also evident. These decrees collectively signal a stricter enforcement of customs regulations‚ demanding travelers exercise greater caution and thorough preparation to avoid penalties and ensure compliance.

Permitted Items & Quantities ― General Guidelines

Travelers may bring personal effects‚ clothing‚ toiletries‚ and gifts within specified limits. Updated regulations‚ Decreto-Ley 101 & 108‚ govern allowed values and quantities.

Personal Effects: Clothing & Toiletries

Cuban Customs generally permits travelers to bring reasonable quantities of personal effects‚ including clothing and toiletries‚ for personal use without incurring duties. This encompasses items such as apparel‚ shoes‚ and personal hygiene products. However‚ these items must be demonstrably intended for the traveler’s own use and not for commercial purposes.

While specific quantity limits aren’t rigidly defined for everyday clothing‚ excessive amounts that suggest intent to resell may be scrutinized. Toiletries should be in reasonable travel sizes. New regulations‚ stemming from Decreto-Ley 108‚ emphasize that customs officials retain the discretion to assess whether the quantity of personal effects is justifiable for the duration of the stay. Travelers should retain receipts as proof of purchase‚ if available‚ to support their declarations.

Gifts & Samples: Allowed Values & Restrictions

Bringing gifts and commercial samples into Cuba is permitted‚ but subject to strict valuation and restrictions under current customs regulations. Generally‚ gifts with a declared value not exceeding 50 USD per item are allowed without incurring significant duties. However‚ exceeding this value may trigger taxes and require detailed documentation‚ including invoices.

Commercial samples must be clearly identified as such and accompanied by supporting documentation from the exporting company. Decreto-Ley 101 impacts valuation methods‚ potentially increasing scrutiny of declared values. Items deemed as propaganda or politically sensitive are strictly prohibited‚ regardless of value. Travelers should be prepared to declare all gifts and samples accurately to avoid penalties and potential confiscation.

Medications & Medical Devices

Travelers entering Cuba with personal medications and medical devices require careful adherence to customs regulations. Prescription medications are permitted‚ but must be accompanied by a valid prescription from a licensed physician‚ clearly stating the medication’s name‚ dosage‚ and intended use. Quantities should not exceed a reasonable supply for the duration of the stay.

Medical devices‚ such as wheelchairs or glucose monitors‚ are generally allowed with supporting documentation from the manufacturer or a medical professional. It’s crucial to declare all medications and devices on the customs declaration form (Forma Única Aduanera). Failure to declare or exceeding permitted quantities may result in confiscation or penalties. Ensure medications are in their original packaging.

Food Items: Restrictions & Allowed Quantities

Cuban customs impose restrictions on importing food items to protect local agriculture and public health. Travelers are generally permitted to bring a limited quantity of non-perishable food items for personal consumption. This typically includes sealed‚ commercially packaged goods like canned foods‚ pasta‚ and cereals. Quantities should be reasonable and clearly declared on the customs form.

However‚ fresh fruits‚ vegetables‚ meat products‚ and dairy are often subject to strict regulations or outright prohibition due to potential disease transmission or support for local producers. It’s advisable to check the latest official guidelines before traveling‚ as regulations can change. Undeclared or prohibited food items may be confiscated.

Specific Item Limits & Regulations

Detailed limits apply to alcohol‚ tobacco‚ electronics‚ and appliances. Travelers must adhere to quantity restrictions and be prepared for potential taxes or valuation assessments.

Alcoholic Beverages: Quantity Limits & Taxes

Cuban customs regulations impose specific limits on the quantity of alcoholic beverages travelers can import for personal use. Generally‚ visitors are permitted to bring in up to three liters of alcoholic beverages without incurring substantial duties. However‚ exceeding this limit will result in the assessment of taxes‚ potentially significantly increasing the cost.

The tax rate varies depending on the type of alcohol and its alcoholic content. It’s crucial to retain purchase receipts as proof of value for customs assessment. Failure to declare alcohol accurately or exceeding the allowed quantity can lead to confiscation and fines. Travelers should be aware that these regulations are strictly enforced‚ particularly with increased scrutiny following recent legislative changes (Decreto-Ley 108 & 101).

Tobacco Products: Cigars‚ Cigarettes & Regulations

Cuba‚ renowned for its tobacco‚ has specific regulations regarding the importation of cigars and cigarettes by travelers. Currently‚ individuals are generally allowed to bring in up to 50 cigars or five packets of cigarettes for personal consumption without facing excessive taxes. Quantities exceeding this threshold are subject to import duties‚ calculated based on weight and value.

It’s essential to declare all tobacco products upon arrival and retain proof of purchase. Undeclared or excessive amounts can result in confiscation and financial penalties. Recent updates to customs law (Decreto-Ley 108 & 101) emphasize stricter enforcement of these regulations. Travelers should be mindful of these rules to avoid complications during customs clearance‚ especially given increased scrutiny.

Electronics: Laptops‚ Cameras & Mobile Phones

Travelers entering Cuba with personal electronics like laptops‚ cameras‚ and mobile phones generally face minimal restrictions‚ provided these items are for personal use. There’s typically no strict limit on the number of devices a traveler can bring‚ but customs officials may assess the value of these goods.

While personal use is generally accepted‚ bringing multiple identical items might raise suspicion of commercial intent‚ potentially leading to duties. It’s crucial to retain purchase receipts as proof of value. Recent changes in valuation methods (Decreto-Ley 101) may impact duty calculations. Declaring all electronics on the customs form (Forma Única Aduanera) is highly recommended to avoid potential issues and ensure smooth clearance.

Household Appliances: Restrictions & Valuation

Importing household appliances into Cuba is subject to stricter regulations than personal electronics. While small‚ personal-use appliances may be permitted‚ larger or multiple items are often viewed as commercial imports‚ triggering duties and potential restrictions. Decreto-Ley 101 significantly impacts valuation.

Customs officials will carefully assess the value of appliances‚ potentially using methods different from the purchase price. Accurate invoices and receipts are essential to support declared values. Bringing in items like refrigerators or washing machines without proper declaration can lead to confiscation and fines. Travelers should be prepared for scrutiny and potential valuation adjustments based on Cuban customs guidelines.

Prohibited Items & Potential Penalties

Cuba strictly prohibits propaganda‚ political materials‚ weapons‚ ammunition‚ and illegal drugs. Violations can result in severe fines‚ confiscation‚ and potential legal consequences for travelers.

Propaganda & Political Materials

Cuban customs authorities rigorously enforce prohibitions against the importation of materials deemed subversive or politically sensitive. This includes‚ but isn’t limited to‚ literature‚ pamphlets‚ audio recordings‚ and digital media that criticizes the Cuban government or promotes opposing ideologies. Recent reports emphasize increased scrutiny of items originating from Miami‚ reflecting heightened concerns regarding potential political influence.

Travelers attempting to bring in such materials face significant penalties‚ potentially including confiscation of the items‚ substantial fines‚ and even legal repercussions. The definition of “propaganda” is broadly interpreted‚ so caution is advised. It’s crucial to avoid carrying anything that could be construed as challenging the established political system‚ even unintentionally.

Weapons & Ammunition

The importation of weapons and ammunition into Cuba is strictly prohibited under all circumstances; This encompasses firearms of any kind‚ including pistols‚ rifles‚ and shotguns‚ as well as ammunition‚ explosives‚ and related components. Even seemingly innocuous items like replica weapons or self-defense tools (pepper spray‚ stun guns) are subject to immediate confiscation and severe penalties.

Cuban customs officials maintain a zero-tolerance policy regarding weapons. Travelers attempting to bring in prohibited items‚ regardless of intent‚ risk substantial fines‚ imprisonment‚ and a permanent ban from entering the country. Declaring such items does not guarantee permission for entry; it will simply expedite the confiscation process and potential legal action.

Illegal Drugs & Substances

Cuba maintains a strict prohibition on the importation of all illegal drugs and substances. This includes‚ but is not limited to‚ narcotics like cocaine‚ heroin‚ and marijuana‚ as well as synthetic drugs and psychoactive substances. Penalties for possessing or trafficking illegal drugs in Cuba are exceptionally severe‚ potentially resulting in lengthy prison sentences and substantial fines.

Even the possession of small quantities for personal use is considered a criminal offense. Cuban authorities actively enforce these regulations‚ and travelers should be aware that customs inspections are thorough. Attempting to conceal drugs‚ regardless of quantity‚ will significantly exacerbate the penalties. There are no exceptions‚ and declaring these items offers no legal protection.

Restricted Agricultural Products

The importation of certain agricultural products into Cuba is heavily restricted to protect domestic agriculture and prevent the introduction of pests and diseases. This includes fresh fruits‚ vegetables‚ seeds‚ plants‚ and certain processed food items containing agricultural components. Restrictions are in place due to biosecurity concerns and support for local farmers.

Travelers should anticipate rigorous inspection of any food items they attempt to bring into the country. Undeclared or prohibited agricultural products will be confiscated‚ and fines may be imposed. Specific regulations can change‚ so it’s crucial to verify current allowances before travel. Generally‚ commercially packaged and processed foods are viewed more favorably than fresh produce‚ but even these may be subject to limitations.

Customs Declaration Requirements

Travelers must complete the ‘Forma Única Aduanera‚’ declaring all items and monetary value. Accurate documentation‚ including invoices and receipts‚ is essential for smooth clearance.

Completing the Customs Form (Forma Única Aduanera)

The ‘Forma Única Aduanera’ (Single Customs Form) is crucial for entry. Travelers must declare all items brought into Cuba‚ even those seemingly insignificant. This form requires detailed information about personal effects‚ gifts‚ and any goods intended for commercial purposes. Accuracy is paramount; discrepancies can lead to delays‚ fines‚ or even confiscation.

The form asks for a comprehensive list of items‚ their quantities‚ and estimated values. Be prepared to provide specific details‚ avoiding vague descriptions. Ensure all sections are completed legibly and truthfully. Electronic submission may be available at some entry points‚ but a physical copy is generally required. Retain a copy of the completed form for your records throughout your stay in Cuba‚ as it may be requested upon departure.

Declaration of Monetary Value

Cuban Customs requires a full declaration of any currency or traveler’s checks exceeding USD 5‚000. This includes US dollars‚ Euros‚ or any other convertible currency. Failure to declare accurately can result in confiscation of the undeclared funds. The declaration is made on the ‘Forma Única Aduanera’ and must reflect the exact amount being brought into the country.

It’s vital to understand that this declaration isn’t a tax‚ but a reporting requirement. Upon departure‚ any remaining undeclared currency above the limit must also be declared to avoid penalties. Keep all exchange receipts and banking documentation as supporting evidence. Accurate reporting prevents legal complications and ensures a smooth travel experience.

Supporting Documentation (Invoices‚ Receipts)

Maintaining comprehensive documentation is crucial for navigating Cuban Customs. Travelers should retain all original invoices‚ receipts‚ and purchase confirmations for imported goods. These documents substantiate the declared value of items‚ particularly electronics‚ appliances‚ and gifts‚ aiding in accurate valuation by customs officials.

Having proof of purchase helps avoid disputes regarding item value and potential overestimation of taxes. For medications‚ a doctor’s prescription is essential. Regarding gifts‚ a clear indication of the gift’s nature and value is required. Proper documentation streamlines the customs process and minimizes the risk of fines or confiscation‚ ensuring a hassle-free entry or exit.

New Regulations Regarding Importation (Effective January 1‚ 2025)

Decreto-Ley 101 introduced significant changes to import policies‚ impacting travelers with revised valuation methods and stricter regulations on permitted goods and quantities.

Impact of Decreto-Ley 101 on Travelers

Decreto-Ley 101 fundamentally alters the landscape for travelers bringing goods into Cuba. Previously‚ a more lenient approach existed regarding personal belongings and gifts. However‚ this legislation introduces stricter controls and a more rigorous valuation process for imported items. Travelers departing from cities like Miami must now be acutely aware of these changes to avoid substantial penalties.

The decree focuses heavily on preventing the introduction of “propaganda” and materials deemed politically sensitive‚ leading to increased scrutiny of travelers’ belongings. Furthermore‚ the valuation methods have been revised‚ potentially increasing taxes and duties on imported goods. Understanding the specific quantity limits for items like alcohol and tobacco is now crucial‚ as exceeding these limits can result in confiscation and fines. Detailed information is available on the official Cuban Customs website.

Changes in Valuation Methods for Imported Goods

Decreto-Ley 101 introduces significant shifts in how Cuban Customs assesses the value of imported goods. Previously‚ valuation was often based on declared prices‚ but the new regulations emphasize a more comprehensive approach. Customs officials now have greater authority to determine the “real” value of items‚ potentially using market prices or comparable goods as benchmarks.

This change impacts travelers bringing in electronics‚ appliances‚ and even gifts. Under-declaring the value of items is now considered a serious offense‚ leading to fines and confiscation. Accurate invoices and receipts are essential to support declared values. The updated framework aims to increase revenue collection and prevent undervaluation schemes‚ requiring travelers to be meticulously prepared with documentation proving the true cost of their belongings.

Penalties for Non-Compliance

Non-compliance with Cuban Customs regulations can result in substantial fines‚ confiscation of goods‚ and potentially‚ legal repercussions for travelers.

Fines & Confiscation of Goods

Cuban Customs authorities are increasingly strict regarding undeclared or prohibited items. Fines levied for non-compliance vary based on the infraction’s severity and the value of the goods. Travelers attempting to import items exceeding permitted quantities‚ or bringing in prohibited goods like propaganda materials‚ face significant financial penalties.

Furthermore‚ all undeclared or prohibited items are subject to immediate confiscation. This means travelers risk losing their goods without compensation. Confiscation extends to items deemed to be for commercial purposes when imported under a traveler’s allowance. Recent legislation‚ particularly Decreto-Ley 108‚ empowers customs officials to enforce these penalties rigorously‚ emphasizing the importance of accurate declarations.

Potential Legal Consequences

Beyond fines and confiscation‚ serious customs violations in Cuba can lead to legal repercussions. Attempting to import prohibited items‚ especially those deemed a threat to national security – like unauthorized political materials or weaponry – may result in detention and investigation. Travelers could face criminal charges and potential imprisonment‚ depending on the nature and severity of the offense.

Decreto-Ley 108 strengthens the legal framework for customs enforcement‚ granting authorities broader powers to prosecute violations. Repeat offenders or those involved in large-scale smuggling operations are particularly vulnerable. It’s crucial to understand that Cuban law prioritizes protecting its sovereignty and economic interests‚ leading to strict penalties for those who disregard customs regulations.

Resources & Further Information

For detailed regulations and updates‚ consult the official Cuban Customs website. Direct contact with Cuban Customs authorities provides clarification on specific import requirements and procedures.

Official Cuban Customs Website

The official website of Cuban Customs (Aduana de Cuba) is the primary source for the most current and comprehensive information regarding travel regulations. While a direct‚ easily navigable English version can be challenging to locate‚ the site – often accessible through Cuban government portals – publishes official decrees like Decreto-Ley 108 and 101. These documents detail permitted items‚ quantities‚ and valuation methods.

Travelers should prioritize reviewing these official publications‚ even utilizing translation tools if necessary‚ to ensure compliance. The website frequently updates information regarding import restrictions‚ particularly concerning propaganda‚ agricultural products‚ and monetary declarations. Regularly checking for updates is crucial‚ as regulations are subject to change. Look for downloadable PDFs outlining specific allowances.

Contacting Cuban Customs Authorities

Directly contacting Cuban Customs can provide clarification on specific regulations‚ particularly regarding permitted quantities detailed in documents like Decreto-Ley 101 and 108. However‚ communication in English may be limited‚ so utilizing a translator is highly recommended. Contact information is often scarce online‚ but inquiries can be directed through the Cuban Ministry of Finance and Prices‚ which oversees customs operations.

Travelers experiencing difficulties finding information on the official website should attempt to contact Cuban consulates or embassies in their country. These diplomatic missions may offer assistance or provide contact details for relevant customs officials. Be prepared to provide specific details about your travel plans and the items you intend to import to receive accurate guidance.

foreign exchange manual

Forex Manual: A Comprehensive Guide

Forex trading offers access to a vast global market‚ enabling individuals to capitalize on currency fluctuations and economic shifts with diligent study.

Understanding forex futures‚ exchange rates‚ and day trading strategies are crucial for success‚ alongside careful consideration of geopolitical events.

This manual provides a foundational understanding‚ covering everything from currency pairs to risk management‚ empowering traders to navigate this dynamic landscape.

What is Forex Trading?

Forex trading‚ short for foreign exchange trading‚ fundamentally involves the buying and selling of currencies with the aim of profiting from fluctuations in their exchange rates. It’s a decentralized‚ global marketplace‚ making it the largest and most liquid financial market in the world‚ trading trillions of dollars daily.

Unlike stock exchanges‚ forex doesn’t have a central location; transactions occur electronically over-the-counter (OTC). This accessibility allows individuals‚ banks‚ financial institutions‚ and governments to participate. Traders speculate on whether a currency’s value will increase or decrease relative to another.

The core concept revolves around currency pairs – for example‚ EUR/USD (Euro versus US Dollar). If a trader believes the Euro will strengthen against the Dollar‚ they ‘buy’ the pair. Conversely‚ if they anticipate a decline‚ they ‘sell’ it. Profit is realized when the exchange rate moves in the predicted direction. Understanding global economics‚ government policies‚ and consumer behavior is vital for informed trading decisions.

The History of Forex Markets

The roots of the forex market trace back to the collapse of the Bretton Woods system in 1971. Prior to this‚ exchange rates were largely fixed. The Bretton Woods agreement established a system of fixed exchange rates pegged to the US dollar‚ which was‚ in turn‚ convertible to gold.

However‚ economic pressures and imbalances led to its abandonment‚ ushering in an era of floating exchange rates. This transition marked the birth of the modern forex market as we know it. Initially‚ trading was primarily conducted by banks and large financial institutions.

The 1980s witnessed the introduction of electronic trading platforms‚ increasing accessibility and liquidity. The 1990s saw further growth with the rise of the internet‚ opening the market to retail traders. Today‚ the forex market continues to evolve‚ driven by technological advancements and increasing globalization‚ becoming a cornerstone of international finance.

Key Forex Terminology

Understanding forex terminology is paramount for successful trading; Currency pairs‚ like EUR/USD‚ represent the exchange rate between two currencies; the first is the base currency‚ the second the quote currency. A pip (percentage in point) is the smallest price movement a currency pair can make.

Lots define the size of a trade – standard‚ mini‚ and micro lots are common. Leverage allows traders to control larger positions with a smaller capital outlay‚ amplifying both potential profits and losses. Margin is the collateral required to open and maintain a leveraged position.

Familiarity with these terms‚ alongside concepts like spreads (the difference between buy and sell prices) and bid/ask prices‚ is essential for interpreting market data and executing informed trading decisions. Mastering this vocabulary unlocks a deeper understanding of the forex landscape.

Pips and Lots

In forex trading‚ a pip represents the smallest incremental price change in a currency pair. For most pairs‚ it’s the fourth decimal place (e.g.‚ 0.0001). However‚ for JPY pairs‚ it’s the second decimal place (e.g.‚ 0.01). Understanding pip value is crucial for calculating potential profit or loss.

A lot is a standardized unit of trading‚ representing the amount of currency you’re buying or selling. A standard lot is 100‚000 units of the base currency‚ a mini lot is 10‚000 units‚ and a micro lot is 1‚000 units.

The size of the lot directly impacts the potential profit and risk. Traders choose lot sizes based on their risk tolerance and account size. Calculating pip value per lot is essential for effective risk management.

Leverage and Margin

Leverage in forex trading allows traders to control a larger position with a smaller amount of capital. It’s expressed as a ratio‚ like 1:50 or 1:100‚ meaning you can control $50‚000 or $100‚000 with $1‚000. While it amplifies potential profits‚ it also magnifies potential losses.

Margin is the collateral required by the broker to open and maintain a leveraged position. It’s a percentage of the total position value. Insufficient margin can lead to a margin call‚ forcing you to deposit more funds or close your position.

Understanding leverage and margin is vital for risk management. High leverage can quickly deplete your account‚ so use it cautiously and always calculate potential risks before entering a trade.

Currency Pairs: Majors‚ Minors‚ and Exotics

Currency pairs are quoted as a combination of two currencies‚ representing the exchange rate between them. The first currency is the base currency‚ and the second is the quote currency. Understanding these pairings is fundamental to forex trading.

Major pairs involve the most traded currencies: EUR/USD‚ USD/JPY‚ GBP/USD‚ and USD/CHF. They typically have the tightest spreads and highest liquidity. Minor pairs‚ also known as crosses‚ don’t include the US dollar‚ like EUR/GBP or AUD/JPY.

Exotic pairs involve a major currency paired with a currency from an emerging economy‚ such as USD/TRY or EUR/ZAR. They often have wider spreads and higher volatility‚ presenting both opportunities and risks.

Forex Market Participants

Central banks‚ commercial banks‚ and individual retail traders collectively drive the forex market‚ influencing liquidity and price discovery through diverse strategies.

These entities interact‚ creating a complex ecosystem where economic policies and speculative trading converge to shape currency valuations globally.

Central Banks

Central banks are pivotal players in the forex market‚ wielding significant influence through monetary policy and intervention strategies. These institutions‚ such as the Federal Reserve in the US or the European Central Bank‚ manage a nation’s currency‚ credit conditions‚ and overall economic stability.

They directly impact exchange rates by adjusting interest rates‚ implementing quantitative easing‚ or directly intervening in the currency markets by buying or selling their own currency. These actions aim to stabilize the national currency‚ control inflation‚ and promote economic growth.

Furthermore‚ central bank announcements and policy decisions are closely watched by traders worldwide‚ often triggering substantial market volatility. Their reserves of foreign currencies are also substantial‚ allowing them to influence exchange rates when deemed necessary. Understanding central bank behavior is therefore crucial for any forex trader seeking to interpret market movements and formulate effective trading strategies.

Commercial Banks

Commercial banks form a substantial backbone of the forex market‚ facilitating a large volume of currency transactions for their clients. These institutions act as intermediaries‚ executing trades on behalf of corporations‚ governments‚ and other financial institutions‚ contributing significantly to overall market liquidity.

They profit from the spread between the buying and selling prices of currencies‚ and also provide forex services like currency exchange‚ international payments‚ and hedging solutions. Large commercial banks often have dedicated forex trading desks‚ employing skilled traders to manage their currency positions and capitalize on market opportunities.

Their activities are driven by client demand and their own proprietary trading strategies. Consequently‚ monitoring the actions of major commercial banks can offer valuable insights into prevailing market sentiment and potential future price movements‚ making them key observers for forex traders.

Retail Traders

Retail traders represent individual investors who participate in the forex market through online brokers‚ utilizing platforms for currency speculation. While each individual trader’s volume is relatively small‚ collectively they constitute a significant and growing force within the forex ecosystem‚ contributing to market depth and volatility.

Driven by diverse motivations – from supplemental income to full-time trading – retail traders employ various strategies‚ including day trading‚ swing trading‚ and scalping‚ often leveraging educational resources and analytical tools. Access to the market has been democratized by technology‚ allowing participation from around the globe.

However‚ retail trading carries inherent risks‚ demanding discipline‚ knowledge‚ and robust risk management techniques. Success hinges on understanding market dynamics‚ employing sound strategies‚ and controlling emotional biases‚ making continuous learning essential.

Fundamental Analysis in Forex

Fundamental analysis assesses economic indicators‚ geopolitical events‚ and interest rate decisions to determine currency value‚ influencing trading decisions and market predictions.

Analyzing GDP‚ inflation‚ and employment data provides insights into a nation’s economic health‚ impacting currency strength and potential investment opportunities.

Economic Indicators: GDP‚ Inflation‚ and Employment

Gross Domestic Product (GDP) is a primary indicator of a country’s economic health‚ reflecting the total value of goods and services produced; strong GDP growth typically strengthens a currency.

Inflation‚ measured by changes in the Consumer Price Index (CPI)‚ impacts purchasing power and central bank policy; high inflation can devalue a currency‚ prompting interest rate hikes.

Employment data‚ including the unemployment rate and non-farm payrolls‚ signals economic strength; robust job growth often correlates with a stronger currency‚ indicating a healthy economy.

Traders closely monitor these indicators released by governmental bodies‚ like the Bureau of Labor Statistics‚ to anticipate market movements and adjust their trading strategies accordingly.

Understanding the interplay between these indicators is crucial; for example‚ rising inflation coupled with stagnant GDP might signal stagflation‚ impacting currency valuations;

Analyzing these economic releases requires considering their historical context‚ revisions‚ and potential impact on central bank monetary policy decisions‚ influencing forex market dynamics.

Geopolitical Events and Their Impact

Geopolitical events‚ encompassing political instability‚ conflicts‚ and international relations‚ significantly influence currency valuations by introducing uncertainty and risk aversion into the market.

Events like elections‚ referendums (e.g;‚ Brexit)‚ and trade wars can trigger substantial currency fluctuations as investors reassess economic and political landscapes.

Political instability in a country often leads to capital flight‚ weakening its currency as investors seek safer havens‚ such as the US dollar or Japanese yen.

Trade disputes and tariffs can disrupt supply chains and economic growth‚ impacting currencies of involved nations; escalating tensions often increase volatility.

Traders must closely monitor global news and geopolitical developments‚ assessing their potential impact on currency pairs and adjusting their strategies accordingly.

Understanding the interconnectedness of global economies and the ripple effects of geopolitical events is vital for successful forex trading and risk management.

Interest Rate Decisions

Interest rate decisions made by central banks are paramount in forex trading‚ directly impacting currency values and capital flows. Higher interest rates typically attract foreign investment‚ increasing demand for the currency and strengthening its value.

Conversely‚ lower interest rates can discourage investment‚ leading to currency depreciation. Traders meticulously analyze central bank statements and economic forecasts to anticipate rate changes.

Central banks‚ like the Federal Reserve (US) or the European Central Bank (ECB)‚ adjust rates to manage inflation and stimulate economic growth‚ influencing forex markets.

Unexpected rate hikes or cuts can cause significant market volatility‚ presenting both opportunities and risks for traders. Understanding the rationale behind these decisions is crucial.

Monitoring economic indicators – such as inflation‚ GDP‚ and employment – helps predict potential rate movements and informs trading strategies. Staying informed is key.

Forex traders must integrate interest rate expectations into their analysis to make informed decisions and manage risk effectively in the dynamic currency market.

Technical Analysis in Forex

Technical analysis utilizes historical price data‚ chart patterns‚ and technical indicators to forecast future price movements‚ aiding traders in identifying opportunities.

Analyzing support and resistance levels‚ moving averages‚ RSI‚ and MACD provides insights into market sentiment and potential entry/exit points.

Chart Patterns: Head and Shoulders‚ Double Top/Bottom

Chart patterns are visually recognizable formations on price charts that suggest potential future price movements‚ offering valuable insights for forex traders. Recognizing these patterns is a cornerstone of technical analysis.

The Head and Shoulders pattern is a bearish reversal signal‚ indicating a potential shift from an uptrend to a downtrend. It features three peaks‚ with the middle peak (the “head”) being higher than the two outer peaks (“shoulders”).

Conversely‚ the Double Top is another bearish pattern‚ characterized by two peaks at roughly the same price level‚ suggesting resistance. A Double Bottom is its bullish counterpart‚ signaling a potential reversal from a downtrend to an uptrend‚ with two troughs at similar price points.

Successful identification requires confirming volume and a clear breakdown or breakout from key levels. These patterns aren’t foolproof‚ but they provide probabilistic advantages when combined with other technical indicators and risk management strategies.

Technical Indicators: Moving Averages‚ RSI‚ MACD

Technical indicators are mathematical calculations based on price and volume data‚ designed to forecast future price movements and identify potential trading opportunities in the forex market. They complement chart pattern analysis.

Moving Averages (MAs) smooth out price data to create a single flowing line‚ helping to identify trends. Common types include Simple Moving Averages (SMAs) and Exponential Moving Averages (EMAs)‚ with EMAs giving more weight to recent prices.

The Relative Strength Index (RSI) is a momentum oscillator measuring the magnitude of recent price changes to evaluate overbought or oversold conditions. Values above 70 suggest overbought‚ while below 30 indicate oversold.

The Moving Average Convergence Divergence (MACD) shows the relationship between two moving averages‚ generating buy and sell signals. Combining these indicators enhances trading precision and confirms potential trends.

Support and Resistance Levels

Support and resistance levels are key price points where the price tends to stop and reverse. Identifying these levels is fundamental to technical analysis in the forex market‚ aiding in trade entry and exit decisions.

Support levels represent price floors where buying pressure is strong enough to prevent further declines. Traders often look to buy near support‚ anticipating a bounce. Conversely‚ resistance levels mark price ceilings where selling pressure halts upward movement.

These levels aren’t precise but rather zones. Broken support often becomes resistance‚ and vice versa. Combining these levels with chart patterns and technical indicators‚ like moving averages‚ can improve accuracy.

Successfully identifying and utilizing support and resistance can significantly enhance trading strategies‚ allowing for strategic placement of stop-loss and take-profit orders‚ maximizing potential gains and minimizing risk.

Forex Trading Strategies

Forex strategies encompass day trading‚ swing trading‚ and scalping‚ each demanding unique skillsets and time commitments for profitable currency speculation.

Effective strategies require robust risk management‚ technical analysis‚ and adaptation to ever-changing market dynamics for consistent results.

Day Trading

Day trading in the forex market involves opening and closing positions within the same trading day‚ aiming to profit from small price movements. This high-frequency approach demands intense focus‚ quick decision-making‚ and a thorough understanding of technical analysis.

Successful forex day traders often utilize charting tools‚ monitoring multiple currency pairs simultaneously‚ and employing strategies like scalping or breakout trading. Leverage is frequently used to amplify potential gains‚ but it also significantly increases risk;

It’s crucial to have a well-defined trading plan‚ including precise entry and exit points‚ and strict risk management rules‚ such as utilizing stop-loss orders. Staying informed about economic news and geopolitical events impacting currency values is also paramount. Day trading isn’t suitable for beginners due to its inherent volatility and demands.

Furthermore‚ understanding market liquidity and spread fluctuations is essential for maximizing profitability and minimizing slippage during trade execution.

Swing Trading

Swing trading in the forex market focuses on capturing price “swings” that typically last more than a day‚ but less than several weeks. This strategy aims to profit from larger price movements than day trading‚ requiring less screen time and a more patient approach.

Swing traders analyze charts for patterns‚ utilizing technical indicators like moving averages and RSI to identify potential entry and exit points. Fundamental analysis‚ considering economic indicators and geopolitical events‚ also plays a role in predicting market direction.

Effective risk management is vital‚ employing stop-loss orders to limit potential losses and take-profit orders to secure gains. Position sizing should be carefully calculated to avoid overexposure to risk. Unlike day trading‚ swing trades are often held overnight‚ exposing traders to gap risk.

Successful swing traders combine technical and fundamental analysis‚ adapting their strategies to changing market conditions.

Scalping

Scalping is an advanced forex trading strategy aiming to profit from very small price changes‚ often holding positions for just seconds or minutes. It requires intense focus‚ quick decision-making‚ and a high degree of discipline‚ capitalizing on minor fluctuations in currency pairs.

Scalpers rely heavily on technical analysis‚ utilizing fast-moving indicators and level 2 data to identify fleeting opportunities. Tight spreads and low commissions are crucial‚ as profitability depends on accumulating small gains from numerous trades.

Risk management is paramount; stop-loss orders are essential to limit losses‚ given the rapid trade execution. High leverage is often employed‚ amplifying both profits and risks. Scalping is not suitable for beginners due to its demanding nature.

Successful scalpers develop a robust trading plan and consistently execute it‚ adapting to fast-paced market dynamics.

Risk Management in Forex

Effective risk management is paramount in forex trading‚ utilizing stop-loss and take-profit orders alongside strategic position sizing for capital preservation.

Stop-Loss Orders

Stop-loss orders are essential tools for managing risk in forex trading‚ automatically closing a trade when the price reaches a predetermined level. This limits potential losses‚ protecting your capital from significant downturns and emotional decision-making.

Strategically placing stop-loss orders involves identifying key support and resistance levels on your charts. A common approach is to set the stop-loss slightly below a support level for long positions‚ or above a resistance level for short positions.

Consider market volatility when setting your stop-loss; wider spreads or increased price fluctuations may necessitate a wider stop-loss to avoid being prematurely triggered. Remember that a well-placed stop-loss isn’t about predicting market failure‚ but rather defining your risk tolerance and protecting your investment.

Different types of stop-loss orders exist‚ including market and limit orders‚ each with its own advantages and disadvantages depending on your trading strategy and market conditions.

Take-Profit Orders

Take-profit orders are crucial for securing profits in forex trading‚ automatically closing a trade when the price reaches a specified target level. They remove the emotional element of deciding when to exit a winning trade‚ ensuring you capitalize on favorable price movements.

Identifying appropriate take-profit levels often involves analyzing chart patterns and resistance levels. Setting a take-profit just before a significant resistance level can maximize profits while acknowledging potential price reversals;

Consider your risk-reward ratio when setting take-profit levels; a common guideline is to aim for a reward at least twice the size of your risk. This ensures that your winning trades outweigh your losing trades over time.

Like stop-loss orders‚ take-profit orders can be market or limit orders‚ each offering different execution guarantees. Utilizing these orders consistently contributes to a disciplined and profitable trading approach.

Position Sizing

Position sizing is a cornerstone of effective risk management in forex trading‚ determining the appropriate trade volume based on your account balance and risk tolerance. It prevents substantial losses from a single trade‚ safeguarding your capital.

A common rule of thumb is to risk no more than 1-2% of your trading capital on any single trade. This percentage dictates the maximum potential loss you’re willing to accept. Calculating position size involves considering the pip value‚ currency pair‚ and desired risk percentage.

Factors like leverage significantly impact position sizing; higher leverage allows for larger positions but also amplifies risk. Always prioritize capital preservation over potential profits.

Proper position sizing ensures that even a series of losing trades won’t deplete your account‚ allowing you to remain in the market and capitalize on future opportunities. It’s a fundamental skill for long-term success.

Choosing a Forex Broker

Selecting a broker requires careful evaluation of regulation‚ security‚ trading platforms‚ and cost-effectiveness‚ including spreads and commissions for optimal trading.

Regulation and Security

Prioritizing regulation and security is paramount when selecting a Forex broker‚ safeguarding your funds and ensuring fair trading practices. Reputable brokers operate under the oversight of stringent financial authorities‚ such as the Financial Conduct Authority (FCA) in the UK‚ the Commodity Futures Trading Commission (CFTC) in the US‚ or similar bodies in other jurisdictions.

These agencies enforce rules regarding capital adequacy‚ transparency‚ and ethical conduct‚ providing a layer of protection for traders. Verify a broker’s regulatory status through the official website of the relevant authority. Look for segregation of client funds‚ meaning your deposits are held in separate accounts from the broker’s operational funds‚ preventing misuse in case of insolvency.

Robust security measures‚ including encryption of sensitive data and two-factor authentication‚ are also essential to protect your account from unauthorized access. Research the broker’s history and reputation‚ seeking feedback from other traders and checking for any disciplinary actions or complaints. A well-regulated and secure broker fosters trust and allows you to focus on trading with confidence.

Trading Platforms

Choosing the right trading platform is crucial for a seamless and efficient Forex trading experience. Popular platforms like MetaTrader 4 (MT4) and MetaTrader 5 (MT5) are widely used due to their user-friendly interfaces‚ comprehensive charting tools‚ and support for automated trading through Expert Advisors (EAs).

Consider factors like platform compatibility (desktop‚ web‚ mobile)‚ available technical indicators‚ order execution speed‚ and the availability of educational resources. Some brokers offer proprietary platforms with unique features‚ but ensure they meet your specific needs and preferences. A platform should provide real-time market data‚ customizable charts‚ and a variety of order types.

Ease of use and reliability are paramount. Test the platform’s demo account to familiarize yourself with its functionalities before risking real capital. Look for platforms that offer robust security features and responsive customer support. A well-designed trading platform empowers you to analyze markets‚ execute trades‚ and manage your positions effectively.

Spreads and Commissions

Understanding spreads and commissions is vital for calculating your true trading costs. The spread represents the difference between the bid and ask price of a currency pair; it’s essentially the broker’s initial profit. Spreads can be fixed or variable‚ with variable spreads fluctuating based on market volatility. Lower spreads generally benefit traders‚ reducing the cost of entry and exit.

Commissions are fees charged by the broker for executing trades‚ often a fixed amount per lot traded. Some brokers offer commission-free trading‚ but this is typically reflected in wider spreads. Carefully compare the total cost – spread plus commission – across different brokers.

Consider your trading style when evaluating these costs. Frequent traders‚ like scalpers‚ are particularly sensitive to spreads‚ while swing traders may prioritize other factors. Transparency is key; brokers should clearly disclose their pricing structure. Minimizing these costs directly impacts your profitability.

indesit my time washing machine manual

Indesit My Time Washing Machine Manual: A Comprehensive Guide

This manual details operation of your Indesit My Time washer, covering controls like the WASH CYCLE, SPIN SPEED, and TEMPERATURE knobs, plus the START/PAUSE function.

Understanding Your Indesit My Time Washer

Your Indesit My Time washing machine is designed for efficient and reliable laundry care. Familiarizing yourself with its components and functions will ensure optimal performance and longevity. This washer incorporates advanced features, indicated by the control panel’s buttons and indicator lights, allowing for customized wash cycles.

The machine’s operation revolves around selecting appropriate wash cycles, spin speeds, and temperatures based on fabric type and soil level. Understanding the detergent dispenser drawer’s compartments – for pre-wash detergent, main wash detergent, and fabric softener – is crucial for effective cleaning. The START/PAUSE and ON/OFF buttons control the washing process, while the delay timer offers convenient scheduling options. Regularly consulting this manual will help you maximize your washing experience.

Model Identification & Key Features

Identifying your specific Indesit My Time model is essential for accessing accurate support and replacement parts. Locate the model number on the machine’s rear panel or within the door jamb. Key features include a variety of wash cycles tailored to different fabric types – cotton, synthetics, delicates, and wool – alongside energy-saving Eco Wash programs.

The machine boasts adjustable spin speeds to minimize fabric damage and a convenient delay timer for scheduled washes. Indicator lights on the control panel clearly display the wash cycle progress and any error codes. The door lock function enhances safety during operation. These features combine to deliver a versatile and user-friendly laundry solution.

Control Panel Overview

The Indesit My Time control panel is intuitively designed for ease of use. Central to operation are the WASH CYCLE selection knob, allowing program choice, and the SPIN SPEED knob, controlling the final spin intensity. A TEMPERATURE setting knob adjusts the wash water temperature. The START/PAUSE button initiates or temporarily halts a cycle.

An ON/OFF button manages power, with a potential power-saving mode. The display panel utilizes indicator lights to signal cycle progress, door lock status, and any detected errors. Buttons with indicator lights provide clear feedback on selected settings, ensuring optimal control over each wash.

WASH CYCLE Selection Knob

The WASH CYCLE selection knob is the primary control for choosing the appropriate wash program for your laundry. Rotating this knob allows you to select from a variety of cycles, tailored to different fabric types and soil levels. Options typically include settings for cottons, synthetics, delicates, and woolens.

Carefully consider the fabric composition and care label instructions before selecting a cycle. Utilizing the correct program ensures effective cleaning while protecting your garments from damage. The knob’s clear markings and intuitive design simplify the selection process, offering a user-friendly experience.

SPIN SPEED Knob

The SPIN SPEED knob controls the intensity of the final spin cycle, directly impacting the moisture content remaining in your laundry. Lower spin speeds are gentler on delicate fabrics, minimizing wrinkles and preventing damage, but leave clothes wetter. Higher spin speeds extract more water, reducing drying time, but can cause increased wrinkling.

Adjusting the spin speed allows you to customize the wash cycle to suit different fabric types. Options are usually presented in revolutions per minute (RPM). Always check garment care labels for recommended spin speed limitations to avoid shrinking or stretching.

TEMPERATURE Setting Knob

The TEMPERATURE setting knob allows precise control over the water temperature used during the wash cycle. Selecting the appropriate temperature is crucial for effective cleaning and fabric care. Lower temperatures (cold or 30°C) are ideal for delicate items and preventing color fading, while higher temperatures (60°C or 90°C) are best for heavily soiled laundry and sanitizing.

Refer to garment care labels for temperature recommendations. Using excessively high temperatures can damage certain fabrics, causing shrinkage or color loss. The knob typically offers options ranging from cold wash to a high-temperature sanitize cycle.

START/PAUSE Button Functionality

The START/PAUSE button is central to operating your Indesit My Time washing machine. Pressing this button initiates the selected wash cycle, bringing the machine to life. During operation, a single press on the START/PAUSE button will temporarily halt the cycle – a useful feature for adding forgotten items.

Pressing the button again resumes the cycle from where it left off. The indicator light associated with this button illuminates when the machine is actively running. If an error occurs, the machine will pause, and the indicator light may flash, signaling a problem requiring attention. Always ensure the door is securely locked before starting a cycle.

ON/OFF Button & Power Saving Mode

The ON/OFF button controls the main power supply to your Indesit My Time washing machine. Pressing this button completely shuts down the appliance, disconnecting it from the electrical outlet – crucial for safety during maintenance or extended periods of non-use. Some models incorporate a power-saving mode.

This mode activates automatically after a period of inactivity, reducing energy consumption. It minimizes standby power usage, contributing to lower electricity bills and a smaller environmental footprint. The display panel will typically indicate when power-saving mode is active. Remember to fully switch off the machine before cleaning or performing any repairs.

Display Panel Indicators

The Indesit My Time washing machine’s display panel utilizes indicator lights to communicate the machine’s status. A “DOOR LOCKED” indicator illuminates when the door is securely fastened, preventing accidental opening during operation. The “PROGRESS” indicator shows the current stage of the wash cycle, providing a visual timeline.

Additional lights signal selected options like temperature or spin speed. Error codes, if any, will also appear on the display, assisting in troubleshooting. Familiarize yourself with these indicators to understand the machine’s operation and quickly identify potential issues. Refer to the troubleshooting section for error code definitions.

Detergent Dispenser Drawer

The Indesit My Time washing machine features a multi-compartment detergent dispenser drawer, crucial for optimal wash results. This drawer is typically located on the control panel. It’s divided into sections for pre-wash detergent, main wash detergent, and fabric softener.

Always use the correct type of detergent for each compartment, following the detergent manufacturer’s instructions. Compartment 1 is for pre-wash detergent, used for heavily soiled items. Compartment 2 accepts the main wash detergent. Finally, Compartment 3 is dedicated to fabric softener, releasing it during the final rinse cycle for softer clothes.

Compartment 1: Pre-Wash Detergent

Compartment 1 within the Indesit My Time detergent dispenser is specifically designated for pre-wash detergent. This compartment is utilized when you select a wash cycle that includes a pre-wash phase, ideal for garments with significant dirt or staining. Using pre-wash detergent helps loosen stubborn soils before the main wash cycle begins, enhancing cleaning performance.

Only add pre-wash detergent if the selected program includes a pre-wash option. Overusing detergent can lead to residue buildup and reduced washing efficiency. Refer to your detergent packaging for appropriate dosage levels for pre-wash applications. Ensure the compartment is not overfilled.

Compartment 2: Main Wash Detergent

Compartment 2 of the Indesit My Time washing machine’s dispenser is dedicated to the main wash detergent. This is where you add detergent for the primary cleaning phase of every wash cycle, unless a pre-wash cycle is also selected. The amount of detergent needed depends on the load size, water hardness, and the level of soiling of your laundry.

Always follow the detergent manufacturer’s instructions for dosage. Using too much detergent won’t necessarily result in cleaner clothes and can leave residue. Liquid or powder detergent can be used in this compartment. Ensure the compartment is easily accessible for convenient detergent addition before each wash.

Compartment 3: Fabric Softener

Compartment 3 in the Indesit My Time washing machine’s detergent dispenser is specifically designed for fabric softener. This compartment releases the softener during the final rinse cycle, leaving your clothes feeling softer and reducing static cling. It’s crucial not to overfill this compartment, as concentrated fabric softener can cause staining or leave a residue on your garments.

Always dilute fabric softener with water according to the manufacturer’s instructions before pouring it into this compartment. Avoid direct contact of undiluted softener with fabrics. The maximum fill line is clearly marked within the compartment – do not exceed it.

Wash Cycle Programs

The Indesit My Time washing machine offers a variety of wash cycle programs tailored to different fabric types and soiling levels. These include programs for Cotton, Synthetics, Delicates/Wool, and a Quick Wash option for lightly soiled items needing a fast refresh. An Eco Wash program prioritizes energy efficiency, using lower temperatures and optimized wash cycles.

Selecting the appropriate program ensures optimal cleaning performance and protects your clothes. Refer to the garment care labels for guidance. The machine’s control panel allows easy selection of the desired program, adjusting wash duration and intensity to suit your laundry needs.

Cotton Wash Program Details

The Cotton Wash program is designed for robust, everyday cotton items like t-shirts, underwear, and bed linen. It utilizes a more vigorous wash action and higher temperatures – typically ranging from 40°C to 90°C – to effectively remove dirt and stains. This program is ideal for heavily soiled cottons, ensuring thorough cleaning.

Users can often adjust the intensity of the Cotton Wash, selecting options for pre-wash or extra rinse cycles. Always check garment care labels before using high temperatures, as some cotton items may shrink or fade. This program provides a reliable and efficient clean for your cotton laundry.

Synthetics Wash Program Details

The Synthetics Wash program caters to fabrics like polyester, nylon, acrylics, and blends. It employs a gentler wash action and lower temperatures – typically between 30°C and 60°C – to protect these materials from damage. This program prevents shrinking, stretching, and color fading commonly associated with synthetic fibers.

Adjustable settings often include spin speed reduction for delicate synthetics. It’s crucial to consult garment care labels, as some synthetics require specific washing instructions. Utilizing the Synthetics program ensures your synthetic clothing remains in excellent condition, maintaining its shape, color, and overall quality through careful cleaning.

Delicate/Wool Wash Program Details

The Delicate/Wool Wash program is specifically designed for items requiring extra care, such as silk, lace, and wool garments. This cycle utilizes a very gentle wash action with minimal agitation to prevent stretching, shrinking, or damage to delicate fibers. Water temperatures are kept consistently low, typically around 30°C, to safeguard fabric integrity.

A reduced spin speed is automatically selected to minimize creasing and distortion. Always check garment care labels before using this program, and consider using a specialized wool or delicate detergent. Proper use of this cycle extends the lifespan of your most treasured, fragile clothing items.

Quick Wash Program – Time Saving Options

The Quick Wash program offers a convenient solution for lightly soiled laundry, providing a full wash cycle in a significantly reduced timeframe – typically under 30 minutes. This program is ideal for refreshing clothes that haven’t accumulated heavy dirt or stains. It utilizes a higher water flow rate and optimized wash actions to achieve effective cleaning in less time.

While efficient, remember that the Quick Wash cycle may not be suitable for heavily soiled items or those requiring intensive cleaning. Select this option when time is of the essence and your laundry doesn’t demand a full-length wash cycle.

Eco Wash Program – Energy Efficiency

The Eco Wash program is specifically designed to minimize energy and water consumption, making it an environmentally responsible choice for your laundry needs. This cycle operates at a lower temperature, typically around 20°C or 30°C, and utilizes optimized wash actions to deliver effective cleaning results while reducing your carbon footprint.

Although the Eco Wash cycle may have a longer duration compared to other programs, the significant savings in energy and water make it a sustainable option. It’s best suited for normally soiled laundry and contributes to lower utility bills and a greener lifestyle.

Delay Timer Function

The Indesit My Time washing machine features a convenient Delay Timer function, allowing you to schedule wash cycles to start at a later, more convenient time. This is particularly useful for taking advantage of off-peak electricity rates or ensuring laundry is finished when you’re home. The delay timer can be set in increments, typically ranging from 1 to 24 hours, providing flexibility to suit your schedule.

Using the delay timer allows you to pre-load the machine with detergent and laundry, then set the timer to begin the wash cycle automatically at your desired time, offering enhanced convenience and control over your laundry routine.

Using the Wash Cycle Delay Timer

To utilize the Delay Timer, first select your desired wash cycle, temperature, and spin speed. Then, press the DELAY TIMER button repeatedly to set the desired delay duration, typically displayed on the function display. Each press increases the delay time, usually in hourly increments. Ensure the START/PAUSE button isn’t illuminated before setting the delay.

Once the delay time is set, press the START/PAUSE button. The indicator light for the delay timer will illuminate, confirming activation. The machine will automatically begin the wash cycle after the specified delay period. Remember to check the detergent dispenser drawer is correctly loaded before initiating the delayed start.

Safety Precautions & Warnings

Always ensure the washing machine is properly grounded for electrical safety. Never attempt to repair the appliance yourself; contact qualified service personnel. Keep children away from the machine during operation, utilizing the child lock feature if available to prevent accidental program changes.

Avoid overloading the drum, as this can damage the machine and reduce washing efficiency. Do not wash items that have been exposed to flammable liquids. Regularly check the power cord for damage and never operate the machine if it’s compromised. Disconnect the appliance from the power supply before cleaning or maintenance.

Electrical Safety Guidelines

Prioritize electrical safety when using your Indesit My Time washing machine. Ensure the voltage supplied matches the appliance’s rating label. Never operate the machine with a damaged power cord or plug; replace immediately. Avoid using extension cords or multi-plugs, as they can overload the circuit.

The appliance must be properly grounded to prevent electric shock; Do not touch the power cord or appliance with wet hands. Disconnect the machine from the power supply before cleaning, maintenance, or during thunderstorms. If the machine malfunctions electrically, immediately disconnect it and contact a qualified technician for repair.

Child Lock Feature (If Applicable)

Certain Indesit My Time washing machine models feature a child lock function, enhancing safety by preventing unintended operation. This feature typically involves pressing and holding specific buttons simultaneously – consult your model’s specific instructions for the correct combination.

When activated, the child lock disables the control panel buttons, preventing changes to the wash cycle or settings. To deactivate, repeat the button combination; Always ensure the child lock is disengaged when you intend to use the machine. This feature is crucial in households with young children, minimizing risks associated with accidental appliance activation.

Avoiding Overloading the Machine

To ensure optimal performance and longevity of your Indesit My Time washing machine, avoid overloading the drum. Overloading restricts garment movement, hindering effective cleaning and potentially damaging the machine’s components. Refer to your machine’s specifications for the maximum load capacity, typically measured in kilograms.

Distribute items evenly within the drum to maintain balance during the spin cycle. Uneven loads can cause excessive vibration and noise, potentially leading to damage. Always leave sufficient space for clothes to move freely. Respecting the load limits preserves the machine’s efficiency and prevents unnecessary wear and tear.

Troubleshooting Common Issues

Encountering problems with your Indesit My Time washer? This section addresses frequent concerns. If the machine doesn’t start, verify the power supply and ensure the door is securely closed. Drainage issues often stem from a blocked filter – regular cleaning is crucial. Error codes displayed on the panel indicate specific faults; consult the full manual for interpretations.

A door lock malfunction might prevent cycles from initiating. If this occurs, try restarting the machine. Always disconnect the power before attempting any internal checks. For persistent issues, contacting a qualified technician is recommended to avoid further damage or safety hazards.

Machine Not Starting

If your Indesit My Time washing machine fails to start, begin with the simplest checks. Confirm the power cord is firmly plugged into a working outlet. Verify the door is completely closed and latched; the machine won’t operate if the door isn’t secured. Check your home’s circuit breaker or fuse box to ensure the circuit hasn’t tripped or blown.

Also, ensure the START/PAUSE button has been properly pressed after selecting a wash cycle. If these steps don’t resolve the issue, there might be an internal fault requiring professional attention. Do not attempt to disassemble the machine yourself.

Drainage Problems & Error Codes

Drainage issues with your Indesit My Time washer often manifest as standing water in the drum. First, check the drain hose for kinks or obstructions. Ensure the hose isn’t inserted too far into the drainpipe, which can cause siphoning. A clogged drain filter is a common culprit; refer to the ‘Filter Cleaning Procedure’ section for instructions.

Error codes displayed on the machine’s panel indicate specific problems. Consult the full manual (available on ManualsLib) for a comprehensive list and their meanings. Common codes relate to drainage faults or issues with the water inlet. Note the code before contacting support.

Door Lock Malfunction

If the door of your Indesit My Time washing machine won’t unlock after a cycle, a malfunction in the door lock mechanism is likely. The machine prioritizes safety, preventing opening during operation. Do not force the door open, as this could cause damage. First, ensure the machine is completely powered off and unplugged from the electrical outlet.

Sometimes, simply restarting the machine can reset the lock. If the problem persists, a faulty door lock switch or wiring may require professional attention. Refer to the machine’s display for any error codes related to the door lock, and consult the full manual for troubleshooting guidance.

Cleaning & Maintenance

Regular cleaning ensures optimal performance and longevity of your Indesit My Time washing machine. Begin by cleaning the detergent dispenser drawer frequently to prevent residue buildup, which can affect wash results. Wipe down the drum and rubber seal after each wash to remove moisture and prevent mold growth.

Crucially, the filter requires periodic cleaning to remove lint and debris. Consult your manual for the filter’s location and cleaning procedure. A clean filter ensures proper drainage. Avoid harsh chemicals; use a damp cloth and mild detergent for all surfaces. Consistent maintenance prevents issues and keeps your machine running efficiently.

Cleaning the Detergent Dispenser

To clean the detergent dispenser, first, remove it from the washing machine – usually by pressing a release button or lever. Rinse each compartment (pre-wash, main wash, and fabric softener) thoroughly under warm running water to dissolve any accumulated detergent or softener residue. Use a small brush, like an old toothbrush, to scrub away stubborn deposits.

Ensure all traces of detergent are removed, as buildup can cause blockages and affect wash performance. Once clean, dry the dispenser completely before reinserting it into the machine. Regular cleaning, ideally monthly, prevents issues and maintains optimal detergent distribution.

Cleaning the Drum & Rubber Seal

Regularly cleaning the drum and rubber seal prevents mold and mildew growth, ensuring fresh laundry. Run an empty hot wash cycle with a washing machine cleaner or a cup of white vinegar monthly. After the cycle, wipe down the drum’s interior with a clean, damp cloth.

Pay close attention to the rubber seal around the door; this area traps moisture and debris. Carefully inspect the folds for any visible mold or residue. Use a diluted bleach solution (follow product instructions) or a specialized rubber cleaner to disinfect the seal, then wipe dry.

Filter Cleaning Procedure

The filter prevents debris from clogging the drain pump. Locate the filter access panel, usually at the bottom front of the machine. Have a shallow container and towels ready to catch any spilled water. Carefully open the panel and unscrew the filter cap – water will drain out.

Remove any lint, coins, buttons, or other objects from the filter. Rinse the filter thoroughly under running water, ensuring all debris is removed. Inspect the filter housing for obstructions. Reinsert the cleaned filter, securely tightening the cap to prevent leaks. Close the access panel.

Technical Specifications

This Indesit My Time washing machine operates on a standard 220-240V AC power supply, with a typical power consumption varying based on the selected wash cycle. Maximum wash load capacity ranges depending on the program, generally between 5 to 9 kilograms. Spin speeds are adjustable, reaching up to 1400 RPM for efficient water extraction.

Dimensions are approximately 85cm (height) x 60cm (width) x 59.5cm (depth). Water inlet pressure should be between 0.1 and 1.0 MPa. The machine’s energy efficiency class is typically rated ‘A’ or higher, promoting responsible energy usage. Please refer to the product label for precise details.

samsung hw-q990c manual

The Samsung HW-Q990C delivers immersive Dolby Atmos sound, simplifying home theater setup without compromising audio quality. It’s a flagship model, offering a premium experience.

Overview of the Soundbar

The Samsung HW-Q990C is a top-tier 11.1.4 channel soundbar designed to provide a truly cinematic audio experience within your home. It eliminates the complexity of a traditional multi-speaker system while delivering room-filling, powerful sound. This model, the latest iteration in Samsung’s Q-series, is lauded for its authoritative and large-scale soundstage, coupled with a remarkably smooth and mellow sonic character.

Its ease of setup makes it ideal for users seeking high-performance audio without extensive installation. The HW-Q990C aims to redefine home entertainment with its advanced features and impressive capabilities, offering a complete audio solution.

Key Features and Specifications

The Samsung HW-Q990C boasts an impressive 11.1.4 channel configuration, delivering a truly immersive sound experience with 456W of total power (200W subwoofer). Key features include Dolby Atmos and DTS:X support for three-dimensional audio, alongside SpaceFit Sound+ technology for optimized calibration to your room’s acoustics.

It incorporates Auto EQ for automatic sound adjustments and offers Voice Enhance and Night Mode for clearer dialogue and quieter listening. Wireless connectivity options include Bluetooth, and the soundbar is compatible with voice control assistants. The unit is available in a sleek grey finish.

Setting Up Your HW-Q990C

Initial setup involves unboxing components, connecting to your TV, and wirelessly pairing the subwoofer and rear speakers for a complete surround sound system.

Unboxing and Component Check

Carefully unpack the HW-Q990C soundbar, wireless subwoofer, and rear speakers. Verify all components are present: the soundbar unit itself, the subwoofer, two rear speakers, a power cord for each unit, an HDMI cable, the remote control, batteries, and the Quick Setup Guide. Inspect each item for any physical damage sustained during shipping.

Retain the original packaging for potential future transport or warranty claims. The included documentation, such as the full user manual (available online), provides detailed information about each component and their functions. Ensure you have all necessary parts before proceeding with the connection process to avoid interruptions.

Connecting to Your TV

Connect the Samsung HW-Q990C to your TV using the provided HDMI cable. Utilize the HDMI eARC (Enhanced Audio Return Channel) port on both the soundbar and your TV for optimal audio performance, supporting Dolby Atmos and DTS:X. Alternatively, an optical connection is available, though it may have limitations.

Power on both the TV and the soundbar. The soundbar may automatically detect the TV and switch to the appropriate input. If not, manually select the correct HDMI input on the soundbar using the remote control. Confirm audio output settings on your TV are set to HDMI eARC or optical, depending on your connection method.

Wireless Subwoofer and Rear Speaker Pairing

To pair the wireless subwoofer and rear speakers, ensure the soundbar is powered on. Locate the ‘Pairing’ button on the rear of the subwoofer and hold it until the LED indicator flashes. Repeat this process for each rear speaker. The soundbar should automatically detect and connect to the subwoofer and speakers.

If automatic pairing fails, access the ‘Settings’ menu on the SmartThings app or soundbar interface and manually initiate the pairing process. Confirm successful connection by checking the LED indicators on each component; a solid light indicates a stable connection.

Understanding the Control Options

Control the HW-Q990C via the remote, SmartThings app, or voice commands. These options provide convenient access to settings and sound modes for personalized audio.

Remote Control Functions

The Samsung HW-Q990C’s remote offers comprehensive control over your sound experience. Key buttons include power, volume adjustment, and source selection. Dedicated sound mode buttons allow quick access to presets like Dolby Atmos and DTS:X. You can navigate the settings menu to fine-tune audio parameters. The remote also facilitates Bluetooth pairing and subwoofer level adjustments.

Furthermore, the remote enables control of connected devices, streamlining your entertainment setup. Its intuitive layout ensures ease of use, even in low-light conditions. Explore the various functions to unlock the full potential of your soundbar and customize the audio to your preferences.

Using the SmartThings App

The SmartThings app expands control of your HW-Q990C beyond the remote. After connecting the soundbar, the app provides a user-friendly interface for adjusting settings. You can access advanced audio options, including equalizer adjustments and SpaceFit Sound+ calibration. The app also allows for firmware updates, ensuring optimal performance and access to new features.

Moreover, SmartThings enables seamless integration with other Samsung devices within your smart home ecosystem. Monitor soundbar status, control playback, and customize settings remotely. The app simplifies setup and offers a centralized hub for managing your entire audio experience.

Voice Control Compatibility

The HW-Q990C boasts built-in voice control compatibility, enhancing hands-free operation. It works seamlessly with voice assistants like Amazon Alexa and Google Assistant, allowing you to control playback, adjust volume, and switch sound modes using simple voice commands. This feature adds convenience and accessibility to your home theater experience.

To enable voice control, connect the soundbar to your smart home network and follow the setup instructions within the SmartThings app. Once configured, simply speak your commands, and the HW-Q990C will respond accordingly, providing a truly immersive and intuitive audio experience.

Sound Modes and Customization

The HW-Q990C offers Dolby Atmos, DTS:X, Auto EQ calibration, Voice Enhance, and Night Mode for a tailored listening experience.

Dolby Atmos and DTS:X Support

The Samsung HW-Q990C excels in immersive audio thanks to its robust Dolby Atmos and DTS:X support. This 11;1.4 channel configuration creates a truly three-dimensional soundscape, enveloping listeners with overhead sound effects and enhanced clarity. Dolby Atmos places sounds precisely within a spherical space, while DTS:X adapts to your room’s acoustics for optimal performance.

These technologies work in tandem to deliver a cinematic experience within your home. The soundbar’s up-firing speakers, combined with the wireless rear speakers, project sound upwards, simulating the height channels crucial for a realistic Atmos experience. Enjoy movies, games, and music with a newfound level of depth and realism;

Auto EQ Calibration

The HW-Q990C features Samsung’s Auto EQ calibration technology, designed to optimize sound output for your specific room’s acoustics. This automated process analyzes your room’s characteristics – size, shape, and furnishings – to deliver a balanced and accurate audio experience. Simply initiate the calibration through the SmartThings app, and the soundbar will emit test tones to measure the room’s response.

Based on these measurements, Auto EQ automatically adjusts the soundbar’s equalizer settings, ensuring optimal clarity, bass response, and overall sound quality. This eliminates the need for manual adjustments and guarantees a tailored listening experience, regardless of your room’s unique properties.

Voice Enhance Mode & Night Mode

The Samsung HW-Q990C provides dedicated sound modes to enhance specific listening scenarios. Voice Enhance mode clarifies dialogue, making voices more distinct and easier to understand – ideal for movies and TV shows with complex soundtracks or quiet speech. This feature boosts vocal frequencies, ensuring you never miss a word;

Night Mode reduces dynamic range, minimizing loud sounds and maximizing quiet ones. This allows you to enjoy immersive audio at lower volumes, preventing disturbance to others while still experiencing a rich soundscape. Both modes are easily accessible through the remote control or the SmartThings app, offering convenient customization.

Advanced Audio Settings

Fine-tune your audio experience with channel level adjustments, a customizable equalizer, and Samsung’s SpaceFit Sound+ technology for optimized sound.

Adjusting Channel Levels

The Samsung HW-Q990C allows precise control over individual speaker channels, enabling a truly personalized soundstage. Access the settings through the SmartThings app or the soundbar’s on-screen menu. You can independently increase or decrease the volume of each channel – front, center, rear, and subwoofer – to perfectly match your room’s acoustics and your listening preferences.

This feature is particularly useful if certain sounds seem too prominent or are lost in the mix. Experiment with subtle adjustments to achieve optimal clarity and balance. Remember to save your customized settings for future listening sessions, ensuring a consistently tailored audio experience. Careful channel leveling enhances immersion and overall sound quality.

Equalizer Settings

The Samsung HW-Q990C provides a comprehensive equalizer to fine-tune the audio output to your exact liking. Accessible via the SmartThings app, the EQ allows adjustments across various frequency bands. Users can boost or reduce specific frequencies – bass, mid-range, and treble – to emphasize desired sounds or correct imbalances.

Pre-set EQ modes, like ‘Movie’ or ‘Music’, offer quick adjustments, but the custom EQ provides granular control. Experiment with different settings to optimize sound for various content types. Save personalized profiles for different listening scenarios. Mastering the EQ unlocks the full potential of the soundbar’s audio capabilities, delivering a truly immersive experience.

SpaceFit Sound+ Technology

Samsung’s SpaceFit Sound+ technology optimizes audio output based on your room’s acoustics. Utilizing the TV’s microphone, it analyzes the room’s dimensions and surfaces to calibrate the soundbar for peak performance. This automated process ensures balanced and clear audio, regardless of room size or furniture arrangement.

SpaceFit Sound+ goes beyond basic calibration, adapting to changes in the room. Run the calibration periodically to maintain optimal sound quality. It works seamlessly with Auto EQ, creating a truly customized listening experience. This innovative feature eliminates guesswork, delivering professional-grade sound in your home theater.

Troubleshooting Common Issues

Common problems include no sound, Bluetooth connectivity issues, and subwoofer synchronization. Refer to the manual for solutions and ensure proper connections for optimal performance.

No Sound Output

If experiencing no sound, first verify the power cord is securely connected to both the soundbar and a working electrical outlet. Ensure the TV audio output is set to the correct source – typically HDMI ARC or eARC. Double-check the HDMI cable connection between the TV and soundbar, trying a different cable if necessary.

Confirm the soundbar isn’t muted and the volume is at a reasonable level. Test with a different audio source (like Bluetooth) to isolate the issue. If using an optical cable, ensure it’s firmly plugged in. Consult the manual’s troubleshooting section for specific error codes or further assistance, potentially requiring a system reset.

Bluetooth Connection Problems

If Bluetooth pairing fails, ensure the soundbar is in Bluetooth pairing mode – typically activated via the remote control; Verify Bluetooth is enabled on your source device (phone, tablet, etc.) and that it’s within range of the soundbar (approximately 30 feet). Remove any previously paired devices from the soundbar’s Bluetooth memory, then attempt pairing again.

Restart both the soundbar and your source device. Interference from other wireless devices can sometimes cause issues; try moving them away. Check for firmware updates for the soundbar, as these often include Bluetooth connectivity improvements. Refer to the manual for specific Bluetooth troubleshooting steps.

Subwoofer Synchronization Issues

If the subwoofer isn’t connecting or frequently disconnects, initiate the pairing process again. Place the subwoofer within 30 feet of the soundbar, ensuring a clear line of sight, free from obstructions. Confirm the subwoofer is powered on and not in standby mode. Resetting both the soundbar and subwoofer can often resolve synchronization problems – consult the manual for reset procedures.

Check for potential interference from other wireless devices. Ensure the subwoofer’s AC power cable is securely connected. Firmware updates can also address synchronization bugs; verify the soundbar has the latest version installed;

Maintenance and Care

Regularly clean the soundbar with a soft, dry cloth. Keep the firmware updated for optimal performance and to address potential issues proactively.

Cleaning Instructions

To ensure the longevity and optimal appearance of your Samsung HW-Q990C soundbar, consistent cleaning is recommended. Always power off the device and disconnect it from the power outlet before commencing any cleaning procedures. Use a soft, dry cloth to gently wipe the exterior surfaces of the soundbar, subwoofer, and rear speakers.

Avoid using harsh chemicals, abrasive cleaners, or excessive moisture, as these can damage the finish or internal components. For stubborn marks, lightly dampen the cloth with water and wring it out thoroughly before wiping. Ensure no water enters the speaker openings. Regularly dust the speaker grilles with a soft brush or vacuum cleaner attachment to maintain clear sound quality.

Firmware Updates

Maintaining up-to-date firmware on your Samsung HW-Q990C is crucial for optimal performance and access to the latest features. Updates often include bug fixes, improved compatibility, and enhanced sound quality. Firmware updates are typically delivered over-the-air via the SmartThings app.

Ensure your soundbar is connected to a Wi-Fi network and the SmartThings app is installed on your smartphone. The app will notify you when updates are available. Follow the on-screen instructions to download and install the firmware. Do not power off the soundbar during the update process, as this could cause damage.

Safety Information and Warranty

To ensure safe operation of your Samsung HW-Q990C, avoid exposing it to direct sunlight, extreme temperatures, or humidity. Do not place the soundbar near flammable materials or liquids. Ensure adequate ventilation around the device to prevent overheating.

Samsung provides a limited warranty covering defects in materials and workmanship. The warranty period varies by region; consult your purchase documentation for specific details. The warranty does not cover damage caused by misuse, accidents, or unauthorized modifications. Retain your proof of purchase for warranty claims.